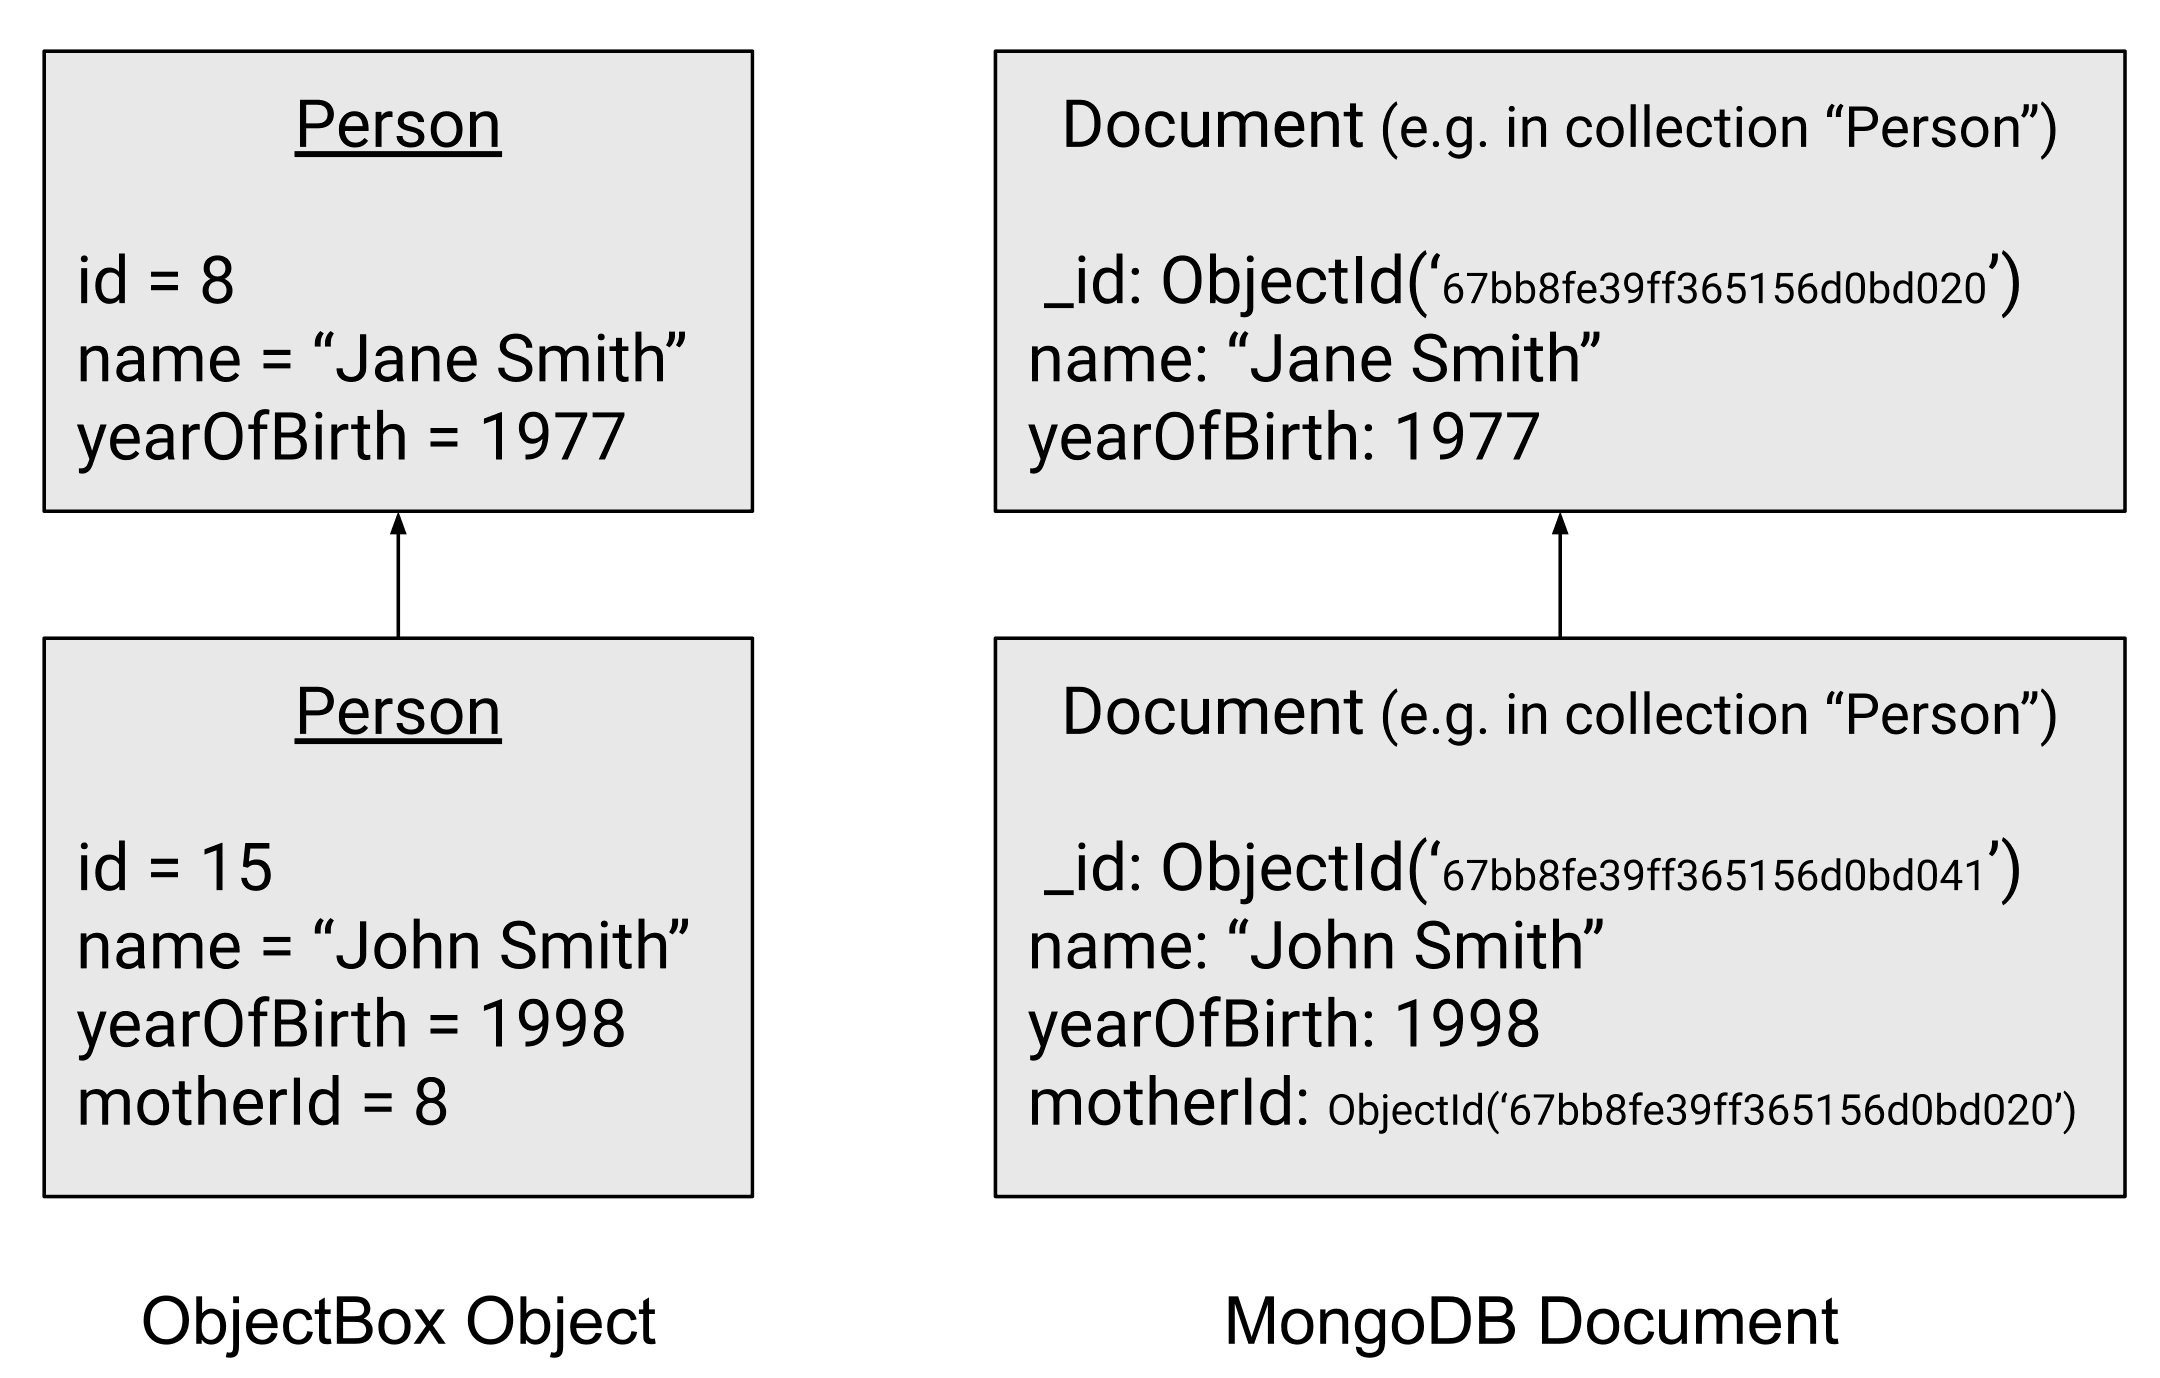
# Data Synchronization

Offline-first out-of-the-box Data Sync for the ObjectBox database. Seamless, bi-directional, selective data flows across devices, offline as well as online, is simplified with ObjectBox Data Sync.

Welcome to the official documentation for **ObjectBox Sync**!

{% hint style="info" %}
To learn more about the ObjectBox **database**, have a look at its [website](https://objectbox.io/offline-first-mobile-database/).
{% endhint %}

In a nutshell, here are the **three steps to start with ObjectBox Sync**:

1. Set up your data model using one of the [ObjectBox Sync Client](/sync-client) language bindings (Java, Dart, Swift, C, ...) to get a data model JSON file.
2. [Start the server](/sync-server) using the data model file.
3. Point your sync client to the server URL to start syncing.

Please use the navigation on the left for more detailed information.

{% hint style="info" %}
Prefer to look at example code? Check out [our examples repository](https://github.com/objectbox/objectbox-sync-examples).
{% endhint %}

What follows is an overview of how the Sync feature works.

## Sync Architecture

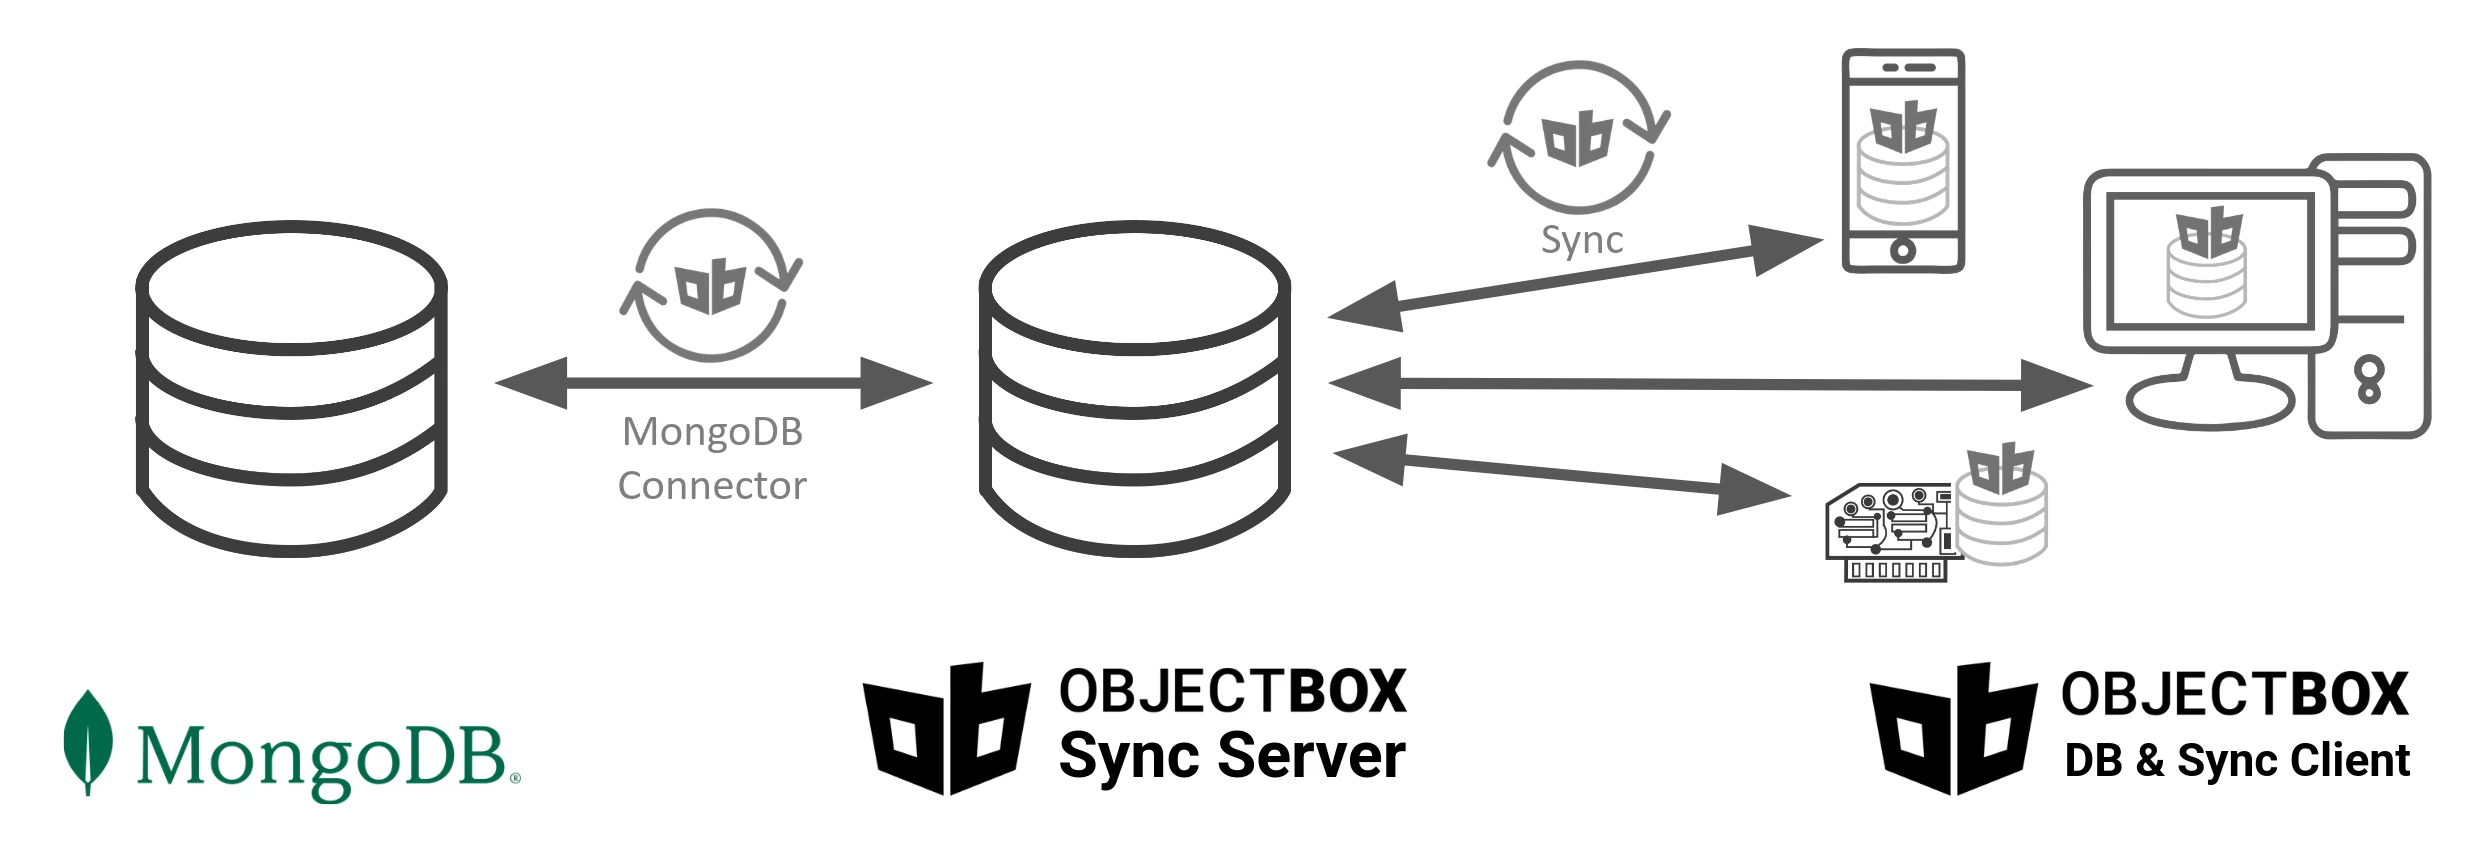
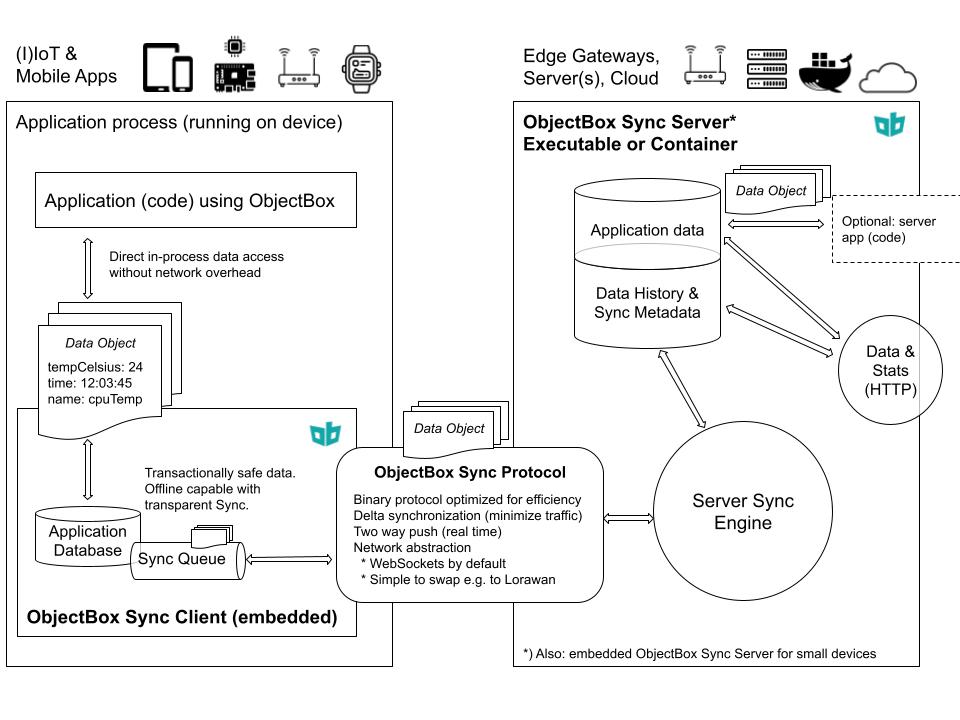
<figure><img src="/files/CwQt6z3DcRyRLnkfu6B2" alt="ObjectBox Sync Architecture Diagram"><figcaption><p>Figure 1: ObjectBox Sync Architecture Overview</p></figcaption></figure>

## Sync Concepts

Typically you **interact with your local ObjectBox database**. It does not matter if the device is online or offline. You get and put objects using the regular ObjectBox APIs. If you are interested in details on how this is done, please refer to the language binding of your choice:\
[Java/Kotlin](https://docs.objectbox.io/), [Swift](https://swift.objectbox.io/), [Go](https://golang.objectbox.io/), [C++](https://cpp.objectbox.io/), [Dart/Flutter](https://github.com/objectbox/objectbox-dart), [Python](https://github.com/objectbox/objectbox-python) (alpha).

The same APIs apply to synced objects, e.g. you use the same `put` call on a synced object as you would do for any (non-synced) object. Under the hood however, ObjectBox will synchronize those objects to their destination device, e.g. some server. Thus, those objects will become available outside of originating device.

### Online, Offline, :person\_shrugging:

When you write applications with ObjectBox Sync, it does not matter if the device is online or offline. You work with the objects that you have at hand and let ObjectBox Sync manage the synchronization process. But what does this entail?

So, let's look a bit behind the scenes. Whenever you change data (on sync-enabled types), ObjectBox **tracks these changes** and stores them safely in an **outgoing queue**. In the background, ObjectBox Sync tries to connect to the data synchronization destination (Sync server). If the connection was successfully established, the outgoing queue is "processed". This means that enqueued data is sent, and once the sync destination acknowledges the receipt, that piece of data can be safely removed from the queue.

When disconnected, Sync clients will **periodically try to reconnect** in the background. By default, this is done using increasing backoff intervals. While details may change, the backoffs should stay similar to this sequence \[seconds]: 0.5, 1, 2, 4, 8, 15, 30, 30, 60. This closely resembles an exponential backoff, but also ensures not to delay a (re-)connection attempt for longer than one minute.

### Delta synchronization

When you look at typical REST applications, an often used pattern is that clients request all data from the server. This happens regardless of any previous interaction, often because it is a simple approach and avoids complex caching strategies (of course you are aware of the 3 hard problems in software: cache invalidation and off-by-one errors). Needless to say that this is not the most resource-efficient setup as it involves redundant data processing and sub-optimal network traffic.

ObjectBox Sync does not follow the request-response paradigm. Instead, it **pushes changes**. This has several advantages like significantly reducing traffic while using less computing resources. Also, this enables "real-time" data updates out of the box.

### Networking

ObjectBox Sync exchanges **messages** over the network. You do not interact with messages directly, but it is good to remember that; e.g., you may see some message-related charts in Sync statistics.

**WebSockets** is the standard protocol ObjectBox Sync uses to exchange messages. It borrows some advantages from HTTP for the handshake (e.g., usually plays nice with firewalls), while providing TCP-like properties. Thus, unlike HTTP, WebSockets enables fast two-way push communication. It also scales nicely: we have tested with hundreds of thousands of concurrent clients connected to a single ObjectBox Sync server.

While WebSockets is a great match for ObjectBox Sync for most cases, we are not strictly bound to it. Internally, we have a network abstraction layer, which allows us to quickly adapt to special networking requirements like supporting LoRaWAN or other non-IP based protocols. Reach out to us if you are interested.

### Robust data synchronization

Sync is tightly integrated with the ObjectBox database. When you put an object in the database, this always happens inside a [database transaction](https://en.wikipedia.org/wiki/Database_transaction). This is great to ensure that your data is always consistent. A notable feature of ObjectBox Sync is that it uses **the same database transaction** for metadata used by synchronization. Thus, this high level of consistency extends to Sync, as Sync metadata cannot diverge from the actual data.

OK, this may sound a bit abstract, so let's look at an example. Let's say device A is constantly computing data based on a never-ending stream of sensor data. Also, that computed data is synced to an edge gateway B. Now at any point in time, device A suddenly loses power. Don't worry, your data is safe and consistent. Transactions ensure that the state on device A is consistent with what will be synchronized to gateway B. ObjectBox takes care of all that; no matter if A and B were connected to each other or whatever the synchronization state was at the point when the power went out. Once device A boots up again, ObjectBox will synchronize data to gateway B from the point it was interrupted.

## Future Sync

Our vision of providing data where it's needed, when it's needed, goes way beyond what we have already implemented. We encourage you to contact us and be part of that exciting journey. We will listen to where you want to go; let us provide the infrastructure so you can focus on your core product.


# Sync Client

How to create an ObjectBox Sync client and connect to an ObjectBox Sync server.

{% hint style="info" %}
Prefer to look at example code? Check out [our Sync examples repository](https://github.com/objectbox/objectbox-sync-examples).
{% endhint %}

## ObjectBox Sync enabled library

The standard ObjectBox (database) library does not include ObjectBox Sync (but may provide Sync **API interfaces**, to allow compiling).

{% hint style="info" %}
If you have not used ObjectBox before, please also be aware of documentation for the standard (non-sync) edition of ObjectBox (the ObjectBox DB) for your programming language ([Java/Kotlin](https://docs.objectbox.io/), [Swift](https://swift.objectbox.io/), [C and C++](https://cpp.objectbox.io/), [Go](https://golang.objectbox.io/)). You are currently looking at the documentation specific to ObjectBox Sync, which does not cover ObjectBox basics.
{% endhint %}

To get the ObjectBox Sync client library follow the instructions for your programming language:

{% tabs %}
{% tab title="Java/Kotlin (JVM, Android)" %}
Follow the [Getting Started](https://docs.objectbox.io/getting-started) page instructions. Then change the applied Gradle plugin to the sync variant:

```groovy
// This automatically adds the native dependency:
apply plugin: "io.objectbox.sync"  // instead of "io.objectbox"
```

This will automatically add the Sync variant for your platform.

If needed, e.g. to publish a JVM app that supports multiple platforms or to add Linux ARM support, add the libraries manually:

<pre class="language-groovy"><code class="lang-groovy"><strong>// Android
</strong><strong>implementation("io.objectbox:objectbox-sync-android:$objectboxVersion")
</strong>
<strong>// JVM
</strong>implementation("io.objectbox:objectbox-sync-linux:$objectboxVersion")
implementation("io.objectbox:objectbox-sync-macos:$objectboxVersion")
implementation("io.objectbox:objectbox-sync-windows:$objectboxVersion")
// JVM Linux on ARM (not added automatically)
implementation("io.objectbox:objectbox-sync-linux-arm64:$objectboxVersion")       
implementation("io.objectbox:objectbox-sync-linux-armv7:$objectboxVersion")
</code></pre>

{% endtab %}

{% tab title="Swift" %}
{% hint style="info" %}
This gives you specific information about how to get the Sync-enabled version of ObjectBox. Please also check our [general installation and update](https://swift.objectbox.io/install) docs for in-depth information.
{% endhint %}

We may distribute ObjectBox Sync for Swift in our **CocoaPods** staging repository (details will be provided by the ObjectBox team). In that case, these are some typical lines to put in your Podfile (please check the version, there might be a newer one available):

```
target 'MyCoolSyncProject' do
    use_frameworks!
    pod 'ObjectBox', '5.2.0-sync'
end

```

{% endtab %}

{% tab title="Dart/Flutter" %}
See the [Getting Started](https://docs.objectbox.io/getting-started) instructions for Flutter or Dart and note the different instructions for Sync (different Flutter library, increasing Android minSdkVersion, install script parameter).
{% endtab %}

{% tab title="C/C++" %}

```bash
bash <(curl -s https://raw.githubusercontent.com/objectbox/objectbox-c/main/download.sh) --sync
```

Or use [CMake's FetchContent](https://cmake.org/cmake/help/latest/module/FetchContent.html) to get ObjectBox headers and library ready to use in your project:

{% code title="CMakeLists.txt" %}

```cmake
include(FetchContent)
FetchContent_Declare(
    objectbox
    GIT_REPOSITORY https://github.com/objectbox/objectbox-c.git
    GIT_TAG        v5.3.1 # Or a newer sync-enabled version
)

FetchContent_MakeAvailable(objectbox)

add_executable(myapp main.cpp)
target_link_libraries(myapp objectbox-sync)
```

{% endcode %}
{% endtab %}

{% tab title="Go" %}

```bash
bash <(curl -s https://raw.githubusercontent.com/objectbox/objectbox-go/main/install.sh) --sync
```

{% endtab %}

{% tab title="Others" %}
Please reach out to the ObjectBox team.
{% endtab %}
{% endtabs %}

Now it is time to **verify** the setup using a flag telling if Sync is available; for example, simply log the result:

{% tabs %}
{% tab title="Java" %}

```java
import io.objectbox.sync.Sync;

String syncAvailable = Sync.isAvailable() ? "available" : "unavailable";
System.out.println("ObjectBox Sync is " + syncAvailable);
```

{% endtab %}

{% tab title="Kotlin" %}

```kotlin
import io.objectbox.sync.Sync

val syncAvailable = if (Sync.isAvailable()) "available" else "unavailable"
Log.d(App.TAG, "ObjectBox Sync is $syncAvailable")
```

{% endtab %}

{% tab title="Swift" %}

```swift
let isSyncAvailable = Sync.isAvailable()
print("ObjectBox Sync is \(isSyncAvailable ? "available" : "unavailable")")
```

{% endtab %}

{% tab title="Dart/Flutter" %}

```dart
final isSyncAvailable = Sync.isAvailable();
print('ObjectBox Sync is ${isSyncAvailable ? "available" : "unavailable"}');
```

{% endtab %}

{% tab title="C++" %}

```cpp
#include <iostream>
#include "objectbox-sync.hpp"

// ...
bool isSyncAvailable = obx::Sync::isAvailable();
std::cout << "ObjectBox Sync is " << (isSyncAvailable ? "available" : "unavailable") << std::endl;
```

{% endtab %}

{% tab title="C" %}

```c
#include <stdio.h>
#include "objectbox-sync.h"

// ...
bool hasSync = obx_has_feature(OBXFeature_Sync);
printf("ObjectBox Sync is %s\n", hasSync ? "available" : "unavailable");
```

{% endtab %}

{% tab title="Go" %}

```go
import "fmt"
import "github.com/objectbox/objectbox-go/objectbox"

// ...
var syncAvailable = "unavailable"
if objectbox.SyncIsAvailable() {
    syncAvailable = "available"
}
fmt.Printf("ObjectBox Sync is %s\n", syncAvailable)
```

{% endtab %}

{% tab title="Others" %}

```
// Depending on the platform something like:
// bool isAvailable = Sync.isAvailable();
// print("ObjectBox Sync is " + (isAvailable ? "available" : "unavailable"));
```

{% endtab %}
{% endtabs %}

## Enable your Objects for ObjectBox Sync

ObjectBox Sync allows you to define which objects are synced and which are not. This is done at an object type level (a "class" in many programming languages). By default, an object (type) is local only: objects are kept in the database on the local device and do not get synced to other devices.

To enable sync for an object type, you add a **"sync" annotation** to the type definition. This is typically the entity source file, or, if you are using ObjectBox Generator, the FlatBuffers schema file:

{% tabs %}
{% tab title="Java" %}

```java
@Sync
@Entity
public class User {
    // ...
}
```

{% endtab %}

{% tab title="Kotlin" %}

```kotlin
@Sync
@Entity
data class User(
        // ...
)
```

{% endtab %}

{% tab title="Swift" %}

```swift
// objectbox: entity, sync
class User {
    // ...
}
```

{% endtab %}

{% tab title="Dart/Flutter" %}

```dart
@Entity
@Sync
class User {
    // ...
}
```

{% endtab %}

{% tab title="C/C++ (using Generator)" %}

```cpp
/// objectbox: sync
table User {
    // ...
}
```

{% endtab %}

{% tab title="Go" %}

```go
// `objectbox:"sync"`
type User struct {
    // ...
}
```

{% endtab %}
{% endtabs %}

Once the sync annotation is set on the intended types, you need to rebuild (e.g. Java/Kotlin) or trigger the ObjectBox generator (e.g. C and C++). This activates a "sync flag" in the metamodel (e.g. the model JSON file is updated).

{% hint style="info" %}
At this point, it is not allowed to change a non-synced object type to a synced one. This would raise questions on how to handle pre-existing data, e.g. should it be deleted, synced (how exactly? using how many transactions? ...), or kept locally until objects are put again? We welcome your input on your use case if this is a scenario you encounter.

Additionally, there may only be relations between sync-enabled or non-sync entities, not across this boundary.
{% endhint %}

If you already have a non-synced type that you now want to sync (see also the info box above), these are the typical options you have:

1. If you are still in development, add the sync annotation and wipe your database(s) to start fresh with that new data model.
2. "Replace" the entity type using a new UID (check schema changes docs for the ObjectBox binding you are using). You can keep the type name; to ObjectBox it will be a different type as the UID is different. This will delete all existing data in that type.
3. Have a second, synced, object type and migrate your data in your code following your rules.

## Start the Sync Client

Create a Sync client for your Store and start it. It connects to a given sync server URL using some form of credentials to authenticate with the server. A minimal setup can look like this:

{% tabs %}
{% tab title="Java" %}

```java
SyncClient syncClient = Sync.client(boxStore) 
        .url("ws://127.0.0.1") // Use wss for encrypted traffic.
        .credentials(SyncCredentials.none())
        .buildAndStart(); // Connect and start syncing.
```

{% endtab %}

{% tab title="Kotlin" %}

```kotlin
val syncClient = Sync.client(boxStore) 
        .url("ws://127.0.0.1") // Use wss for encrypted traffic.
        .credentials(SyncCredentials.none())
        .buildAndStart() // Connect and start syncing.
```

{% endtab %}

{% tab title="Swift" %}

```swift
let configuration = Sync.Configuration(store: store, url: "ws://127.0.0.1:9999")
configuration.credentials = [SyncCredentials.makeNone()]
let client = try Sync.makeClient(configuration: configuration)
try client.start()
```

{% endtab %}

{% tab title="Dart/Flutter" %}

```dart
final syncClient = SyncClient(
        store,
        ['ws://127.0.0.1:9999'], // wss for SSL, ws for unencrypted traffic
        [SyncCredentials.none()]);
syncClient.start(); // connect and start syncing
```

{% endtab %}

{% tab title="C++" %}

```cpp
std::shared_ptr<obx::SyncClient> syncClient = obx::Sync::client(
    store, 
    "ws://127.0.0.1:9999",  // wss for SSL, ws for unencrypted traffic
    obx::SyncCredentials::none()
);
syncClient->start();  // connect and start syncing
```

{% endtab %}

{% tab title="C" %}

```c
OBX_sync* sync_client = obx_sync(store, "ws://127.0.0.1:9999");  // wss for SSL
obx_sync_credentials(sync_client, OBXSyncCredentialsType_NONE, NULL, 0);
obx_sync_start(sync_client);  // connect and start syncing
```

{% endtab %}

{% tab title="Go" %}

```go
syncClient, err := objectbox.NewSyncClient(
		store,
		"ws://127.0.0.1", // wss for SSL, ws for unencrypted traffic
		objectbox.SyncCredentialsNone())

if err == nil { // Corrected: check if err is nil before starting
		err = syncClient.Start() // Connect and start syncing.
}
if err != nil {
    // Handle error, e.g., log it
    fmt.Printf("Error starting sync client: %v\n", err)
}
```

{% endtab %}
{% endtabs %}

{% hint style="info" %}
The example uses ws\://127.0.0.1 for the server endpoint. This is the IP address of localhost and assumes that you run the server and client(s) on the same machine. If it is separate machines, you need to exchange 127.0.0.1 with a reachable IP address of the server, or some valid DNS name.

Using Android emulator? You can use 10.0.2.2 to reach the host (the machine running the emulator). [Details](https://developer.android.com/studio/run/emulator-networking)
{% endhint %}

{% hint style="info" %}
It's highly recommended to provide the `RemoveWithObjectData` sync flag when using sync filters. This will help to keep the sync performance high. See [sync flags](#sync-flags) for more details.

Note: This flag is opt-in for a transitional period. It will become the default in a future release.
{% endhint %}

The Sync client is started by calling `start()` or `buildAndStart()`. It will then try to connect to the server, authenticate and start syncing. Read below for more configuration options you can use before starting the connection.

Once the client is logged in, the server will push any changes it has missed. The server will also push any future changes while the client remains connected. This [sync updates behavior](#controlling-sync-updates-behavior) can be configured.

All of this happens asynchronously. To observe these events (log in, sync completed, …) read below on how to [configure an event listener](#listening-to-events).

The client will now also push changes to the server for each Store transaction.

Should the client get disconnected, e.g. due to internet connection issues, it will automatically try to reconnect using an exponential back-off. Once the connection succeeds, data synchronization resumes.

{% hint style="warning" %}
Always close the client **before** closing the store. Closing the store with a still running sync client results in undefined behavior (e.g. crashes). Keep in mind that it typically is fine to **leave the sync client and store open**; once the application exits, they will be automatically closed properly.
{% endhint %}

### Sync filter client variables

Sync clients may provide variables for sync filters, see [sync filters](/sync-server/sync-filters) and specifically the [section on client variables](/sync-server/sync-filters#client-variables) for general information.

The client APIs to add sync filter variables take name/value pairs (both strings) and look like this:

{% tabs %}
{% tab title="Java" %}

```java
SyncClient syncClient = Sync.client(...)
                            .filterVariable("name", "value")
                            .buildAndStart(); 
```

{% endtab %}

{% tab title="Kotlin" %}

```kotlin
val syncClient = Sync.client(...)
                     .filterVariable("name", "value")
                     .buildAndStart()
```

{% endtab %}

{% tab title="Swift" %}

```swift
let configuration = Sync.Configuration(store: store, url: "ws://127.0.0.1:9999")
configuration.credentials = [SyncCredentials.makeNone()]
configuration.filterVariables = ["name": "value"]
let client = try Sync.makeClient(configuration: configuration)
try client.start()
```

{% endtab %}

{% tab title="Dart/Flutter" %}

```dart
final syncClient = SyncClient(store, ['ws://127.0.0.1:9999'], [SyncCredentials.none()],
                              filterVariables: {"name": "value"});
syncClient.start();
```

{% endtab %}

{% tab title="C++" %}

```cpp
// Init as before: std::shared_ptr<obx::SyncClient> syncClient = obx::Sync::client(...);
syncClient->putFilterVariable("name", "value");
syncClient->start();  // connect and start syncing
```

{% endtab %}

{% tab title="C" %}

```c
// Init as before: OBX_sync* sync_client = obx_sync(...); // plus credentials
obx_sync_filter_variables_put(sync_client, "name", "value");
obx_sync_start(sync_client);  // connect and start syncing
```

{% endtab %}

{% tab title="Go" %}

```go
// coming soon
```

{% endtab %}
{% endtabs %}

#### Supplying multiple values for IN conditions

When you use the `IN` operator in a sync filter, you want to provide multiple values to a variable. This can be done by providing a string that contains a comma-separated list of values.

Let's suppose we have a sync filter `"fruit IN $client.fruits"`; then we can provide the values like this:

```java
List<String> values = List.of("apple", "banana", "cherry");
SyncClient syncClient = Sync.client(...)
                            .filterVariable("fruits", String.join(",", values))
                            .buildAndStart(); 
```

```kotlin
val values = listOf("apple", "banana", "cherry")
val syncClient = Sync.client(...)
                     .filterVariable("fruits", values.joinToString(","))
                     .buildAndStart()
```

```swift
let values = ["apple", "banana", "cherry"]
let configuration = Sync.Configuration(store: store, url: "ws://127.0.0.1:9999")
configuration.credentials = [SyncCredentials.makeNone()]
configuration.filterVariables = ["fruits": values.joined(separator: ",")]
let client = try Sync.makeClient(configuration: configuration)
try client.start()
```

```dart
List<String> values = ['apple', 'banana', 'cherry'];
final syncClient = SyncClient(store, ['ws://127.0.0.1:9999'], [SyncCredentials.none()],
                              filterVariables: {"fruits": values.join(',')});
syncClient.start();
```

```cpp
// Init as before: std::shared_ptr<obx::SyncClient> syncClient = obx::Sync::client(...);
std::vector<std::string> values = {"apple", "banana", "cherry"};
std::string joined;
for (size_t i = 0; i < values.size(); ++i) {
    if (i > 0) joined += ",";
    joined += values[i];
}
syncClient->putFilterVariable("fruits", joined);
syncClient->start();  // connect and start syncing
```

```c
// Init as before: OBX_sync* sync_client = obx_sync(...); // plus credentials
const char* values = "apple,banana,cherry";
obx_sync_filter_variables_put(sync_client, "fruits", values);
obx_sync_start(sync_client);  // connect and start syncing
```

```go
// coming soon
```

Note: future versions of the client APIs will also take a list of values. This will also take care of escaping special characters for string values, as mentioned in the [sync filter documentation](/sync-server/sync-filters#escaping-commas-and-backslashes).

### Drop-off, send-only clients

For some use cases, a client should only report data and thus only send updates without ever receiving any data. We call those "drop-off clients". Technically, from an API perspective, these clients do not request updates from the server. Because requesting updates is the default, the sync client API has to be configured to do "manual" updates to actually disable updates from the server. This configuration has to happen before the client starts.

```cpp
// C++; create syncClient as above, but do not start() just yet
syncClient->setRequestUpdatesMode(OBXRequestUpdatesMode_MANUAL);
syncClient->start();
```

### Secure Connection

When using `wss` as the protocol in the server URL a TLS encrypted connection is established. Use `ws` instead to turn off transport encryption (insecure, not recommended; e.g. only use for testing).

## Sync Flags

Sync flags allow you to adjust the behavior of the sync client. These flags can be combined using bitwise OR to enable multiple options at once.

### Available Flags for Clients

* **DebugLogIdMapping**: Enable extensive logging on how IDs are mapped between local and global. Useful for debugging sync issues.
* **KeepDataOnSyncError**: If the client gets in a state that does not allow any further synchronization, this flag instructs Sync to keep local data nevertheless. While this preserves data, you need to resolve the situation manually (e.g., backup the data and start with a fresh database). The default behavior (flag not set) is to wipe existing data from all sync-enabled types and sync from scratch from the server.
* **RemoveWithObjectData**: When set, remove operations will include the full object data in the TX log. This allows sync filters on the Sync Server to filter out remove operations based on the object content. Without this flag, remove operations only contain the object ID and cannot be filtered.
  * **Setting this flag is highly recommended** when using sync filters.
  * This flag is opt-in for a transitional period (until clients and servers are updated). It will become the default in a future release.
  * Note that once remove operations are filtered, the server updates other clients with only the ID to optimize bandwidth.
* **DebugLogTxLogs**: Enables debug logging of TX log processing.
* **SkipInvalidTxOps**: Skips invalid (put object) operations in the TX log instead of failing. Errors will be logged.

{% tabs %}
{% tab title="Java" %}

```java
final SyncClient syncClient = Sync.client(store)
        .url("wss://sync.server.example")
        .credentials(SyncCredentials.none())
        // Enable multiple flags using bitwise OR
        .flags(SyncFlags.RemoveWithObjectData | SyncFlags.DebugLogTxLogs)
        .build();
syncClient.start();
```

{% endtab %}

{% tab title="Kotlin" %}

```kotlin
val syncClient = Sync.client(store)
    .url("wss://sync.server.example")
    .credentials(SyncCredentials.none())
    // Enable multiple flags using bitwise OR
    .flags(SyncFlags.RemoveWithObjectData or SyncFlags.DebugLogTxLogs)
    .build()
syncClient.start()
```

{% endtab %}

{% tab title="Swift" %}

```swift
let configuration = Sync.Configuration(store: store, url: "wss://sync.server.example")
configuration.credentials = [SyncCredentials.makeNone()]
// Enable multiple flags using array literal syntax
configuration.flags = [.removeWithObjectData, .debugLogTxLogs]
let client = try Sync.makeClient(configuration: configuration)
try client.start()
```

{% endtab %}

{% tab title="Dart/Flutter" %}

```dart
import 'package:objectbox/src/native/bindings/objectbox_c.dart' show OBXSyncFlags;

final syncClient = SyncClient(
    store,
    ['wss://sync.server.example'],
    [SyncCredentials.none()],
    // Enable multiple flags using bitwise OR
    flags: OBXSyncFlags.RemoveWithObjectData | OBXSyncFlags.DebugLogTxLogs);
syncClient.start();
```

{% endtab %}

{% tab title="C++" %}

```cpp
// Coming soon
```

{% endtab %}

{% tab title="C" %}

```c
OBX_sync_options* opt = obx_sync_opt(store);
obx_sync_opt_add_url(opt, "wss://sync.server.example");

// Enable multiple flags using bitwise OR
uint32_t flags = OBXSyncFlags_RemoveWithObjectData | OBXSyncFlags_DebugLogTxLogs;
obx_sync_opt_flags(opt, flags);

OBX_sync* sync_client = obx_sync_create(opt);
obx_sync_credentials(sync_client, OBXSyncCredentialsType_NONE, NULL, 0);
obx_sync_start(sync_client);
```

{% endtab %}

{% tab title="Go" %}

```go
// Coming soon
```

{% endtab %}
{% endtabs %}

## Authentication options

There are currently multiple supported options for authenticating clients with a Sync server.

### JWT authentication

Clients can be authenticated using tokens in JWT (JSON web token) format. The general process is outlined in the [server-side JWT documentation](/sync-server/jwt-authentication). Your client application typically will use a JWT authentication provider SDK to get a token in JWT format. This token is then set as a credential using the ObjectBox Sync client API:

{% tabs %}
{% tab title="Java" %}

```java
String idToken = "<your_jwt_id_token>"; // Get from JWT authentication provider
SyncCredentials credential = SyncCredentials.jwtIdToken(idToken);
// Options for other types of JWT are available:
// jwtAccessToken(token), jwtRefreshToken(token), jwtCustomToken(token)
```

{% endtab %}

{% tab title="Kotlin" %}

```kotlin
val idToken: String = "<your_jwt_id_token>" // Get from JWT authentication provider
val credential = SyncCredentials.jwtIdToken(idToken)
// Options for other types of JWT are available:
// jwtAccessToken(token), jwtRefreshToken(token), jwtCustomToken(token)
```

{% endtab %}

{% tab title="Swift" %}

```swift
let idToken: String = "<your_jwt_id_token>" // Get from JWT authentication provider
let credential = SyncCredentials.makeJwtIdToken(idToken)
// Options for other types of JWT are available:
// makeJwtAccessToken(...), makeJwtRefreshToken(...), makeJwtCustomToken(...)
```

{% endtab %}

{% tab title="Dart/Flutter" %}

```dart
String idToken = "<your_jwt_id_token>"; // Get from JWT authentication provider
SyncCredentials credential = SyncCredentials.jwtIdToken(idToken);
// Options for other types of JWT are available:
// jwtAccessToken(token), jwtRefreshToken(token), jwtCustomToken(token)
```

{% endtab %}

{% tab title="C++" %}

```cpp
std::string idToken = "<your_jwt_id_token>"; // Get from JWT authentication provider
obx::SyncCredentials credential = obx::SyncCredentials::jwtIdToken(idToken);
// Options for other types of JWT are available:
// obx::SyncCredentials::jwtAccessToken(token), obx::SyncCredentials::jwtRefreshToken(token), obx::SyncCredentials::jwtCustomToken(token)
```

{% endtab %}

{% tab title="C" %}

```c
const char* idToken = "<your_jwt_id_token>"; // Get from JWT authentication provider
// Assuming obx_sync_credentials_jwt_id_token exists or similar mechanism
obx_sync_credentials_jwt(sync_client, OBXSyncJwtTokenType_ID_TOKEN, idToken, strlen(idToken));
// Other token types would use different OBXSyncJwtTokenType enum values.
// The exact C API for JWT might vary; consult specific C API docs or headers.
```

{% endtab %}

{% tab title="Go" %}

```go
idToken := "<your_jwt_id_token>" // Get from JWT authentication provider
credential := objectbox.SyncCredentialsJwtId([]byte(idToken))
```

{% endtab %}
{% endtabs %}

### Shared secret

This can be any pre-shared secret string or a byte sequence.

{% tabs %}
{% tab title="Java" %}

```java
SyncCredentials credential = SyncCredentials.sharedSecret("<your_secret>");
```

{% endtab %}

{% tab title="Kotlin" %}

```kotlin
val credential = SyncCredentials.sharedSecret("<your_secret>")
```

{% endtab %}

{% tab title="Swift" %}

```swift
let credential = SyncCredentials.makeSharedSecret("<your_secret>")
```

{% endtab %}

{% tab title="Dart/Flutter" %}

```dart
// use a string
final credential = SyncCredentials.sharedSecretString("<your_secret>");

// or a byte vector
final secret = Uint8List.fromList([0, 46, 79, 193, 185, 65, 73, 239, 15, 5]);
final credentialBytes = SyncCredentials.sharedSecretUint8List(secret);
```

{% endtab %}

{% tab title="C++" %}

```cpp
// use a string
obx::SyncCredentials cred = obx::SyncCredentials::sharedSecret("your_secret_string");

// or a byte vector
std::vector<uint8_t> secret = {0, 46, 79, 193, 185, 65, 73, 239, 15, 5, 189, 186};
obx::SyncCredentials cred = obx::SyncCredentials::sharedSecret(std::move(secret));
```

{% endtab %}

{% tab title="C" %}

```c
// use a string
const char* secretStr = "your_secret_string";
obx_sync_credentials(sync_client, 
    OBXSyncCredentialsType_SHARED_SECRET, 
    secretStr, 
    strlen(secretStr)
);

// or a byte vector
uint8_t secretBytes[] = {0, 46, 79, 193, 185, 65, 73, 239, 15, 5, 189, 186};
obx_sync_credentials(sync_client, 
    OBXSyncCredentialsType_SHARED_SECRET, 
    secretBytes, 
    sizeof(secretBytes)
);
```

{% endtab %}

{% tab title="Go" %}

```go
// use a string
credStr := objectbox.SyncCredentialsSharedSecret([]byte("your_secret_string"))

// or a byte vector
secretBytes := []byte{0, 46, 79, 193, 185, 65, 73, 239, 15, 5, 189, 186}
credBytes := objectbox.SyncCredentialsSharedSecret(secretBytes)
```

{% endtab %}
{% endtabs %}

### Google Sign-In

The ObjectBox Sync server supports authenticating users using their Google account. This assumes [Google Sign-In](https://developers.google.com/identity/sign-in/android/start-integrating) is integrated into your app and it has [obtained the user's ID token](https://developers.google.com/identity/sign-in/android/backend-auth).

{% tabs %}
{% tab title="Java" %}

```java
SyncCredentials credential = SyncCredentials.google(account.getIdToken());
```

{% endtab %}

{% tab title="Kotlin" %}

```kotlin
val credential = SyncCredentials.google(account.getIdToken())
```

{% endtab %}

{% tab title="Swift" %}
*Coming soon!*
{% endtab %}

{% tab title="Dart/Flutter" %}

```dart
// use a string
SyncCredentials credential = SyncCredentials.googleAuthString("<secret>");

// or a byte vector
Uint8List secret = Uint8List.fromList([0, 46, 79, 193, 185, 65, 73, 239, 15, 5]);
SyncCredentials credential = SyncCredentials.googleAuthUint8List(secret);
```

{% endtab %}

{% tab title="C++" %}
*Coming soon!*
{% endtab %}

{% tab title="C" %}

```c
obx_sync_credentials(sync_client, 
    OBXSyncCredentialsType_GOOGLE_AUTH, 
    googleIdToken, 
    strlen(googleIdToken)
 );
```

{% endtab %}

{% tab title="Go" %}

```go
// use a string
var cred = objectbox.SyncCredentialsGoogleAuth([]byte("string"))

// or a byte vector
var secret = []byte{0, 46, 79, 193, 185, 65, 73, 239, 15, 5, 189, 186}
var cred = objectbox.SyncCredentialsGoogleAuth(secret)
```

{% endtab %}
{% endtabs %}

### No authentication (unsecure)

{% hint style="danger" %}
Never use this option in an app shipped to customers. It is inherently insecure and allows anyone to connect to the sync server.
{% endhint %}

For development and testing, it is often easier to just have no authentication at all to quickly get things up and running.

{% tabs %}
{% tab title="Java" %}

```java
SyncCredentials credential = SyncCredentials.none();
```

{% endtab %}

{% tab title="Kotlin" %}

```kotlin
val credential = SyncCredentials.none()
```

{% endtab %}

{% tab title="Swift" %}

```swift
let credential = SyncCredentials.makeNone()
```

{% endtab %}

{% tab title="Dart/Flutter" %}

```dart
final credential = SyncCredentials.none();
```

{% endtab %}

{% tab title="C++" %}

```cpp
obx::SyncCredentials credential = obx::SyncCredentials::none();
```

{% endtab %}

{% tab title="C" %}

```c
obx_sync_credentials(sync_client, OBXSyncCredentialsType_NONE, NULL, 0)
```

{% endtab %}

{% tab title="Go" %}

```go
var cred = objectbox.SyncCredentialsNone()
```

{% endtab %}
{% endtabs %}

## Manually start

In the Java and Kotlin example above, the sync client automatically connects to the server and starts to sync. It is also possible to just build the client and then start to sync once your code is ready to.

{% tabs %}
{% tab title="Java" %}

```java
// Just build the client.
SyncClient syncClient = Sync.client(...).build();

// Start now.
syncClient.start();
```

{% endtab %}

{% tab title="Kotlin" %}

```kotlin
// Just build the client.
val syncClient = Sync.client(...).build()

// Start now.
syncClient.start()
```

{% endtab %}
{% endtabs %}

Note that a started sync client can not be started again. Stop and close an existing one and build a new one instead.

## Listening to events

The sync client supports listening to various events, e.g. if authentication has failed or if the client was disconnected from the server. This enables other components of an app, like the user interface, to react accordingly.

{% tabs %}
{% tab title="Java" %}
It's possible to set one or more specific listeners that observe some events, or a general listener that observes all events. When building a Sync client use:

* `loginListener(listener)` to observe login events.
* `completedListener(listener)` to observe when synchronization has completed.
* `connectionListener(listener)` to observe connection events.
* `listener(listener)` to observe all of the above events. Use `AbstractSyncListener` and only override methods of interest to simplify your listener implementation.

See the description of each listener class and its methods for details.

Note that listeners can also be set or removed at any later point using `SyncClient.setSyncListener(listener)` and related methods.

```java
SyncLoginListener loginListener = new SyncLoginListener() {
    @Override
    public void onLoggedIn() {
        // Login successful.
    }

    @Override
    public void onLoginFailed(long syncLoginCode) {
        // Login failed. Returns one of SyncLoginCodes.
    }
};

SyncCompletedListener completedListener = new SyncCompletedListener() {
    @Override
    public void onUpdatesCompleted() {
        // A sync has completed, client is up-to-date.
    }
};

SyncConnectionListener connectListener = new SyncConnectionListener() {
    @Override
    public void onDisconnected() {
        // Client disconnected from the server.
        // Depending on the configuration it will try to re-connect.
    }
};

// Set listeners when building the client.
SyncClient syncClient = Sync.client(...)
  .loginListener(loginListener)
  .completedListener(completedListener)
  .connectionListener(connectListener)
  .build();
  
// Set (or replace) a listener later.
syncClient.setSyncLoginListener(listener);

// Remove an existing listener.
syncClient.setSyncConnectionListener(null);
```

{% endtab %}

{% tab title="Kotlin" %}
It's possible to set one or more specific listeners that observe some events, or a general listener that observes all events. When building a Sync client use:

* `loginListener(listener)` to observe login events.
* `completedListener(listener)` to observe when synchronization has completed.
* `connectionListener(listener)` to observe connection events.
* `listener(listener)` to observe all of the above events. Use `AbstractSyncListener` and only override methods of interest to simplify your listener implementation.

See the description of each listener class and its methods for details.

Note that listeners can also be set or removed at any later point using `SyncClient.setSyncListener(listener)` and related methods.

```kotlin
val loginListener: SyncLoginListener = object : SyncLoginListener {
    override fun onLoggedIn() {
        // Login successful.
    }

    override fun onLoginFailed(syncLoginCode: Long) {
        // Login failed. Returns one of SyncLoginCodes.
    }
}

val completedListener = SyncCompletedListener {
    // A sync has completed, client is up-to-date.
}

val connectListener = object : SyncConnectionListener {
    override fun onDisconnected() {
        // Client disconnected from the server.
        // Depending on the configuration it will try to re-connect.
    }
}

// Set listeners when building the client.
val syncClient = Sync.client(...)
  .loginListener(loginListener)
  .completedListener(completedListener)
  .connectionListener(connectListener)
  .build()
  
// Set (or replace) a listener later.
syncClient.setSyncLoginListener(listener)

// Remove an existing listener.
syncClient.setSyncConnectionListener(null)
```

{% endtab %}

{% tab title="Swift" %}
It's possible to set one or more specific listeners that observe some events, or a general listener that observes all events. The SyncClient protocol offers the following properties to attach listeners:

* `loginListener` to observe login events.
* `completedListener` to observe when synchronization has completed.
* `connectionListener` to observe connection events.
* `listener` to observe all of the above events.

There is a protocol for each listener type. Note that listeners can also be set or removed at any later point by setting the listener property to `nil`.

By implementing a listener protocol and setting the matching property in SyncClient, you are called back. Let's have a look at the available listener protocols for details:

```swift
/// Listens to login events.
public protocol SyncLoginListener {
    /// Called on a successful login.
    /// 
    /// At this point the connection to the sync destination was established and
    /// entered an operational state, in which data can be sent both ways.
    func loggedIn()

    /// Called on a login failure with a `result` code specifying the issue.
    func loginFailed(result: SyncCode)
}

/// Listens to sync completed events.
public protocol SyncCompletedListener {
    /// Called each time a sync was "completed", in the sense that the client 
    /// caught up with the current server state. The client is "up-to-date".
    func updatesCompleted()
}

/// Listens to sync connection events.
public protocol SyncConnectionListener {
    /// Called when connection is established; happens before an actual login
    func connected()

    /// Called when the client is disconnected from the sync server, e.g. due to a network error.
    /// 
    /// Depending on the configuration, the sync client typically tries to reconnect automatically,
    /// triggering a `SyncLoginListener` again.
    func disconnected()
}

/// Listens to all possible sync events. See each protocol for detailed information.
public protocol SyncListener: SyncLoginListener, SyncCompletedListener, SyncChangeListener, SyncConnectionListener {

}
```

{% endtab %}

{% tab title="Dart/Flutter" %}
It's possible to listen to sync-related events on the client. Use the following `SyncClient` getters to connect to a stream:

* `Stream<SyncLoginEvent> get loginEvents` - such as logged-in, credentials-rejected.
* `Stream<void> get completionEvents` to observe when synchronization has completed.
* `Stream<SyncConnectionEvent> get connectionEvents` to observe connection events.

Note that these streams don't buffer events so unless you're subscribed, no events are collected. Additionally, don't forget to cancel the subscription when you don't care about the information anymore, to free up resources.

```dart
final client = SyncClient(store, ['ws://127.0.0.1:9999'], [SyncCredentials.none()]);
final subscription = client.loginEvents.listen((SyncLoginEvent event) {
  if (event == SyncLoginEvent.loggedIn) print('Logged in successfully');
});

client.start();

...

// don't forget to unsubscribe if you don't care about the events anymore
subscription.cancel();
```

{% endtab %}

{% tab title="C++" %}

```cpp
struct LoginListener : public obx::SyncClientLoginListener {
    void loggedIn() noexcept override;
    void loginFailed(OBXSyncCode code) noexcept override;
};

auto loginListener = std::make_shared<LoginListener>();
syncClient->setLoginListener(loginListener);

// there can be only one listener of a given type, so calling again with a 
// different callback changes the listener (un-assigns the previous one)
syncClient->setLoginListener(...);

// reset (remove) a listener
syncClient->setLoginListener(nullptr);
```

{% endtab %}

{% tab title="C" %}

```c
void login_listener(void* arg) {
    (*(int*) arg)++;
}

void main() {
    ...
    int login_listener_arg = 0;
    obx_sync_listener_login(sync_client, login_listener, &login_listener_arg);
}

// there can be only one listener of a given type, so calling again with a 
// different callback changes the listener (un-assigns the previous one)
obx_sync_listener_login(sync_client, ..., ...);

// reset (remove) a listener
obx_sync_listener_login(sync_client, NULL, NULL);
```

{% endtab %}

{% tab title="Go" %}

```go
syncClient.SetLoginListener(func() { println("Logged-in") })

// there can be only one listener of a given type, so calling again with a 
// different callback changes the listener (un-assigns the previous one)
syncClient.SetLoginListener(func() { ... })

// reset (remove) a listener
syncClient.SetLoginListener(nil)
```

{% endtab %}
{% endtabs %}

## Advanced

### Listening to incoming data changes

For advanced use cases, it might be useful to know exactly which objects have changed during an incoming sync update. This is typically not necessary, as observing a box or a query may be easier.

On each sync update received on the client, the listener is called with an array of "Sync Change" objects, one for each affected entity type. It includes a list of affected object IDs - the ones that were put or removed in the incoming update.

{% tabs %}
{% tab title="Java" %}
Use `changeListener(changeListener)` when building the client and pass a `SyncChangeListener` to receive detailed information for each sync update. Or set or remove it at any later point using `SyncClient.setSyncChangeListener(changeListener)`.

```java
SyncChangeListener changeListener = syncChanges -> {
    for (SyncChange syncChange : syncChanges) {
        // This is equal to Example_.__ENTITY_ID.
        long entityId = syncChange.getEntityTypeId();
        // The @Id values of changed and removed entities.
        long[] changed = syncChange.getChangedIds();
        long[] removed = syncChange.getRemovedIds();
    }
};
// Set the listener when building the client.
syncBuilder.changeListener(changeListener);
// Or set the listener later.
syncClient.setSyncChangeListener(changeListener);

// Calling again replaces an existing listener.
syncClient.setSyncChangeListener(changeListener);
// Remove an existing listener.
syncClient.setSyncChangeListener(null);
```

{% endtab %}

{% tab title="Kotlin" %}
Use `changeListener(changeListener)` when building the client and pass a `SyncChangeListener` to receive detailed information for each sync update. Or set or remove it at any later point using `SyncClient.setSyncChangeListener(changeListener)`.

```kotlin
val changeListener = SyncChangeListener { syncChanges ->
    for (syncChange in syncChanges) {
        // This is equal to Example_.__ENTITY_ID.
        val entityId = syncChange.entityTypeId
        // The @Id values of changed and removed entities.
        val changed = syncChange.changedIds
        val removed = syncChange.removedIds
    }
}
// Set the listener when building the client.
syncBuilder.changeListener(changeListener)
// Or set the listener later.
syncClient.setSyncChangeListener(changeListener)

// Calling again replaces an existing listener.
syncClient.setSyncChangeListener(changeListener)
// Remove an existing listener.
syncClient.setSyncChangeListener(null)
```

{% endtab %}

{% tab title="Swift" %}

```swift
import ObjectBox

class MyChangeListener: SyncChangeListener {
    func changed(_ changes: [obx_schema_id : SyncChange]) {
        for (schemaId, change) in changes {
            // schemaId identifies the entity for which the changes were recorded
            // change.puts is an [Id] containing the ids of objects
            // that were created/updated
            // change.removals is an [Id] containing the ids of objects
            // that were removed/deleted
        }
    }
}

// set the listener when building the client
client.changeListener = MyChangeListener()
```

{% endtab %}

{% tab title="Dart/Flutter" %}
Use `Stream<List<SyncChange>> get changeEvents` on the SyncClient to receive detailed information for each sync update. Make sure to cancel the subscription when you don't need the information anymore to clear up resources.

```dart
final subscription = client.changeEvents
    .listen((List<SyncChange> event) => event.forEach((change) {
          print('${change.entity}(${change.entityId}) '
              'puts=${change.puts} removals=${change.removals}');
        }));
        
// For connects and disconnects subscribe to client.connectionEvents

// For login status, subscribe to client.loginEvents

// For sync completion, subscribe to client.completionEvents

// ...don't forget to unsubscribe if you don't care about the events anymore
subscription.cancel();
```

{% endtab %}

{% tab title="C++" %}

```cpp
/// Sample listener collecting all puts and removals
class StatsCollector {
    struct EntityChanges {
        std::vector<obx_id> puts;
        std::vector<obx_id> removals;
    };
    std::unordered_map<obx_schema_id, EntityChanges> statsPerEntity;

    /// Receives changes on the object instance, forwarded by the static forward().
    void onChanges(const OBX_sync_change_array* changes) {
        for (size_t i = 0; i < changes->count; i++) {
            const OBX_sync_change& change = changes->list[i];
            EntityChanges& stats = statsPerEntity[change.entity_id];
            if (change.puts) collect(change.puts, stats.puts);
            if (change.removals) collect(change.removals, stats.removals);
        }
    }

    /// Update given vector by adding all ids from current change list.
    void collect(const OBX_id_array* ids, std::vector<obx_id>& targetVector) {
        targetVector.reserve(targetVector.size() + ids->count);
        for (size_t i = 0; i < ids->count; i++) {
            targetVector.push_back(ids->ids[i]);
        }
    }

public:
    /// Just forwards the C-callback to the instance of this class.
    static void forward(void* arg, const OBX_sync_change_array* changes) {
        static_cast<StatsCollector*>(arg)->onChanges(changes);
    }
};


void main() {
    ...
    StatsCollector collector;
    syncClient->setChangeListener(StatsCollector::forward, &collector);
}
```

{% endtab %}

{% tab title="C" %}

```c
void on_puts(void* arg, obx_schema_id entity_id, const OBX_id_array* ids) {
   //...
}

void on_removals(void* arg, obx_schema_id entity_id, const OBX_id_array* ids) {
    //...
}

void change_listener(void* arg, const OBX_sync_change_array* changes) {
    for (size_t i = 0; i < changes->count; i++) {
        const OBX_sync_change* change = &changes->list[i];
        if (change->puts) {
            on_puts(arg, change->entity_id, change->puts);
        }
        if (change->removals) {
            on_removals(arg, change->entity_id, change->removals);
        }
    }
};

void main() {
    ...
    int change_listener_arg = 0;
    obx_sync_listener_change(sync_client, change_listener, &change_listener_arg);
}
```

{% endtab %}

{% tab title="Go" %}

```go
syncClient.SetChangeListener(func(changes []*objectbox.SyncChange) {
		fmt.Printf("received %d changes\n", len(changes))
		for i, change := range changes {
			fmt.Printf("change %d: %v\n", i, change)

			// change.EntityId is a "model-entity-id", e.g. we can choose to process
			// only changes on Entity `User`, with the generated `UserBinding`:
			if change.EntityId == model.UserBinding.Id {
			  fmt.Printf("put user IDs %v\n", change.Puts)
			  fmt.Printf("deleted user IDs %v\n", change.Removals)
			}
		}
	})
```

{% endtab %}
{% endtabs %}

### Checking for outgoing changes

Sometimes you want to know if there are any ("outgoing") changes on the local device that are not yet synchronized to the server. This is helpful to when you want to show the sync status in the user interface, or trigger some logic. Technically, ObjectBox uses a message queue here and there's an API that gives you number of outgoing messages. If this number reaches zero, it means that all changes done on this device have been synced (sent) to the server. It's fine to call this API periodically, e.g. every second, if you want to know the current status.

{% tabs %}
{% tab title="Java" %}

```java
// Not yet available (coming soon)
```

{% endtab %}

{% tab title="Kotlin" %}

```kotlin
// Not yet available (coming soon)
```

{% endtab %}

{% tab title="Swift" %}

```swift
// Not yet available (coming soon)
```

{% endtab %}

{% tab title="Dart/Flutter" %}

```dart
var count = syncClient.outgoingMessageCount();
```

{% endtab %}

{% tab title="C++" %}

```cpp
uint64_t count = syncClient.outgoingMessageCount();
```

{% endtab %}

{% tab title="C" %}

```c
uint64_t count;
obx_err err = obx_sync_outgoing_message_count(sync, 0, &count)
```

{% endtab %}

{% tab title="Go" %}

```go
// Not yet available
```

{% endtab %}
{% endtabs %}

### Listeners concurrency

Some events may be issued in parallel, from multiple background threads. To help you understand when and how you need to take care of concurrency (e.g. use mutex/atomic variables), we've grouped the sync listeners to these two groups:

* [State listeners](#listening-to-events) - listening to login success/failure, connection status, sync complete.
* [Data change listener](#listening-to-incoming-data-changes) - listening to incoming data changes.

There can be only one event executed at any single moment from a listener in a single group. You can imagine this as if there were two parallel threads, one could only issue "state" events, the other only "data change" events.

### Controlling sync updates behavior

By default, after the Sync client is logged in, its database is updated from the server and the client will automatically subscribe for any future changes. For advanced use cases, like unit testing, it is possible to control when the client receives data updates from the server.

To change the default behavior, configure the "Request Updates Mode" before starting the client connection. Three modes are available:

* **automatic** (default): receives updates on login and subscribes for future updates.
* **automatic, but no pushes:** receives updates on login but doesn't subscribe for future updates.
* **manual:** no automatic updates on login or on any updates in the future.

When using one of the non-default modes, synchronization can be controlled after login during application runtime by requesting and cancelling updates using the client:

{% tabs %}
{% tab title="Java" %}

```java
SyncClient syncClient = syncBuilder
        // Turn off automatic sync updates.
        .requestUpdatesMode(RequestUpdatesMode.MANUAL)
        .build();

// Wait for login attempt, proceed if logged in.
syncClient.awaitFirstLogin(20 * 1000 /* ms */);
if (syncClient.isLoggedIn()) {
    // Turn on automatic sync updates.
    syncClient.requestUpdates();
    
    // Turn off automatic sync updates, cancel ongoing sync.
    syncClient.cancelUpdates();
    
    // Request one-time update.
    // Will update client with latest data.
    syncClient.requestUpdatesOnce();
}
```

{% endtab %}

{% tab title="Kotlin" %}

```kotlin
val syncClient = syncBuilder
        // Turn off automatic sync updates.
        .requestUpdatesMode(RequestUpdatesMode.MANUAL)
        .build()

// Wait for login attempt, proceed if logged in.
syncClient.awaitFirstLogin(20 * 1000 /* ms */)
if (syncClient.isLoggedIn()) {
    // Turn on automatic sync updates.
    syncClient.requestUpdates()
    
    // Turn off automatic sync updates, cancel ongoing sync.
    syncClient.cancelUpdates()
    
    // Request one-time update.
    // Will update client with latest data.
    syncClient.requestUpdatesOnce()
}
```

{% endtab %}

{% tab title="Swift" %}
*Coming soon!*
{% endtab %}

{% tab title="Dart/Flutter" %}

```dart
final client = SyncClient(store, ['ws://127.0.0.1:9999'], [SyncCredentials.none()]);

client.setRequestUpdatesMode(SyncRequestUpdatesMode.manual);
client.start(); // Connect but don't synchronize yet.

// Turn on sync updates and subscribe for pushes.
client.requestUpdates(subscribeForFuturePushes: true);

// Cancel ongoing synchronization & unsubscribe from future updates.
client.cancelUpdates();

// Alternatively, catch up with the server but don't subscribe for future.
// You can call this instead of subscribing to do one-time updates as needed.
client.requestUpdates(subscribeForFuturePushes: false);
```

{% endtab %}

{% tab title="C++" %}

```cpp
std::shared_ptr<obx::SyncClient> syncClient = obx::Sync::client(store, ...);

syncClient->setRequestUpdatesMode(OBXRequestUpdatesMode_MANUAL);
syncClient->start();  // Connect but don't synchronize yet.

// Turn on sync updates and subscribe for pushes.
syncClient->requestUpdates(true);

// Cancel ongoing synchronization & unsubscribe from future updates.
syncClient->cancelUpdates();

// Alternatively, catch up with the server but don't subscribe for future.
// You can call this instead of subscribing to do one-time updates as needed.
syncClient->requestUpdates(false);
```

{% endtab %}

{% tab title="C" %}

```cpp
OBX_sync* sync_client = obx_sync(store, ...);
obx_sync_credentials(sync_client, ...);

obx_sync_request_updates_mode(sync_client, OBXRequestUpdatesMode_MANUAL);
obx_sync_start(sync_client);  // Connect but don't synchronize yet.

// Turn on sync updates and subscribe for pushes.
obx_sync_updates_request(sync_client, true);

// Cancel ongoing synchronization & unsubscribe from future updates.
obx_sync_updates_cancel(sync_client);

// Alternatively, catch up with the server but don't subscribe for future.
// You can call this instead of subscribing to do one-time updates as needed.
obx_sync_updates_request(sync_client, false);
```

{% endtab %}

{% tab title="Go" %}

```go
syncClient, err := objectbox.NewSyncClient(...)

syncClient.SetRequestUpdatesMode(objectbox.SyncRequestUpdatesManual)
syncClient.Start()  // Connect but don't synchronize yet.

// Turn on sync updates and subscribe for pushes.
syncClient.RequestUpdates(true)

// Cancel ongoing synchronization & unsubscribe from future updates.
syncClient.CancelUpdates()

// Alternatively, catch up with the server but don't subscribe for future.
// You can call this instead of subscribing to do one-time updates as needed.
syncClient.RequestUpdates(false)
```

{% endtab %}
{% endtabs %}

### Custom Certificates

For use cases like self-signed certificates in a local development environment or custom CAs, you can provide certificate paths referring to the local file system.

{% tabs %}
{% tab title="Java" %}

```java
// Coming soon
```

{% endtab %}

{% tab title="Kotlin" %}

```kotlin
// Coming soon
```

{% endtab %}

{% tab title="Swift" %}

```swift
let configuration = Sync.Configuration(store: store, url: "wss://sync.server.example")
configuration.credentials = [SyncCredentials.makeNone()]
configuration.certificatePaths = ["/path/to/custom-ca.crt"]
let client = try Sync.makeClient(configuration: configuration)
try client.start()
```

{% endtab %}

{% tab title="Dart/Flutter" %}

```dart
final syncClient = SyncClient(
    store,
    ['wss://sync.server.example'],
    [SyncCredentials.none()],
    certificatePaths: ['/path/to/custom-ca.crt']);
syncClient.start();
```

{% endtab %}

{% tab title="C++" %}

```cpp
// Coming soon
```

{% endtab %}

{% tab title="C" %}

```c
OBX_sync_options* opt = obx_sync_opt(store);
obx_sync_opt_add_url(opt, "wss://sync.server.example");
obx_sync_opt_add_cert_path(opt, "/path/to/custom-ca.crt");

OBX_sync* sync_client = obx_sync_create(opt);
obx_sync_credentials(sync_client, OBXSyncCredentialsType_NONE, NULL, 0);
obx_sync_start(sync_client);
```

{% endtab %}

{% tab title="Go" %}

```go
// Coming soon
```

{% endtab %}
{% endtabs %}


# Sync Server

How to use standalone ObjectBox Sync Server and set it up as a data synchronization target for clients.

The ObjectBox Sync Server is the centerpiece of ObjectBox Sync. It lets ObjectBox Sync clients connect to exchange data both ways (data synchronization).

ObjectBox Sync Server is very efficient, making it usable on a wide range of devices. By itself, it needs only a few MB RAM and disk space. It even runs on small devices like a Raspberry Pi and mobile phones. Nevertheless, it seamlessly scales to the cloud, serving millions of clients when set up as a cluster.

## Get the Sync Server

{% hint style="info" %}
Starting from late May 2025, ObjectBox Sync Server trials are publicly available as Docker images. :tada:
{% endhint %}

To test the Sync Server with your data, ObjectBox offers a free trial. It comes as a publicly available Docker image, which you can pull from [our Docker Hub](https://hub.docker.com/r/objectboxio/sync-server-trial/):

```shell
docker pull objectboxio/sync-server-trial
```

{% hint style="info" %}
**New to Docker?** Check these guides: [Get Docker](https://docs.docker.com/get-started/get-docker/), What is [Docker](https://docs.docker.com/get-started/docker-overview/) /[ a container](https://docs.docker.com/get-started/docker-concepts/the-basics/what-is-a-container/) / [an image](https://docs.docker.com/get-started/docker-concepts/the-basics/what-is-an-image/) ?

Ensure that running `docker run hello-world` works before you continue with the Sync server.
{% endhint %}

For a fully operational Sync Server, you need to start it with a **data model file** (see below). But to quickly verify that it is starting up fine, you can use the following command to make it print its version and exit:

```shell
docker run --rm -it objectboxio/sync-server-trial --version
```

OK, now let's see how to get the data model file...

## Data model JSON file

{% hint style="info" %}
Don't have a data model yet? Do you prefer to start with a ready-to-use example? Check out [our Sync Examples repository](https://github.com/objectbox/objectbox-sync-examples).
{% endhint %}

To start the server, you need to pass your data model, which describes the structure of your data. It is a JSON file generated by one of the [ObjectBox Sync clients](/sync-client) and is required to initialize the ObjectBox Server database.

{% hint style="info" %}
**Where to find the data model file?** The file is generated automatically and located close to your source code:

* Java/Kotlin: `objectbox-models/default.json`
* Swift: `model-<project-name>.json`
* Other APIs: `objectbox-model.json`

Before starting the sync server, you typically copy the model file into the directory in which you run the sync server. Ensure its name is the default name (`objectbox-model.json`) so you do not need additional configuration.
{% endhint %}

If you did not define a data model yet, then now is the time to do so. Basically, you need to start this on the **client side** by defining your data types in the programming language of your choice. Then, the **ObjectBox tooling will generate the data model file**. This is a standard process even for the non-sync ObjectBox database. So it's a good idea to look at the [ObjectBox database docs](https://docs.objectbox.io) and especially at the [Entity annotations](https://docs.objectbox.io/entity-annotations) that tag your data classes (e.g. `@Entity`). Data types that shall be synced via ObjectBox Sync also need to be tagged accordingly (e.g. `@Sync`). This is [outlined in the client section](/sync-client#enable-your-objects-for-objectbox-sync).

{% hint style="danger" %}
Keep your data model file safe and secure. It contains the schema of your data model along with **unique IDs which cannot be restored**. If you lose it, you will lose access to your data and synchronization. Thus, **always** check the JSON file into your version control system, e.g. git.
{% endhint %}

## Run the Docker container

Once the image is pulled, you can [run](https://docs.docker.com/reference/cli/docker/container/run/) the container. The following example starts Sync Server using the current directory as the data folder and exposes the sync-server on localhost:9999 and the Admin web UI on <http://localhost:9980>. Ensure that the file objectbox-model.json is in the current directory on your host (it's mapped to /data inside the container):

{% hint style="info" %}
Note: the following command assumes objectbox-model.json is in the current directory.

The database will be stored in the current directory's "objectbox" subdirectory
{% endhint %}

{% tabs %}
{% tab title="Bash" %}

```bash
docker run --rm -it \
    --volume "$(pwd):/data" \
    --publish 127.0.0.1:9999:9999 \
    --publish 127.0.0.1:9980:9980 \
    --user $UID \
    objectboxio/sync-server-trial \
    --model /data/objectbox-model.json \
    --unsecured-no-authentication \
    --admin-bind 0.0.0.0:9980
```

{% endtab %}

{% tab title="PowerShell" %}

```powershell
docker run --rm -it ^
    --volume "%cd%:/data" ^
    --publish 127.0.0.1:9999:9999 ^
    --publish 127.0.0.1:9980:9980 ^
    objectboxio/sync-server-trial ^
    --model /data/objectbox-model.json ^
    --unsecured-no-authentication ^
    --admin-bind 0.0.0.0:9980
```

{% endtab %}
{% endtabs %}

Now the server should be running and accessible:

* ObjectBox Sync on all interfaces, port 9999:\
  Use this information (using a reachable IP or host name) to set up Sync clients
* Admin web UI on localhost, port 9980:\
  Have a look at <http://127.0.0.1:9980> in your web browser.

If you run into any problems, please check the [troubleshooting guide](/troubleshooting-sync).

### Update the Docker image

To get the latest version of the Docker image, you simply pull it again:

```shell
docker pull objectboxio/sync-server-trial
```

## Activating the trial

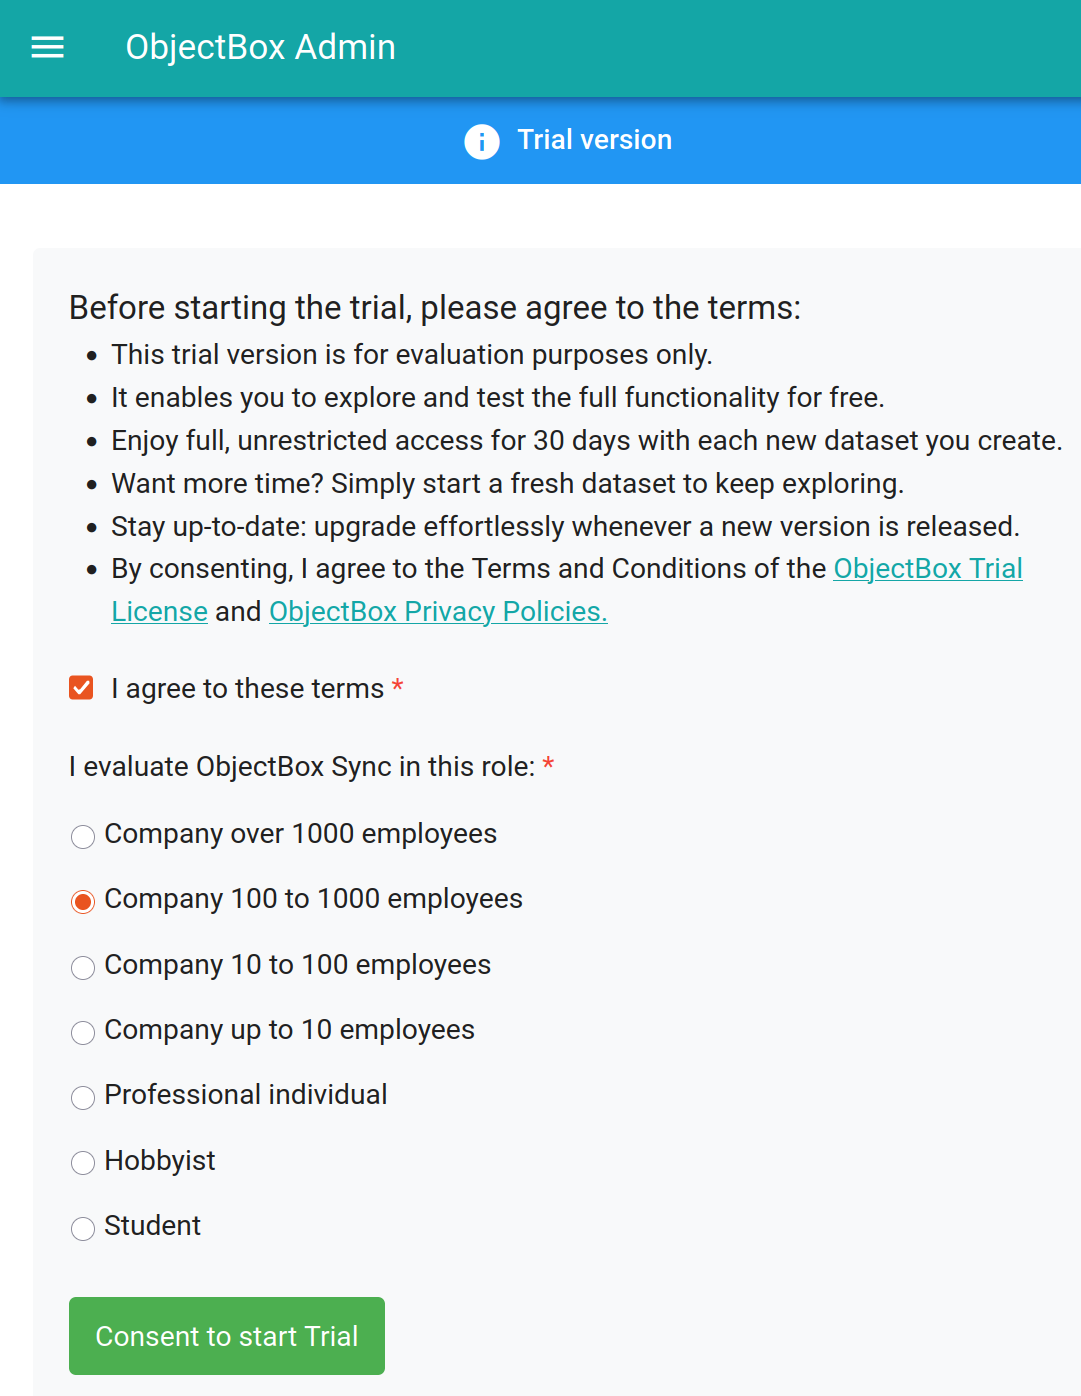
Once the ObjectBox Sync Server is started, open the Admin web UI at <http://127.0.0.1:9980> and you should be taken to the [Sync Trial](http://localhost:9980/#/sync-trial) page. It shows the conditions for the trial version, e.g. that you have a testing period of 30 days **per dataset**. After you consent, you are forwarded to log in with your ObjectBox user account. If you don't have an account yet, you can register using email/password, a GitHub or a Google account.

<figure><img src="/files/TDZ9j521MP0N0FWjPypZ" alt="ObjectBox Sync Architecture Diagram" width="375"><figcaption><p>ObjectBox Sync Trial</p></figcaption></figure>

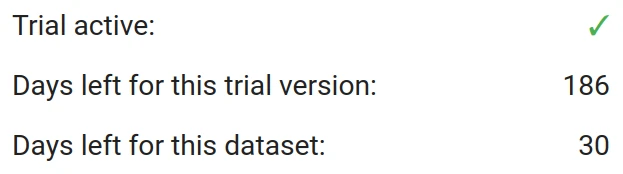
Once consented, the Sync Trial page displays trial status, which should look like this:

<figure><img src="/files/MsTEZuSb8H87gJPO0cdB" alt="" width="312"><figcaption><p>ObjectBox Sync Trial Status</p></figcaption></figure>

You have plenty of time to explore ObjectBox Sync. You can always restart the trial:

* If the "trial version" expired, it is a sign that the software is out of date. Renew the Docker image by pulling (`docker pull objectboxio/sync-server-trial`).
* If the dataset expired, create a new dataset. Start with a fresh database, e.g. by using another mount for the data folder. Alternatively, delete the database folder, which is typically called "objectbox" and contains a data.mdb file. Making a backup of the folder first is recommended.

## Configuration

The setup options for ObjectBox Sync Server are detailed on the [configuration](/sync-server/configuration) page. In summary, you can use command line options (e.g. run `sync-server --help` for a quick overview), or use a JSON configuration file for more complex setups. Again, please check the [configuration](/sync-server/configuration) page for details.

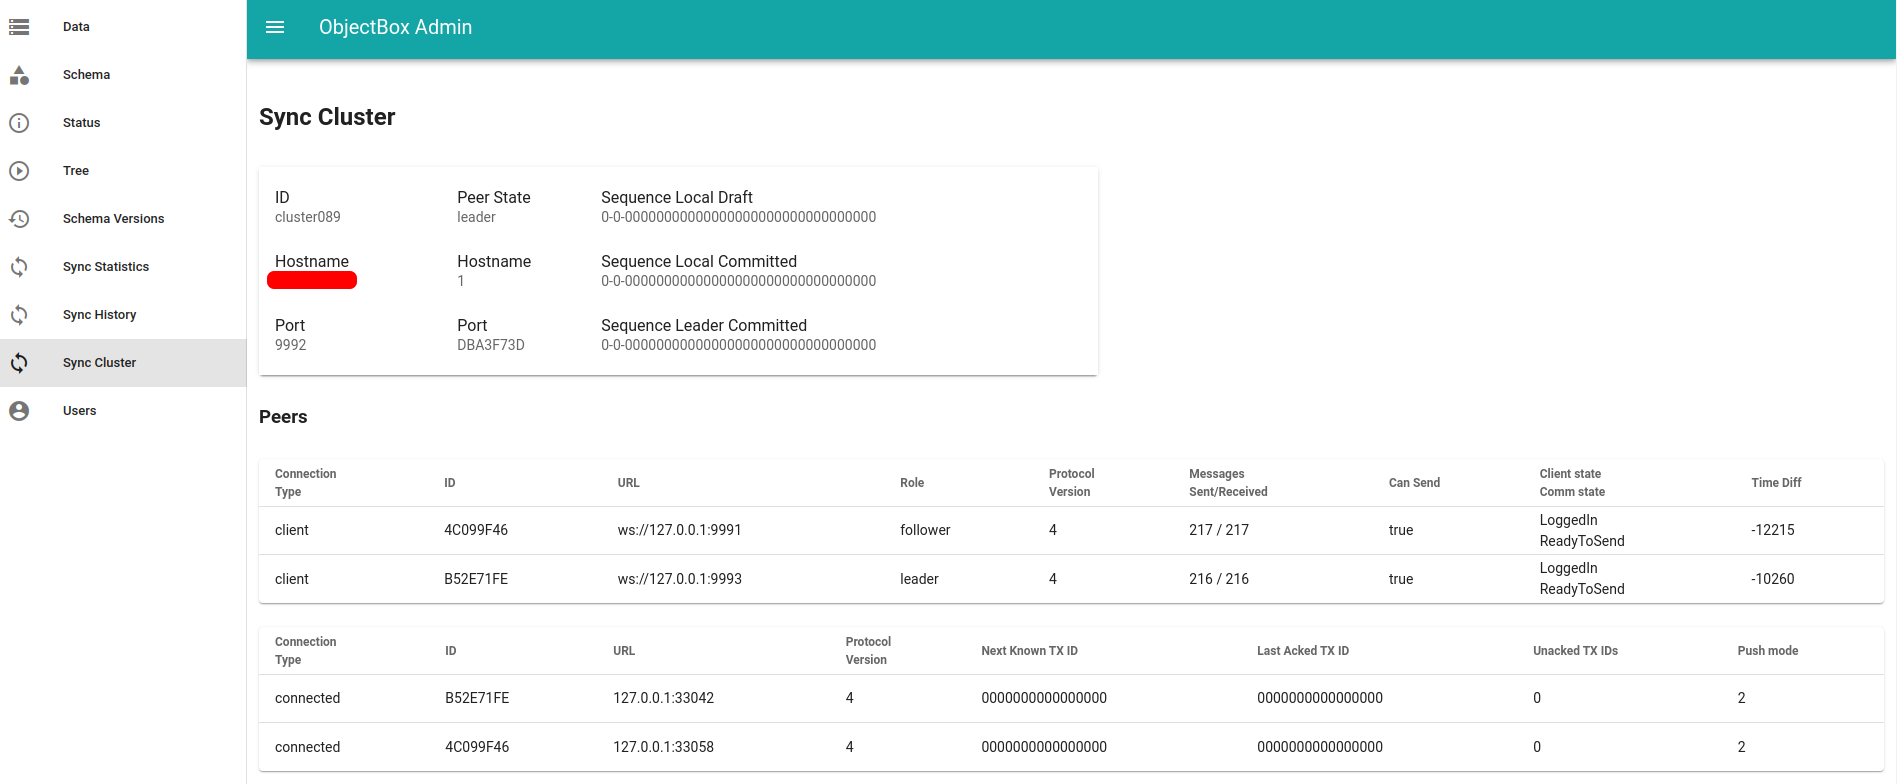
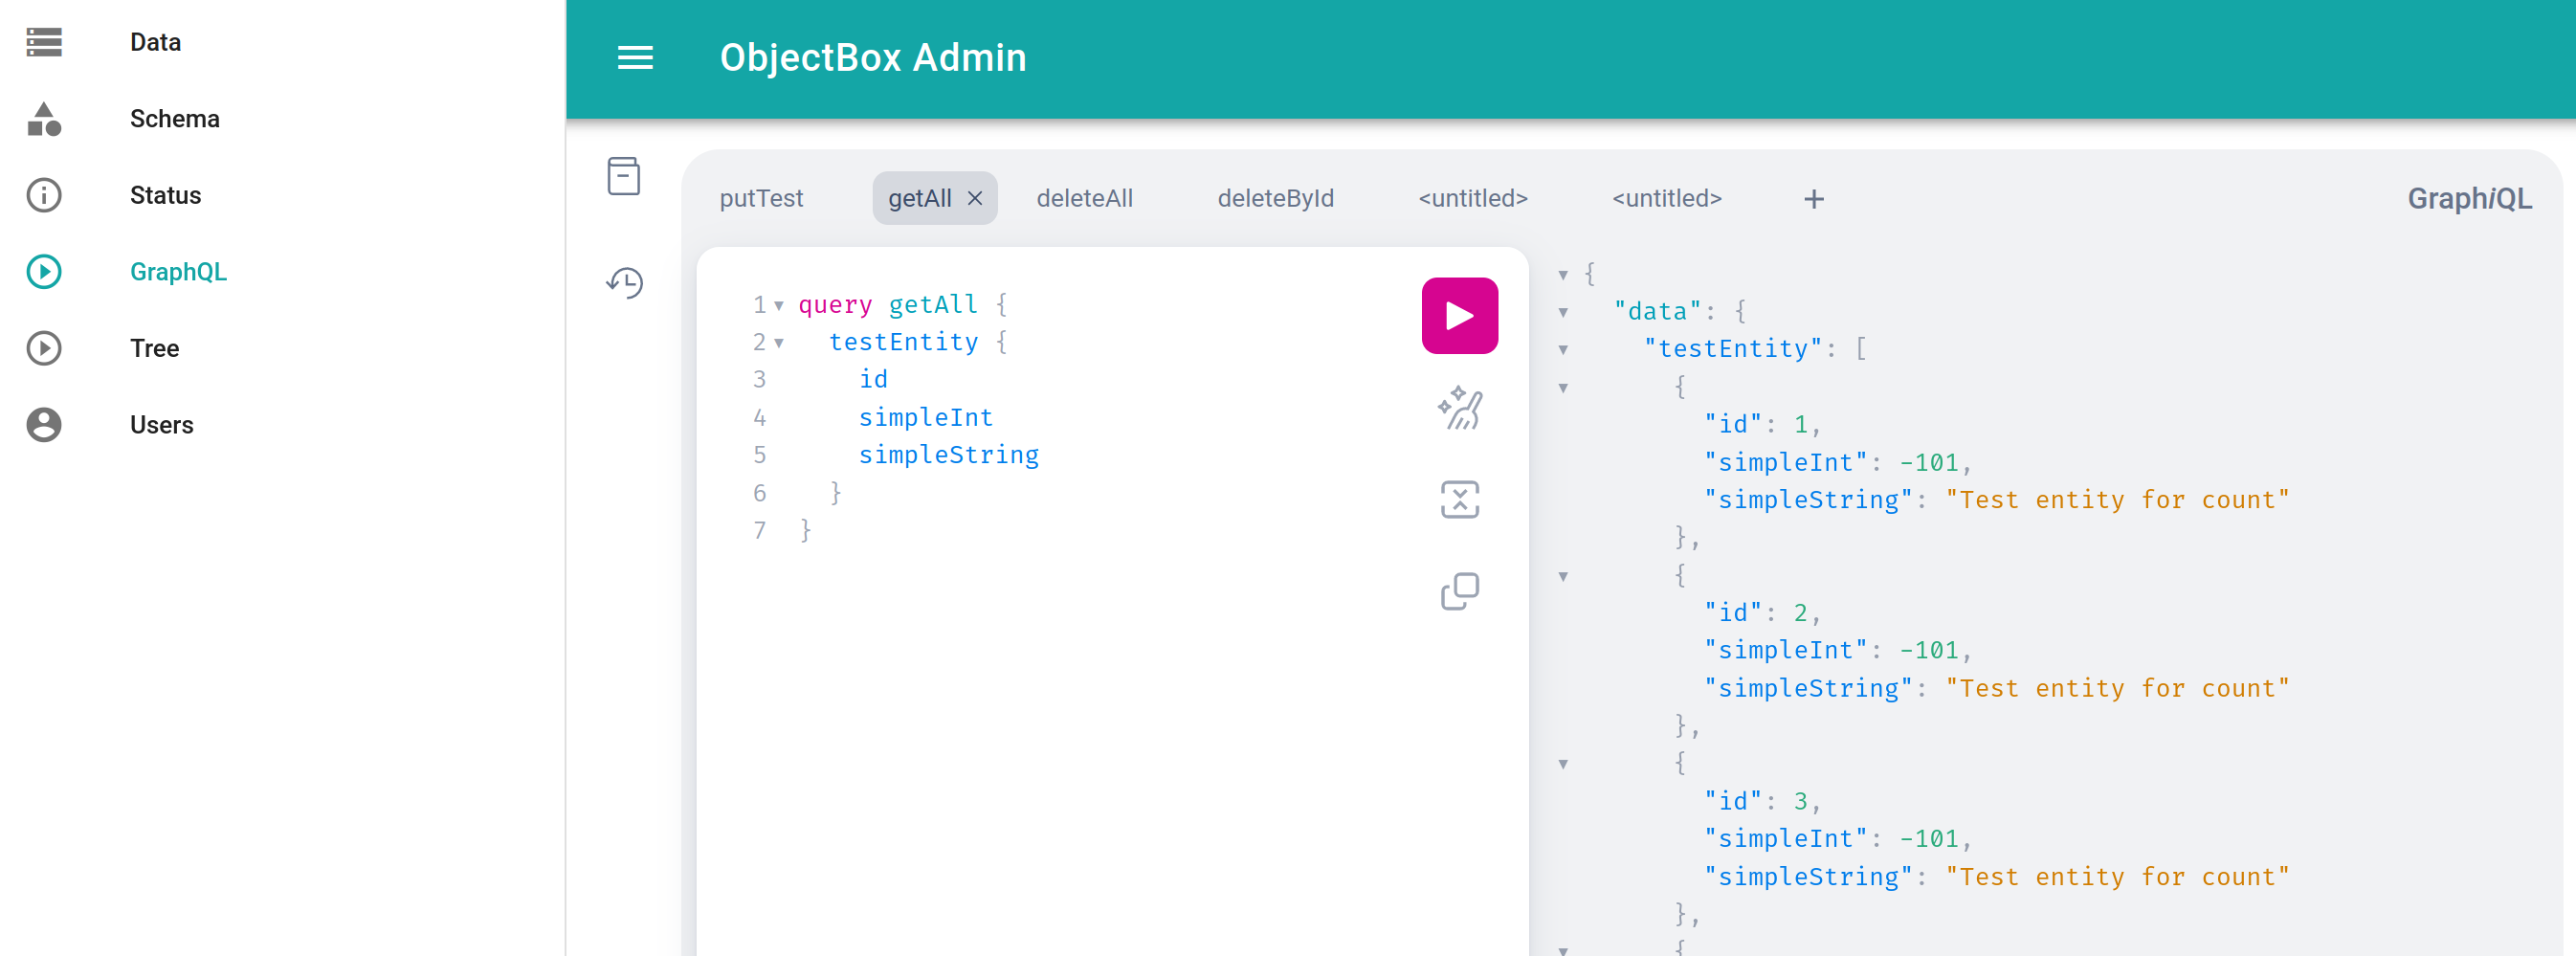
## Admin Web UI

The ObjectBox Sync Server Admin UI runs as part of the sync-server executable and allows you to:

* view the data and download it in JSON format,
* view current schema information and previous schema versions,
* view runtime information, like version number, database size, network interfaces, ...
* manage Admin UI user credentials

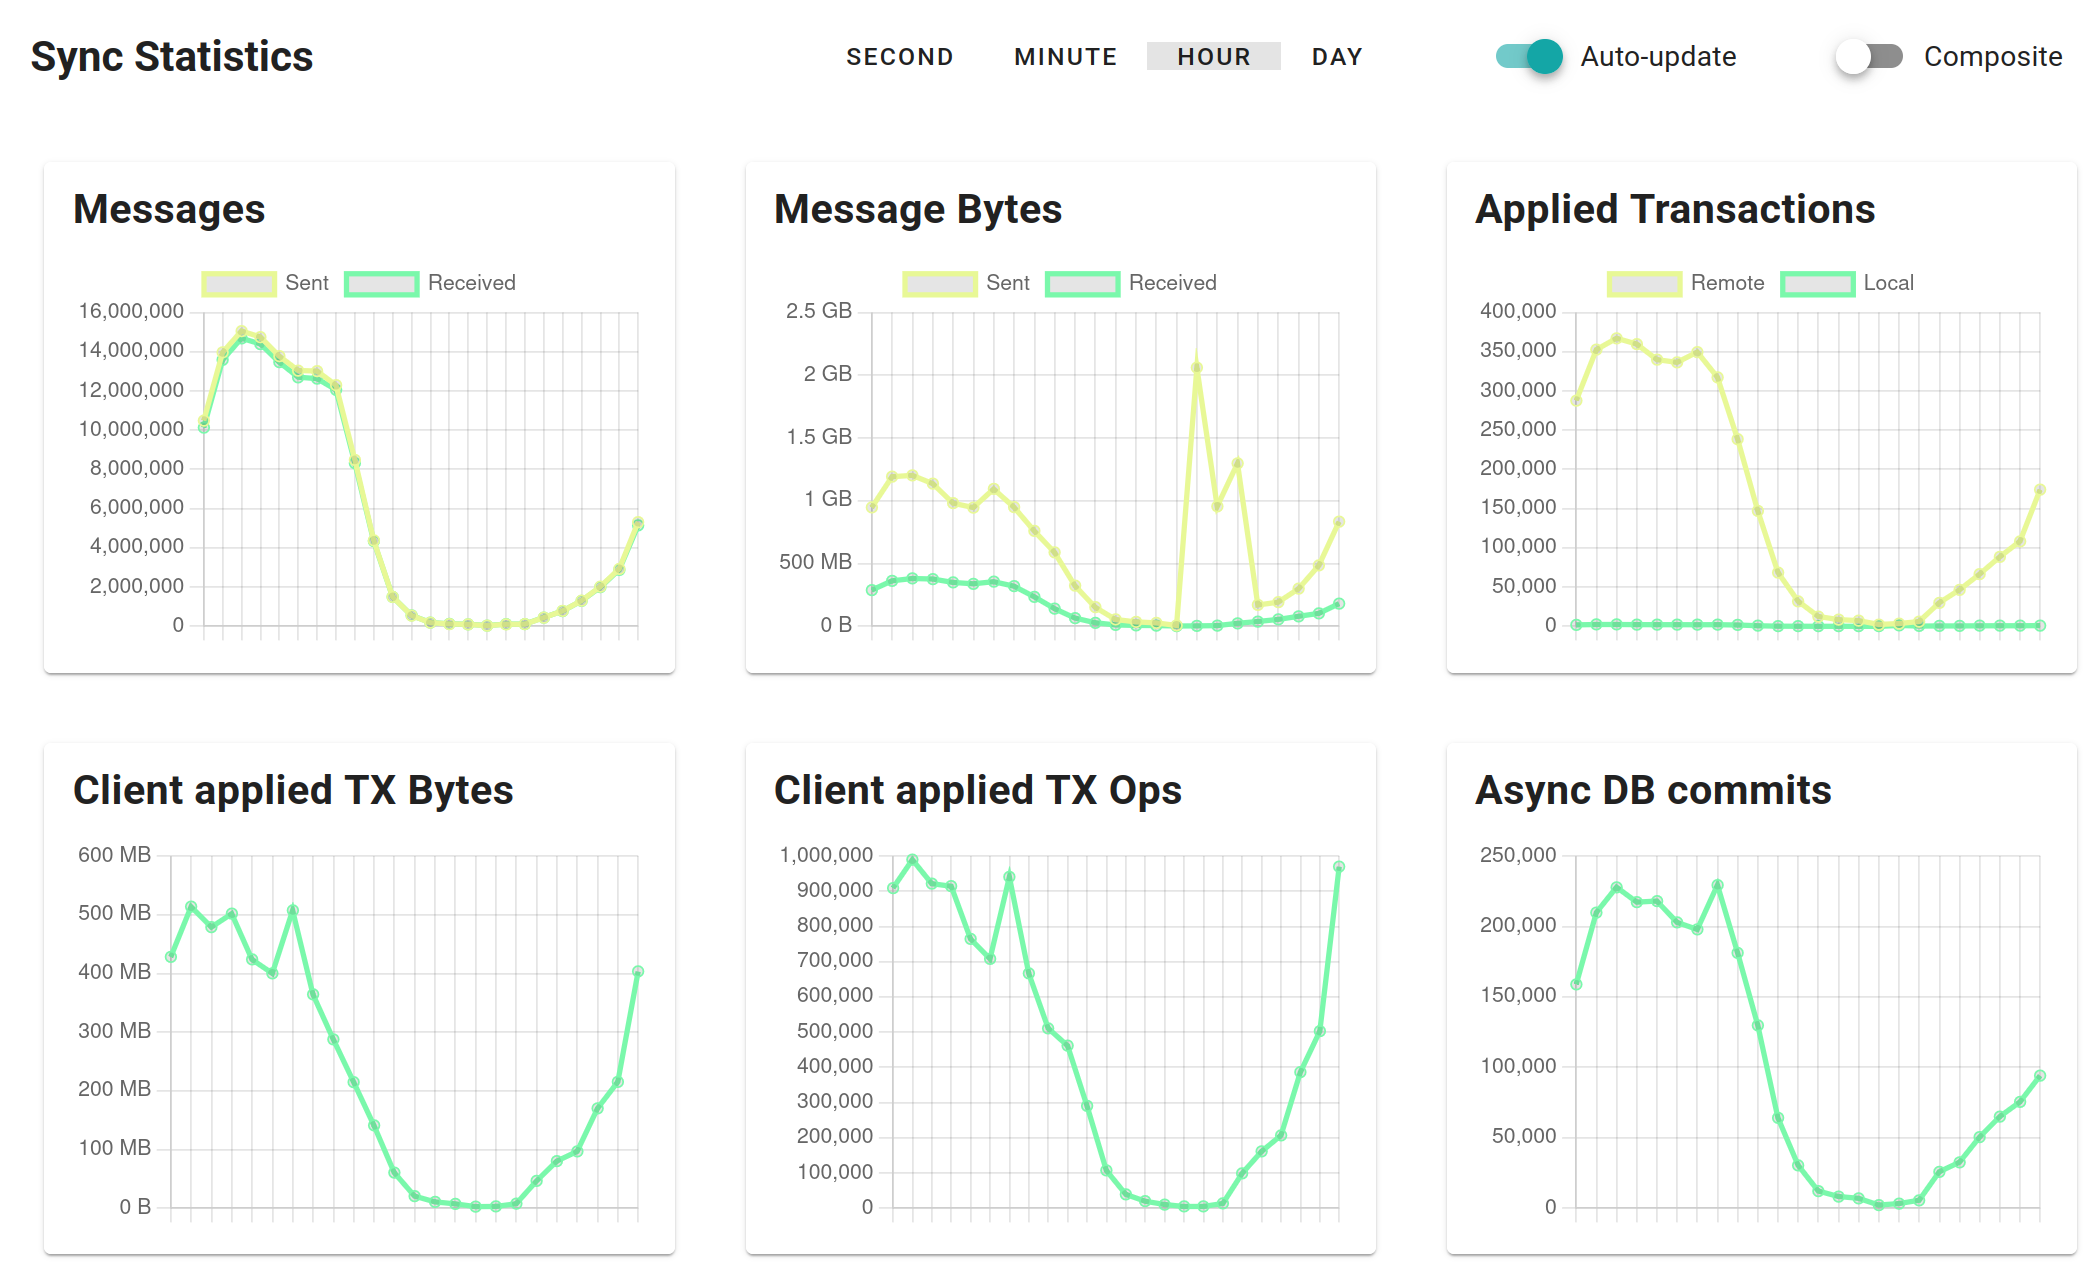
### Sync Statistics

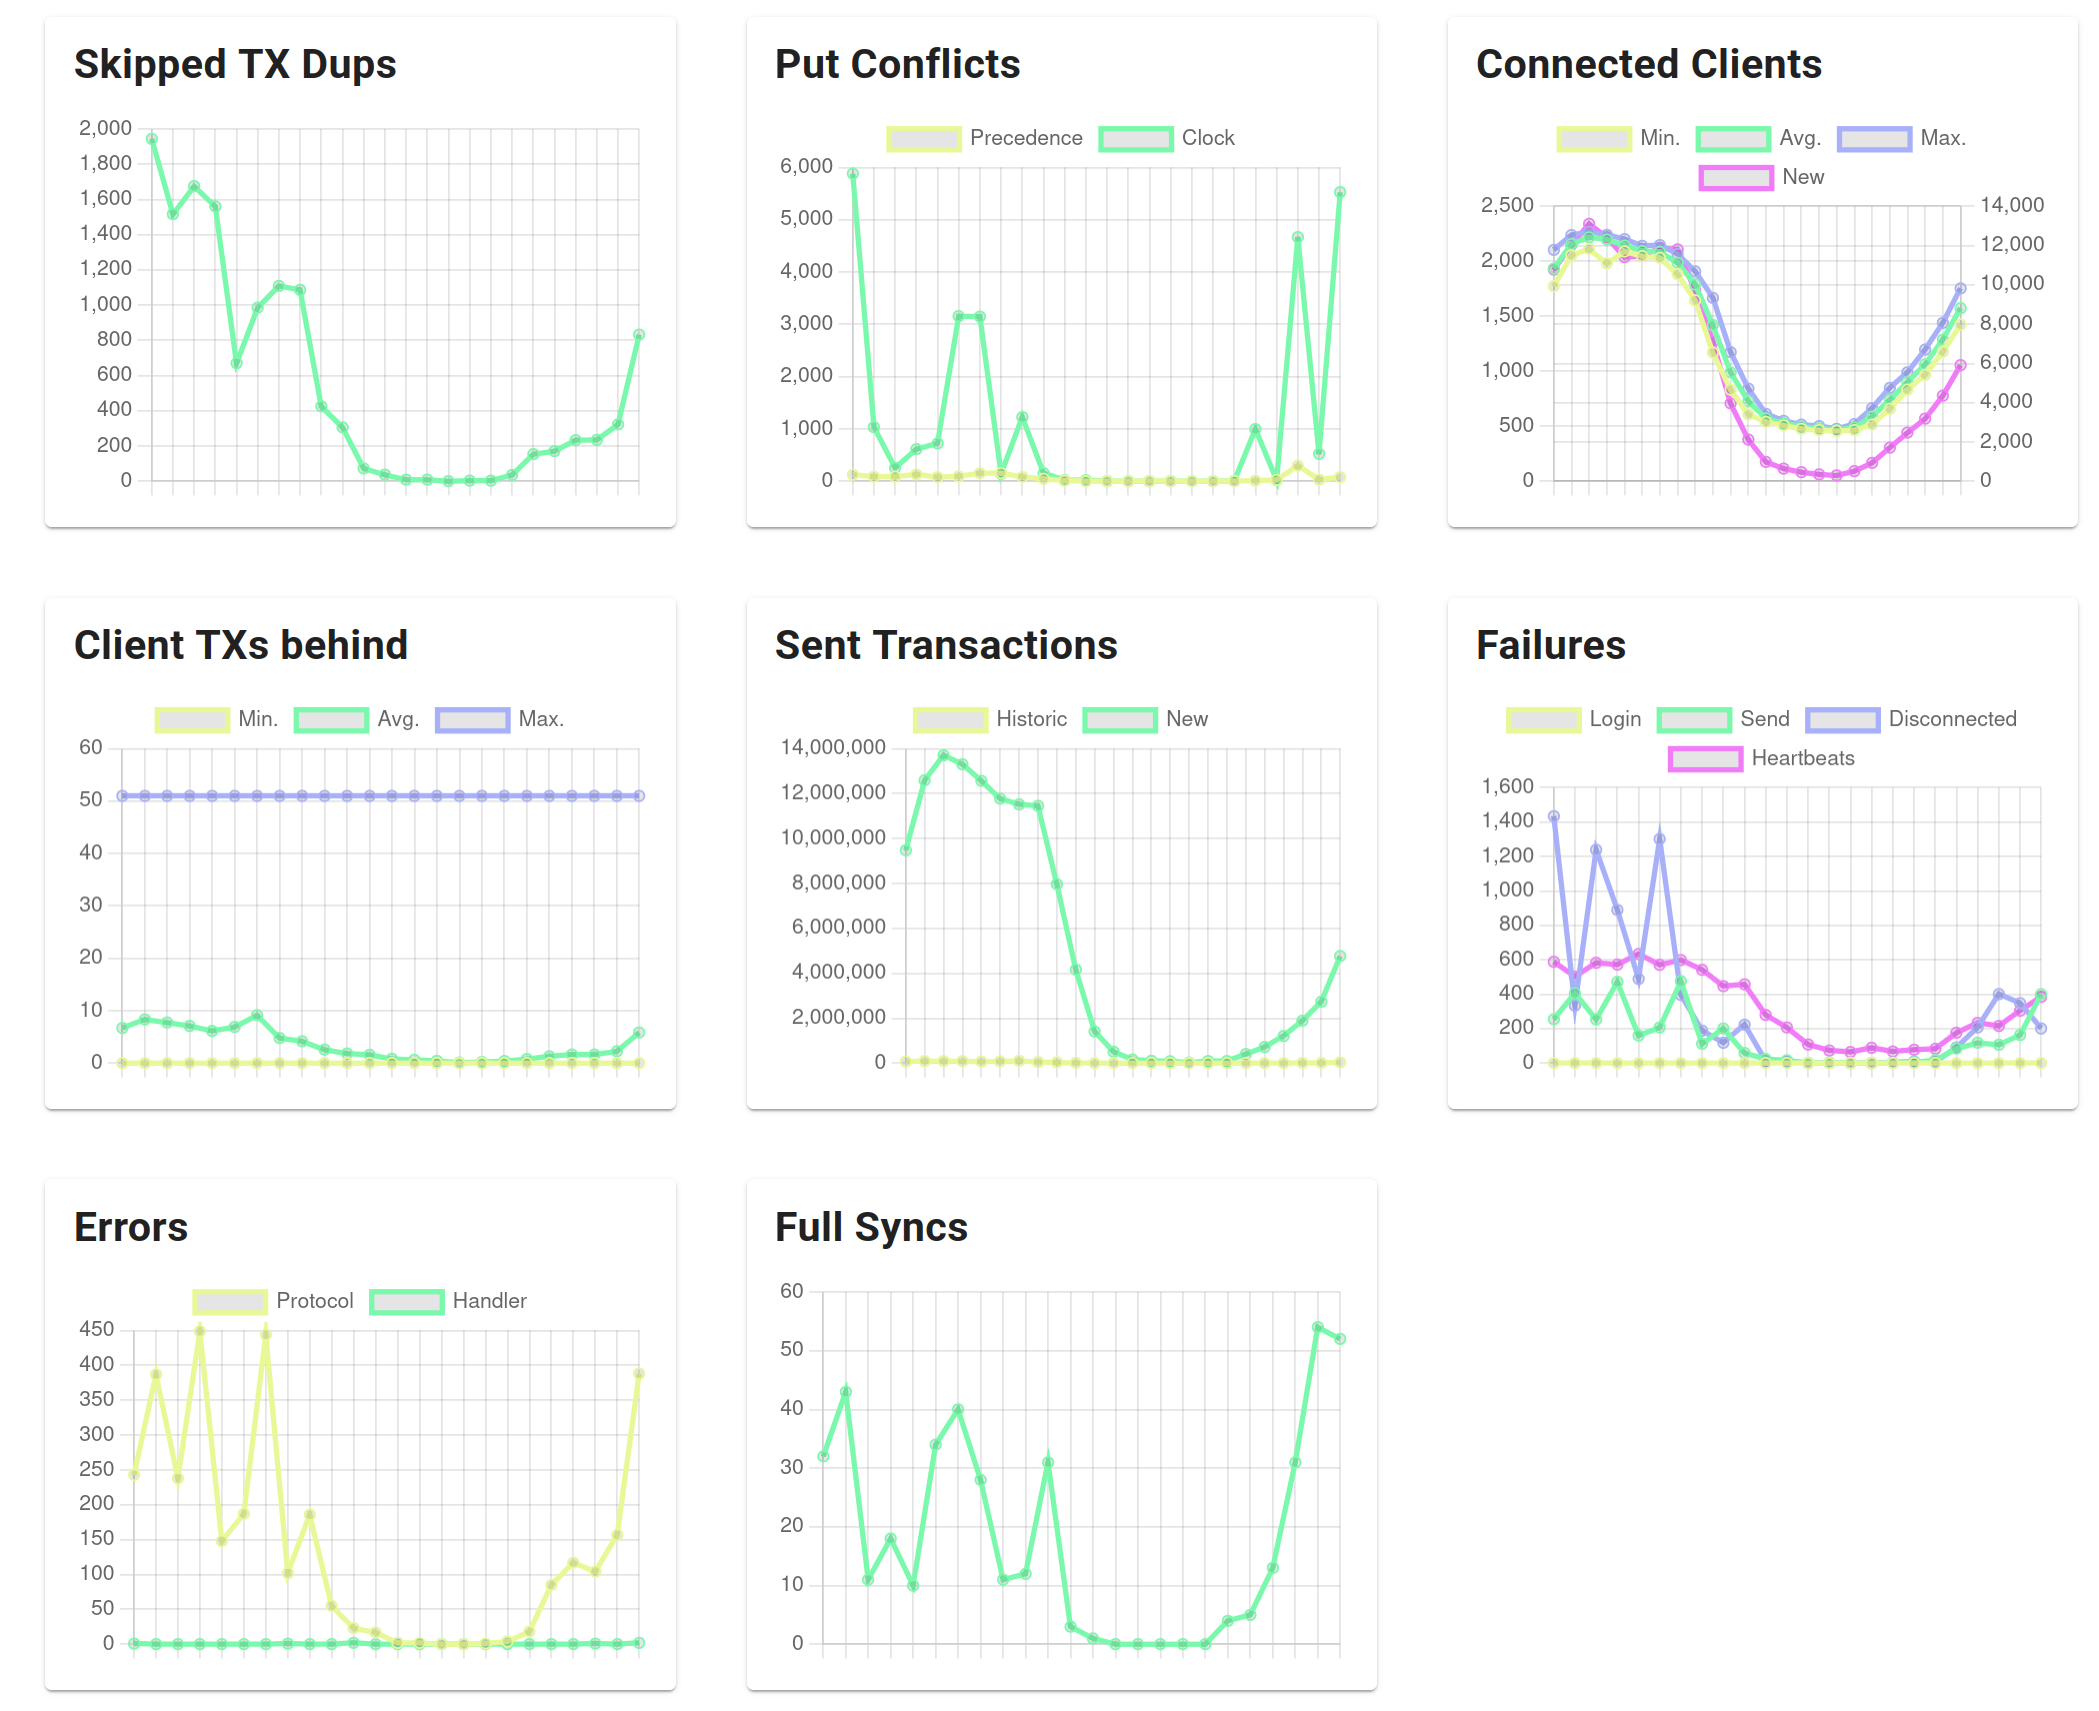
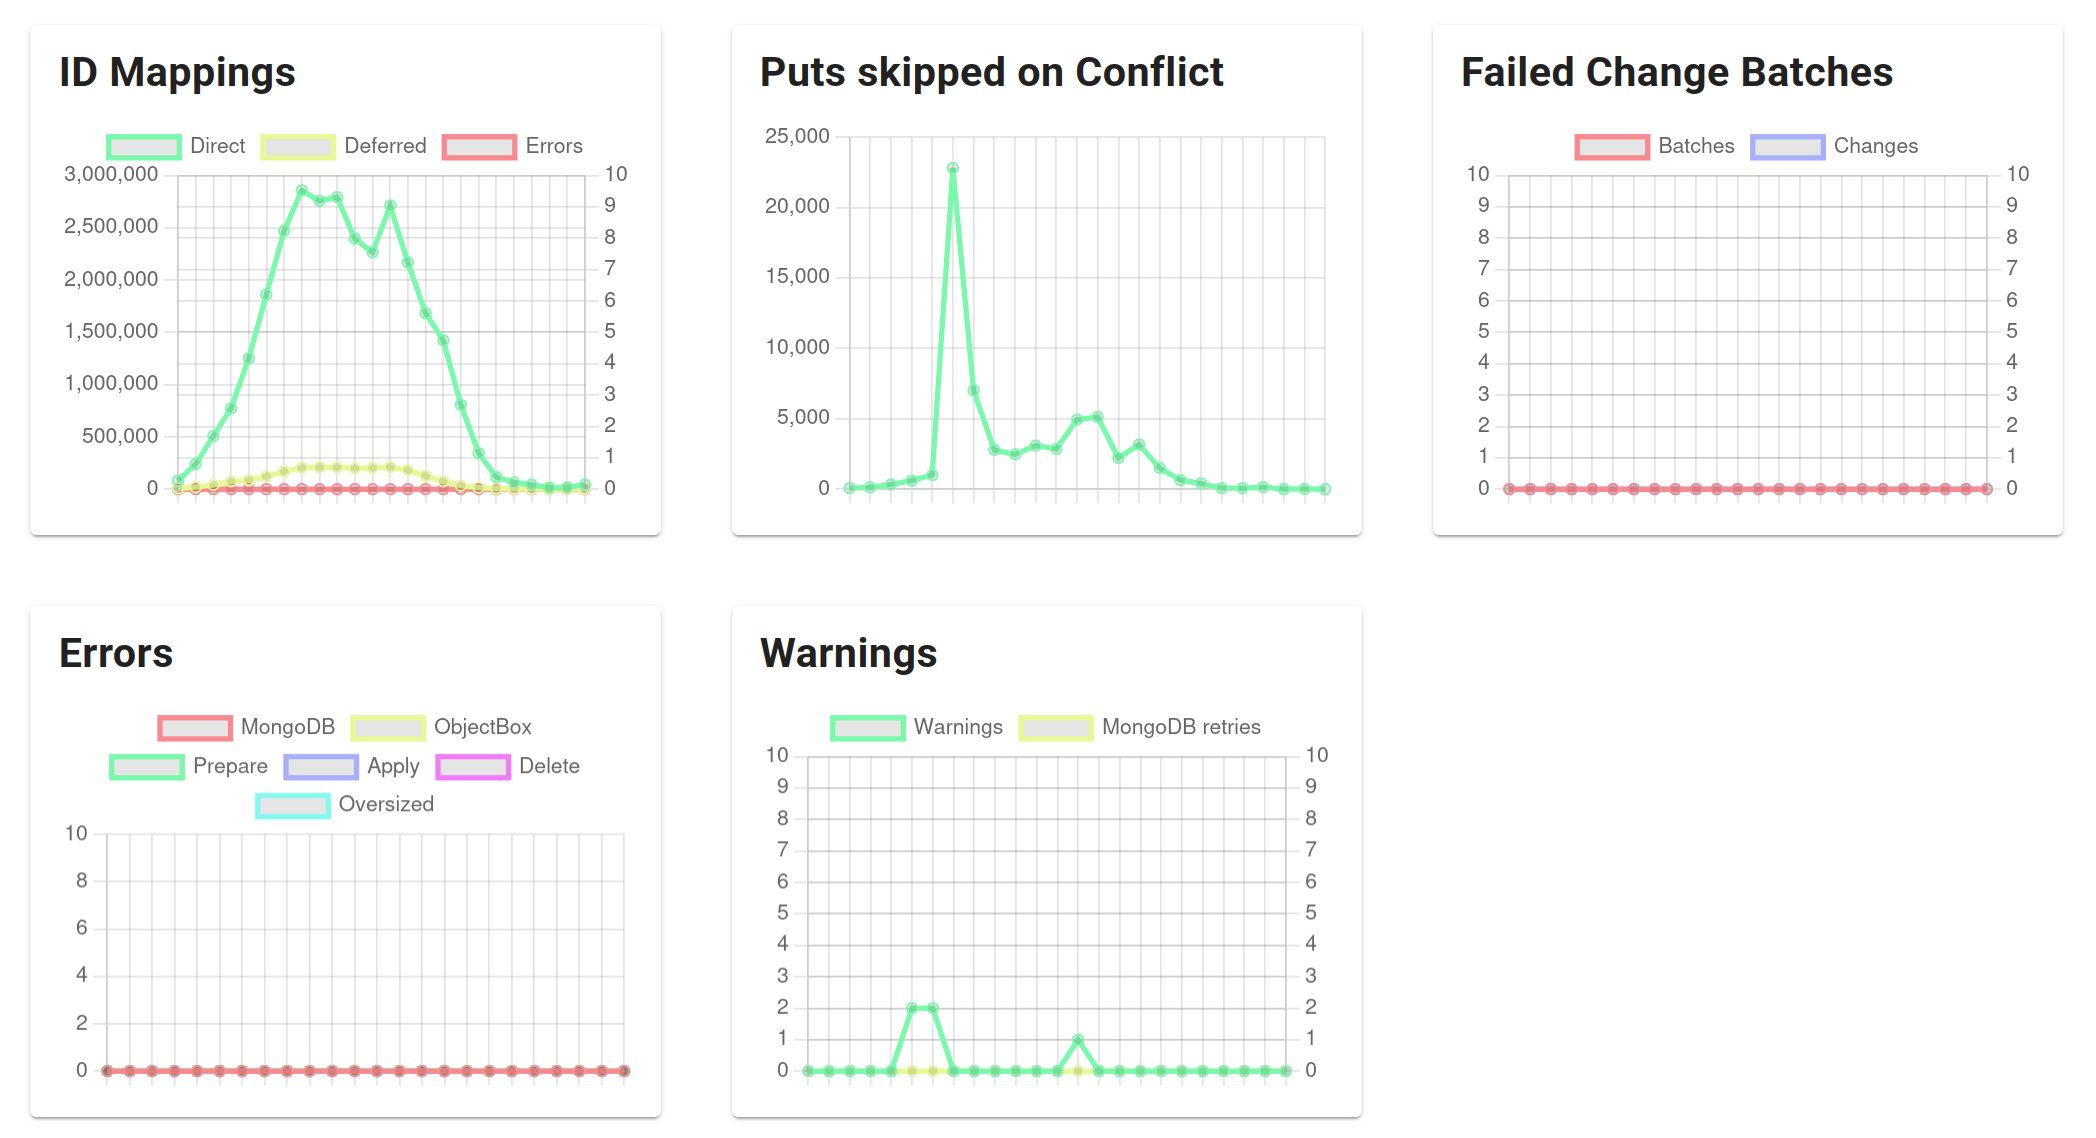
The "Sync Statistics" item of the menu on the left contains numerous charts with server runtime information. This can be valuable in multiple ways, e.g. during development and in production, you can verify your applications connect to the server (show up in "Connects" and "Connected clients") and synchronize data (see "Client applied \*"). Also, there are multiple charts showing errors - watch for those when trying to figure out issues with your clients.

For continuous monitoring in production, the same statistics (and more) are also available via a Prometheus metrics endpoint; see [Monitoring and Alerting](/sync-server/monitoring).

### Status

In the main menu, you will find "Status" to open a page with some useful information. While the following layout is still not final, it will give you a first impression of what to expect:

![](/files/-MIdg4YJ5VbP8A9GcnyW)

The "Debug logging" switch on the status page enables a very detailed logging (to standard output).

## Logging

By default, only logs with "info" level and above are enabled. After startup info level logs are relatively rare. For example, there's nothing logged about standard interactions with clients. That might be overwhelming with a few hundred clients already. Info logs should never "spam" you, no matter how many clients are connected.

Let's look at a typical log during startup:

```
001-14:09:07.5792 [INFO ] [SySvAp] Default configuration file sync-server-config.js not found
001-14:09:07.5793 [INFO ] [SvrMsg] Registering server transport for ws
001-14:09:07.5831 [INFO ] [SvrUws] UwsServer listening on all interfaces, port 9999 without SSL
001-14:09:07.5832 [WARN ] [SvSync] INSECURE no-authentication mode enabled - every client allowed without any validation
001-14:09:07.5883 [INFO ] [SvSync] Started on port 9999
001-14:09:07.5884 [INFO ] [SySvAp] Starting object browser on 0.0.0.0:9980
001-14:09:07.5885 [INFO ] [HttpSv] Running in single-store mode with an already opened store
001-14:09:07.5885 [INFO ] [HttpSv] Listening on 0.0.0.0:9980
001-14:09:07.5885 [INFO ] [HttpSv] User management: enabled
001-14:09:07.5890 [INFO ] [SySvAp] ObjectBox sync server started in 10 ms
```

As you can see, logging is structured into columns:

* **Thread:** the first three digits are the number of the thread that logged the text message
* **Time:** UTC time using 24 hours format, including 1/10,000 second precision (1/10 milliseconds)
* **Level:** One of the log levels (listed with increasing severity):
  * **DEBUG**: extensive logs to help diagnosing a specific behavior. Debug logs are only enabled if the DebugLog feature flag is on (usually the Sync Server ships such feature). You also need to make sure the Debug logging switch is enabled on Admin UI (see the screenshot above).
  * **INFO**: "important" information
  * **WARN**: something unusual has happened that you might want to check.
  * **ERROR**: reserved for special error occasions ("something bad happened") that typically require some action. It might be that the machine is running out of resources (RAM, disk space etc) or an unexpected situation was encountered. When in doubt, reach out to the ObjectBox team to clarify what's going on.
* **Tag (optional):** Most logs include a tag identifying the internal component
* **Message:** the actual log text

After startup, you typically won't see anymore logs by default. In contrast to "info" and above, "debug" level logs give you extensive information including client connects and message interactions with clients.

To give you a feel what debug logs are like have a look at the following example. It shows a new client connecting, logging in and sending data:

```
014-15:25:18.3188 [DEBUG] [SvrUws] (#1) Connection from 127.0.0.1:50488
014-15:25:18.3194 [DEBUG] [SvSync] (#1) Got msg of type LOGIN and length 28
014-15:25:18.3195 [DEBUG] [W-Pool] "SrvRead" Submitted new job successfully
002-15:25:18.3195 [DEBUG] [SvLgIn] (D10F) Authenticator 0 welcomes a new client
002-15:25:18.3195 [DEBUG] [W-Pool] "SrvRead" W#1 finished job in 0.06 ms
014-15:25:18.3195 [DEBUG] [SvrUws] Popped 1 messages to send
014-15:25:18.3207 [DEBUG] [SvSync] (D10F) Got msg of type APPLY_TX and length 140
014-15:25:18.3207 [DEBUG] [W-Pool] "SrvWrite" Submitted new job successfully
012-15:25:18.3215 [DEBUG] [TxLogA] Applied 4 commands
012-15:25:18.3277 [DEBUG] TX #5492 committed
009-15:25:18.3277 [DEBUG] [SvLogM] Applied TX log from D10FDB04A0F0: base=5460B3A444C2CD5377EAE8FBFFAC6B12, old=9A37C8BCA4232AA2D6E502AE2D069C15, new=4B2D216711C60497088B5FB10816CC98
009-15:25:18.3277 [DEBUG] [SvApTx] (D10F) Sending ACK_TX #1: 5460B3A4
009-15:25:18.3277 [DEBUG] [W-Pool] "SrvWrite" W#1 finished job in 7.01 ms
013-15:25:18.3278 [DEBUG] [SvDPsh] Have 116 bytes of data (0 clients).
014-15:25:18.3278 [DEBUG] [SvrUws] Popped 1 messages to send
```

## Updating the data model

The model JSON is used to initialize the data model for sync (and also the database schema). Later, when your data model has evolved, you will want to update model at server. You have two options to supply a newer version:

* Starting the server with an updated model file.
* Upload the model file through the Admin web UI.

For details, please refer to the [data model evolution](/data-model) section.

## Feedback

We're looking forward to your feedback to prioritize the most requested features. Please fill in this [Sync Feedback Form](https://forms.gle/JtUDBo61UQTExRao8) to tell us what you think.

And if you run into issues, please let the ObjectBox team know; we're happy to help.

Thank you!

## Appendix

### Using Docker volumes for database files

Alternatively, you could keep data in a separate docker volume. This example shows how to create the volume for the first time and then how to use it to start the Sync Server container (note: the difference to the previous example is in `--mount` and `--user` arguments).

{% tabs %}
{% tab title="Bash" %}

```bash
# You only need to create the volume once:
docker volume create sync-server-data

# To copy the objectbox-model.json file to the volume, map
# the volume to the current directory. 
# Then use the busybox image to copy the file:
docker run --rm --volume "$(pwd):/src" --volume sync-server-data:/data busybox \
    cp /src/objectbox-model.json /data/

# To start the server, similarly to the example above:
docker run --rm -it \
    --mount source=sync-server-data,target=/data \
    --publish 127.0.0.1:9999:9999 \
    --publish 127.0.0.1:9980:9980 \
    objectboxio/sync-server-trial \
    --model /data/objectbox-model.json \
    --unsecured-no-authentication \
    --admin-bind 0.0.0.0:9980
```

{% endtab %}

{% tab title="PowerShell" %}

```powershell
# You only need to create the volume once:
docker volume create sync-server-data

# To copy the objectbox-model.json file to the volume, map
# the volume to the current directory. 
# Then use the busybox image to copy the file:
docker run --rm --volume ${PWD}:/src --volume sync-server-data:/data busybox `
    cp /src/objectbox-model.json /data/

# To start the server, similarly to the example above:
docker run --rm -it `
    --mount source=sync-server-data,target=/data `
    --publish 127.0.0.1:9999:9999 `
    --publish 127.0.0.1:9980:9980 `
    objectboxio/sync-server-trial `
    --model /data/objectbox-model.json `
    --unsecured-no-authentication `
    --admin-bind 0.0.0.0:9980
```

{% endtab %}
{% endtabs %}

{% hint style="info" %}
If you're running on Windows, you may run into permission issues, with the server unable to create a database directory /data/objectbox. In that case, you can either create the directory with the right permissions (again, using `busybox`) or pass`--user=0` argument to docker run (similar to `--user $UID` in the first example) - to run the sync-server as a root user (only applies inside the container).
{% endhint %}

### Docker on Windows

When using Docker on Windows, this guide expects you to use [Docker Desktop for WSL 2](https://docs.docker.com/docker-for-windows/wsl/). Check the [Install Docker Desktop on Windows instructions](https://docs.docker.com/desktop/install/windows-install/) if you don't have it installed yet.

To follow the best practices and achieve optimal performance, as described by [Microsoft](https://docs.microsoft.com/en-us/windows/wsl/compare-versions#performance-across-os-file-systems) and [Docker](https://docs.docker.com/docker-for-windows/wsl/#best-practices), use a data volume for the database directory instead of binding to a local directory. Follow [#using-docker-volumes-for-database-files](#using-docker-volumes-for-database-files "mention") to do that.

{% hint style="info" %}
If you're using PowerShell, make sure to use `${PWD}` instead of `$(pwd)` and replace the backward slash (\\) for multiline commands with a backtick (\`).
{% endhint %}


# Configuration

To set up ObjectBox Sync Server to your needs, there are various configuration options, which are presented on this page.

There are two approaches to configure ObjectBox Sync Server:

* command line parameters (CLI): simple/quick approach for basic settings (limitations apply)
* configuration file (JSON): recommended for complex settings and required for sync filters and clusters

Note that both approaches can be [combined](#combining-cli-and-file-configuration) (CLI parameters take precedence over file configuration).

## Configuration via command line (CLI)

Running the Sync Server from the command line is a simple way to get started. It's a good idea to look at the output of running `sync-server --help` (your output may vary, e.g. when using a newer version of the Sync Server).

<details>

<summary>Sync Server CLI Help Output (click to expand)</summary>

```
sync-server --help
001-16:12:08.9830 [INFO ] [SvSyAp] Starting ObjectBox Sync Server version 6 (protocol version: 8, core: 5.1.0-2026-01-19 (SyncServer, http, graphql, admin, tree, dlog, cluster, backup, lmdb, VectorSearch, SyncMongoDb))
ObjectBox Sync Server
Usage:
  sync-server [OPTION...]

      --admin-bind arg          host/IP and port the admin http server 
                                should listen on (default: 
                                http://127.0.0.1:9980)
      --admin-threads arg       number of the worker threads used by admin 
                                http server (default: 4)
      --admin-off               do not start the admin http server
      --async-tx-slot arg       If async DB TXs are "too fast", this adds a 
                                delay to fill up the slot (default: 3000)
      --auth-obx-admin          Enable ObjectBox Admin Users database for 
                                authentication
      --auth-required arg       Comma-separated list of authentication 
                                methods (credential types) required for 
                                clients to connect (default: "")
  -b, --bind arg                host/IP and port the sync server should 
                                listen on (default: "")
  -c, --conf arg                configuration file path (default: 
                                sync-server-config.json)
      --cert arg                certificate file path (default: "")
      --cluster-id arg          cluster ID to enable cluster mode for 
                                servers (default: "")
      --debug                   enable debug logs (deprecated; use 
                                --log-level debug)
      --log-level arg          set the log level: all, trace, verbose, 
                                debug, info, warn, error, none (default: 
                                "")
      --fixed-follower          the server never becomes the leader of the 
                                cluster
      --fixed-leader            make the server the (only!) leader of the 
                                cluster (danger: read docs carefully!)
  -d, --db-directory arg        directory where the database is stored 
                                (default: objectbox)
      --db-max-size arg         database size limit; use a number with a 
                                unit (K/M/G/T), e.g. 256G (default: 
                                104857600K)
  -h, --help                    show help
      --jwt-public-key-url arg  URL to the public key for JWT token 
                                validation (default: "")
      --jwt-claim-aud arg       Expected audience claim in JWT token 
                                (default: "")
      --jwt-claim-iss arg       Expected issuer claim in JWT token 
                                (default: "")
  -m, --model arg               schema model file to load (JSON) (default: 
                                "")
      --mongo-url arg           MongoDB Sync Connector: URL to the MongoDB 
                                instance (default: "")
      --mongo-db arg            MongoDB Sync Connector: name of the primary 
                                MongoDB database to sync (default: "")
      --mongo-initial-import    MongoDB Sync Connector: automatically 
                                triggers the full sync/import from MongoDB
      --no-stacks               disable stack traces when logging errors
      --unsecured-no-authentication
                                [UNSECURE] allow connections without 
                                authentication
      --workers arg             number of workers for the main task pool 
                                (default is hardware dependent, e.g. 3 * 
                                CPU "cores") (default: 0)
      --restore-backup arg      restores the DB to the given backup file 
                                (by default, restoration takes place only 
                                if no DB exist)
      --backup-overwrites-db    forces the restoration of the backup even 
                                if the DB already exists (danger: 
                                overwrites the db permanently!)
  -v, --version                 just prints the version and then exits 
                                immediately

```

</details>

More details about the options can be found in the section on the configuration file. Just note that the naming convention is different (e.g. `dbMaxSize` instead of `db-max-size`), but both refer to the same underlying option.

## Configuration file

In the long run, you should store the configuration in a JSON file. This is the preferred choice if our options are getting more complex. Also, you can check in the configuration file into version control.

Note that some options are only available in the config file (not the CLI):

* [Cluster](/sync-server/sync-cluster)
* [Sync Filters](/sync-server/sync-filters)
* [Individual debug log flags](#developer-and-debug-options)

By default, the configuration file is read from `sync-server-config.json` in the current working directory. To use a different location, supply it via the `--conf <path-to-config>` option.

Some options have a default value, so if you are OK with the default, there is no need to specify it.

Example file for a local development setup (not intended for production use as auth is disabled):

```json
{
  "dbDirectory": "objectbox",
  "dbMaxSize": "100G",
  "modelFile": "objectbox-model.json",
  "bind": "ws://0.0.0.0:9999",
  "adminBind": "http://127.0.0.1:9980",
  "_note": "unsecuredNoAuthentication should not be used in production",
  "unsecuredNoAuthentication": true,
  "logLevel": "debug"
}
```

{% hint style="info" %}
Start JSON keys with underscore (`_`) to add comments or to temporarily disable a setting. These keys are exempt from validation and will be ignored by the Sync Server.

Example: `"_debug": true` and `"_note1": "my comment"` are ignored.
{% endhint %}

### Primary options

* `dbDirectory` directory where the database is stored (default: "objectbox").
* `dbMaxSize` database size limit; use a number with a unit, e.g. 256G (default: 100G)
  * `K` for kibibytes, i.e. 1024 bytes
  * `M` for mebibytes, i.e. 1024 kibibytes
  * `G` for gibibytes, i.e. 1024 mebibytes
  * `T` for tebibytes, i.e. 1024 gibibytes
* `modelFile` schema (model) file to create the database with or to use for a schema update
* `bind` Sync server will bind on this URL (scheme, host and port). It should look like `ws://hostname:port`, for example `ws://127.0.0.1:9000`. You can also bind to a specific IP address on the server machine by providing the exact address, as given by `ifconfig` or `ip addr`, e.g. `ws://192.168.0.125:9999`.
* `adminBind` HTTP server (admin/web UI) will bind on this URL (schema, host and port combination).

### Developer and debug options

* `unsecuredNoAuthentication` allows connections without any authentication. Note: this is unsecure and should only be used to simplify test setups.
* `logLevel` set the runtime log level. Accepted values: `all`, `trace`, `verbose`, `debug`, `info`, `warn`, `error`, `none`. Example: `"logLevel": "debug"`. Also available as CLI argument `--log-level`.
* `debugLog` **(deprecated)** — use `"logLevel": "debug"` instead. If still present, a warning is logged; `logLevel` takes precedence when both are set.
* `noStacks` disable stack traces when logging errors (default: `false`)

When using debug logs, advanced users can enable additional logs for internal components (e.g. ObjectBox support may ask you to enable specific logs). This is done using boolean flags in the `log` JSON object (all default to `false` when omitted).

* **transactionRead**: Log the lifecycle of read transactions (begin/commit/abort).
* **transactionWrite**: Log the lifecycle of write transactions and commits to help diagnose write-related issues.
* **queries**: Log executed queries to aid in understanding which lookups are performed at runtime.
* **queryParameters**: Log parameter values bound to queries. May include sensitive data.
* **asyncQueue**: Log asynchronous operations.
* **cacheHits**: Log cache hits and misses to evaluate cache effectiveness (note: only a few metadata items are cached).
* **cacheAll**: Log all cache operations (puts/gets/evictions); very verbose and intended for deep diagnostics.
* **tree**: Log special tree data models.
* **exceptionStackTrace**: Attempt to include stack traces for certain internal error logs (Linux-only, experimental).
* **threadingSelfTest**: Run a quick threading self-test at startup and log its progress and results.
* **wal**: Enable detailed write-ahead logging (WAL, not used by default) debug output.
* **idMapping**: Log how IDs are mapped between local and global spaces during synchronization.
* **syncFilterVariables**: Log values of sync filter variables per client (e.g. derived from JWT or the login message). May include sensitive data.

Example to enable sync-related debug logs (this quickly gets excessive; don't do this by default):

```json
{
  "logLevel": "debug",
  "log": {
    "idMapping": true,
    "syncFilterVariables": true
  }
}
```

### Authentication options

* `auth.jwt` JWT is the primary method for authentication. See the [JWT authentication page](/sync-server/jwt-authentication) for details.

### Sync filter expressions

* `syncFilters` this JSON object contains all filter expressions. Each filter has the type as key and a string value as the expression. Details are available in the [sync filters](/sync-server/sync-filters) page.

### Client schema validation

The `clientSchemaValidation` JSON object lets you configure client schema validation behavior. By default, validation is non-strict: clients with unknown schemas can still connect.

* `strict` (boolean; default: `false`): if `true`, the server rejects clients whose schema hash cannot be resolved to a known, enabled schema version.
* `defaultHash` (string): a hex-encoded hash used that identifies the fallback schema for clients with unknown hashes. When set, unknown clients are treated as if they have this schema version, receiving only types known to that version. To get a hash, go to the "Schema Version" Admin page and click on the short hashes of a schema version. This will open a dialog with the full-length hashes (32 characters); copy one of the client hash values. Do not add a `0x` prefix to the hash, just use the 32 hex characters.

Example ("0123456789abcdef0123456789abcdef" is a placeholder hash; you need to lookup the hash of the schema version you want to use):

```json
"clientSchemaValidation": {
  "strict": true,
  "defaultHash": "0123456789abcdef0123456789abcdef"
}
```

For further details about schema versions and client validation, see the [data model](/data-model) page.

{% hint style="info" %}
Clients with older and **known** schema versions automatically receive only objects of types known to them; new types added in later schema versions are filtered out.
{% endhint %}

### Sync history size limit

The Sync Server maintains a sync history (sync logs), which is used to synchronize clients that reconnect after being offline. By default, this history grows without limit, which can cause the database to grow indefinitely. To prevent this, you can configure a maximum history size. Once the limit is reached, old history logs are automatically deleted.

{% hint style="info" %}
Sync clients that were offline for a longer time may no longer be able to synchronize via delta sync. which is powered by the sync history. In that case, these Sync clients will sync from scratch (full sync); any outgoing data will still be sent to the server.
{% endhint %}

* `historySizeMaxKb` maximum size (in kibibytes) of the sync TX log history. Once this size is reached, old sync logs are deleted to stay below the limit. Default: `0` (no limit).
* `historySizeTargetKb` target size (in kibibytes) when cleaning up old TX logs. When the maximum size is reached, old sync logs are deleted until this target size is reached. This allows the Sync Server to reserve some space for future sync logs and thus "delays" the next cleanup. The value must be lower than `historySizeMaxKb`. Default: `0` (same as `historySizeMaxKb`, i.e. delete just enough to stay below the limit).

{% hint style="info" %}
It's highly recommended to set both values with `historySizeTargetKb` a bit lower than `historySizeMaxKb`. As a rule of thumb set `historySizeTargetKb` to 50 to 200 MB below `historySizeMaxKb` for multi-GB sync histories. This ensures that the Sync Server does the cleanup only occasionally, which is more efficient. Larger gaps/cleanups may also work, but may affect IOPS and performance.
{% endhint %}

Example configuration to limit history to 5 GB, cleaning up to 4.9 GB (thus triggering cleanup every \~100 MB of sync logs):

```json
{
  "historySizeMaxKb": 5242880,
  "historySizeTargetKb": 5138022
}
```

{% hint style="info" %}
When initially setting a limit to an existing database well above the limit, the database size will not decrease. The newly available space inside the database is reserved for future data. Nevertheless, the database file should not grow any further once a limit has been set and reached. This is unless the "active data" grows, for example, by inserting more and/or larger objects.
{% endhint %}

### Backup and restore (CLI only)

These options are available only via command line arguments (not via JSON config).

* `--restore-backup <file>` restores the database from the given backup file. By default, restoration only takes place if no database exists yet.
* `--backup-overwrites-db` forces the restoration of the backup even if a database already exists. **Danger:** this permanently overwrites the existing database.

### Advanced options

* `adminThreads` number of threads the HTTP server uses (default: 4). A low number is typically enough as it's for admins only. You may need to increase if running in some cloud setups that keep the connections active (e.g. Kubernetes).
* `auth.sharedSecret` enables the shared secret authentication. Can be a plain string (the secret) or an object with `value` (the secret) and `required` (boolean; if `true`, clients must provide a shared secret to connect). Example as object:

  ```json
  "sharedSecret": { "value": "my-secret", "required": true }
  ```
* `auth.google.clientIds` a list of GoogleAuth client IDs (strings). The enclosing `auth.google` object also accepts a `required` boolean (if `true`, clients must provide Google credentials).
* `auth.obxAdmin` enables ObjectBox Admin users for sync authentication (e.g. for small deployments and tests). Can be `true` or an object with a `required` boolean (if `true`, clients must provide Admin user credentials). Example as object:

  ```json
  "obxAdmin": { "required": true }
  ```
* `asyncTxSlot` if asynchronous DB transactions are "too fast", this adds a delay (in microseconds) to fill up the transaction slot. This can reduce the maximum amount of transactions and thus disk usage (default: 3000).
* `certificatePath` Supply a SSL certificate directory to enable SSL. This directory must contain the files `cert.pem` and `key.pem`.
* `workers` sets the number of concurrent workers for the main task pool (default is hardware-dependent, e.g. the number of the reported hardware threads).
* `removeWithoutObjectData` by default, the server includes full object data in sync logs for remove operations, which allows [sync filters](/sync-server/sync-filters) to filter removes based on object content. Set to `true` to disable this and only include the object ID (reduces sync log size but prevents filtering of remove operations).
* `fullSyncMessageSplitMb` threshold (in MiB) at which large full-sync messages are split into smaller chunks. Accepts integer or floating-point values (e.g. `8` or `5.5`). Minimum: 1 MiB, default: 4 MiB. Lower values reduce peak memory usage on clients receiving a full sync; higher values reduce per-message overhead. Also, to reduce any "partially synced state," you can increase this value.
* `crasherKey` is not a regular option and is described in a separate document.


# JWT Authentication

How to use JSON Web Tokens (JWT) for ObjectBox Sync Authentication

[JSON Web Tokens (JWT)](https://en.wikipedia.org/wiki/JSON_Web_Token) are a very common method of handling authentication. Many authentication providers support JWT out of the box. Examples include Auth0, Firebase, Clerk, and KeyCloak (an open-source solution that can be self-hosted). For this guide, we assume that you already set up JWT authentication. Since this is a process specific to the provider, please refer to the provider's documentation if you need help.

## Obtaining and Passing the JWT in the Sync Client

After setting up your JWT-based authentication service, you will obtain JWTs on the client side using the provider’s SDK. This process occurs outside of ObjectBox. Once you have the JWT, it will look like a cryptic string. Your client application must then pass this JWT to the ObjectBox SDK as a login credential, using one of the supported JWT types. For specific implementation details, refer to the [ObjectBox Sync client documentation](/sync-client).

## Configuring JWT on the ObjectBox Sync Server

The Sync server verifies JWTs sent by the Sync client. It primarily checks three things:

1. The [**audience** claim](https://datatracker.ietf.org/doc/html/rfc7519#section-4.1.3) (often called `aud`).
2. The [**issuer** claim](https://datatracker.ietf.org/doc/html/rfc7519#section-4.1.1) (`iss`).
3. The **cryptographic signature**.

The audience and issuer claims are initially configured with your authentication provider. You must use the same claim values in your ObjectBox Sync Server configuration.

For signature verification, the Sync Server requires the public key from the authentication provider. This key is often provided via a URL, allowing for automatic rotation (i.e., the key may change over time). The Sync Server uses this public key to verify the signature that was created using the private key at the authentication provider.

### File-based JWT configuration

The JWT configuration is part of the standard JSON configuration file used for the Sync server. All the JWT settings are done within the `auth.jwt` JSON element. Take a look at the following example:

```json
{
  "auth": {
    "jwt": {
      "publicKeyUrl": "https://example.com/public-key",
      "claimAud": "myAUD",
      "claimIss": "myISS"
    }
  }
}
```

It uses the following configuration fields:

* **publicKeyUrl:** The URL where the Sync Server can retrieve the public key(s) from your authentication provider. Public key rotation is automatically handled by pointing to this URL, ensuring that the Sync Server always uses the correct key for signature verification. For more details, see [configuring the public key URL](#configuring-the-public-key-url).
* **publicKey:** As an alternative to `publicKeyUrl`, you can provide a PEM-encoded public key directly as a string. This is useful for development and testing setups where you don't want to host a key URL. The key must be in PKCS#8 PEM format, starting with `-----BEGIN PUBLIC KEY-----` and ending with `-----END PUBLIC KEY-----`. Supply either `publicKey` or `publicKeyUrl`, but not both.
* **claimAud:** Must match the `aud` (audience) value that your authentication provider includes in its issued JWTs. This is used to ensure the token is intended for the correct recipient.
* **claimIss:** Must match the `iss` (issuer) value used by your authentication provider. This ensures the token is issued by a trusted source.
* **publicKeyCacheExpirationSeconds:** When using `publicKeyUrl`, this controls how long (in seconds) fetched public keys are cached before being re-downloaded. The default is 300 (5 minutes). Only valid when `publicKeyUrl` is used.

#### Requiring JWT authentication

By default, JWT is offered as an authentication option alongside other configured methods. You can enforce that clients must present specific JWT token types by setting `required` flags:

* **required:** If `true`, clients must present a JWT ID token to connect.
* **requiredAccess:** If `true`, clients must present a JWT access token to connect.
* **requiredRefresh:** If `true`, clients must present a JWT refresh token to connect.
* **requiredCustom:** If `true`, clients must present a custom JWT token to connect.

Example requiring JWT ID tokens:

```json
{
  "auth": {
    "jwt": {
      "publicKeyUrl": "https://example.com/public-key",
      "claimAud": "myAUD",
      "claimIss": "myISS",
      "required": true
    }
  }
}
```

### CLI based JWT configuration

Starting the Sync Server with a JWT configuration using command-line arguments looks like this:

`sync-server --jwt-public-key-url https://example.com/public-key --jwt-claim-aud myAUD --jwt-claim-iss myISS`

The configuration parameters match their counterparts in the JSON file, so you can refer there for details.

### Configuring the public key URL

A public key is required to verify the signature of the JWT. This validates that the token was issued by the correct authentication provider, and that the token hasn't been tampered with.

The public key URL must point to either a PEM public key directly or a JSON file. JSON formats are recommended for production use as they support key rotation. Single keys are also supported, but when changing the key there is a delay until the signatures match the new key. These are the supported formats:

1. **Key-value JSON file:** contains JSON elements of the form `"<key-id>": "<x509-certificate>"`.

   This format is [used by Firebase](https://firebase.google.com/docs/auth/admin/verify-id-tokens).

   **To configure authentication with Firebase**, use the URL: `https://www.googleapis.com/robot/v1/metadata/x509/securetoken@system.gserviceaccount.com`
2. [**JWKS**](https://datatracker.ietf.org/doc/html/rfc7517) **(JSON Web Key Set):** Each key in the JSON must contain the `x5c` (X.509 certificate chain) property.

   This format is a standard used by many authentication providers, including [Auth0](https://auth0.com/docs/secure/tokens/json-web-tokens/validate-json-web-tokens).

   **To configure authentication with Auth0**, use a URL like: `https://obx-auth-demo.eu.auth0.com/.well-known/jwks.json`
3. **PEM public key file:** This is a text file that contains a PEM-encoded public key.

   Generic PEM files start with `-----BEGIN PUBLIC KEY-----` and are supported by all OpenSSL versions. The more specific PKCS#1 PEM files, e.g., starting with `-----BEGIN RSA PUBLIC KEY-----`, are not supported by the default Sync Server Docker container. You can convert PKCS#1 keys to generic PKCS#8 PEM files using `ssh-keygen -f jwtRS256.key -e -m PKCS8 > jwtRS256_public.pem`.
4. **PEM certificate file:** This is a text file that contains a PEM-encoded X.509 certificate and starts with `-----BEGIN CERTIFICATE-----`.


# Sync Filters

ObjectBox Sync uses filters to enable partial syncing so that each user gets only the data they need.

Unless you want to replicate all data to all clients, you want to use sync filters. For each user, sync filters select the data that is synchronized to the user (client). This enables "user-specific sync".

{% hint style="info" %}
Sync filters are generally available since **ObjectBox 5**, i.e. Sync Server version 2025-09-16 or later. Older ObjectBox clients must be updated to ObjectBox 5.0 or later when using sync filters.
{% endhint %}

## Configuration

Sync filters are defined as part of the Sync Server configuration (via the JSON file only). For each type of your data model, you can configure a sync filter expression (aka "rule").

{% hint style="info" %}
It's generally a good idea to keep this configuration file in a version control system (git) and with sync filters even more so.
{% endhint %}

### Add filter expressions to the JSON configuration

The JSON configuration file is typically named `sync-server-config.json`. For general details and other configuration options, please check the [configuration](/sync-server/configuration) page.

All sync filters are defined inside a `syncFilters` JSON object. Filters are defined per data type (from your ObjectBox data model) with the type names as JSON keys. The value is a string and contains the filter expression.

The JSON configuration is best illustrated by an example:

```json
{
  "syncFilters": {
    "Category": "name == 'public'",
    "Person": "age >= 18",
    "Customer": "email == $auth.email"
  }
}
```

This configuration contains three sync filters for the types `Category`, `Person`, and `Customer`. The filter expression for `Category` references the property `name` (part of the `Category` type) and selects only categories with the name "public" for synchronization. Similarly, the filter expression for `Person` selects only persons who are at least 18 years old.

The `Customer` filter filters on the `email` property and uses a variable called `$auth.email` as its operand. Typically, sync filters use variables as these allow for user-specific sync. Variables start with a `$` character. In this case, it refers to an authentication variable, which represents the Sync user's email address.

{% hint style="info" %}
Typically, sync filters use the equals condition (`==`). In this case, index the underlying property as this is the most efficient approach. See the [performance](#performance) section for details.
{% endhint %}

## Filter expressions

Filter expressions provide a compact and flexible way to query and filter data in ObjectBox Sync. They use a simple syntax that is similar to many programming languages and SQL.

A **filter expression** consists of **conditions** that can be combined using **logical operators**. The basic structure of a condition has three parts:

```
propertyName operator value
```

Simple examples:

```
name == "John"
age > 25
```

### Property names

The first part of a filter condition is the "property name", which refers to a property (aka member/field) in your data objects (aka type defined in your ObjectBox data model). For example, consider a `Person` type defined in your ObjectBox data model that has a `name` and `age` property. Now, when defining a filter expression for the `Person` type, you can refer to `name` and `age` as property names.

### Operators

Filter expressions can use the following operators for all value types:

| Operator | Description                | Example                      |
| -------- | -------------------------- | ---------------------------- |
| `==`     | Equals                     | `name == "Alice"`            |
| `!=`     | Not equals                 | `status != "inactive"`       |
| `>`      | Greater than               | `age > 18`                   |
| `<`      | Less than                  | `price < 100.0`              |
| `>=`     | Greater than or equal      | `score >= 80`                |
| `<=`     | Less than or equal         | `quantity <= 50`             |
| `IN`     | Matches any value in a set | `status IN $client.statuses` |

For string values, the following operators are additionally available:

| Operator | Description             | Example                           |
| -------- | ----------------------- | --------------------------------- |
| `==~`    | Case-insensitive equals | `name ==~ "JOHN"`                 |
| `^=`     | Starts with             | `email ^= "admin"`                |
| `*=`     | Contains                | `description *= "urgent"`         |
| `$=`     | Ends with               | `filename $= ".pdf"`              |
| `IN~`    | Case-insensitive IN     | `category IN~ $client.categories` |

#### The IN operator

The `IN` operator allows matching a property against multiple values provided by a [variable](#variables). It supports string and integer (32 and 64 bit) properties. The actual values for the variable are provided (by the client or JWT) as a comma-separated string.

For example, assume a client wants to sync objects where the `category` property matches "books", "music", or "games". The filter expression would be:

```
category IN $client.categories
```

Like this, clients have to provide the variable `categories` as the comma-separated string `"books,music,games"` without whitespace.

For integer properties, the same approach applies:

```
priorityLevel IN $client.levels
```

Here, the client provides the variable `levels` with values like `"1,3,5"` (matching levels 1, 3, and 5).

**Escaping commas and backslashes**

If your string values contain commas or backslashes, you need to escape them:

* Use `\,` for a literal comma within a value
* Use `\\` for a literal backslash within a value

For example, to match values "a,b" and "c\d", the client would provide:

```
"a\,b,c\\d"
```

This is parsed as two values: "a,b" and "c\d".

**Case-insensitive IN with IN\~**

For string properties, you can use `IN~` for case-insensitive matching. This works the same as `IN`, but the comparison ignores case differences.

```
category IN~ $client.categories
```

With this filter, if the client provides `"books,music"` (case does not matter), it will match objects where `category` is "Books", "BOOKS", "books", "Music", etc.

Note: `IN~` is only available for string properties. For integer types, use the regular `IN` operator.

Performance: prefer the case-sensitive `IN` operator over `IN~` as the case-sensitive variant can use indexes.

#### IN-like filters for literals

The `IN` operator only works with variables, so you cannot use it with fixed literals. However, you can use the `OR` operator (see [Logical operators](#logical-operators)) to create a similar effect with a set of fixed literals:

```
category == 'books' OR category == 'music' OR category == 'games'
```

### Values (operands)

The third and last part of a filter condition is the value or operand. It defines the value to which the property is compared. If it's a match, i.e., the condition is considered "true", then the object is included in the sync.

Operands can either be literals (fixed values) or variables (dynamic values). Supported literal types are strings, integers, and floating-point values. The literal type must match the property type, e.g., the `name` property can only have string values. If there's a mismatch, a configuration error will occur when the Sync Server parses the sync filters.

#### Literal values

Strings can be enclosed in either double quotes (`"`) or single quotes (`'`):

```
name == "John Doe"
title == 'Software Engineer'
```

Escape sequences are supported using backslash (`\`):

```
message == "He said \"Hello\""
path == 'C:\\Users\\John'
```

Literal numbers can be integers and floating-point values:

```
age == 25
price >= 19.99
```

#### Variable Operands

Typically, sync filter operands are "variables", which are resolved when a client logs in using client-specific values. Thus, variables enable user-specific data sync. They are discussed in detail in the [Variables](#variables) section below.

## Variables

In filter conditions, variables are referenced using a dollar sign (`$`) followed by the variable name:

```
email == $auth.email
```

If the variable name includes special characters, you use the braces syntax, e.g. `${variable}`:

```
myProperty == ${auth.https://example.com/custom-claim}
```

{% hint style="info" %}
Note that variable names do not support escape sequences, e.g. the backslash has no special meaning.
{% endhint %}

{% hint style="info" %}
Stick to "reasonable" variable names. If possible, use only letters, numbers, and underscores, e.g. avoid special characters and spaces. One exce While the Sync Server may not enforce rules yet, this may become required in the future.
{% endhint %}

### Variable types

While variables are provided as strings, they are parsed internally into a specific type, e.g. string, integer, floating-point or s set of a values of a specific type. Thus, if you use one variable multiple times, ensure that the variable type is consistent. For example, a variable used to match against a string property, cannot also be used to match against an integer property. This rarely makes sense, but if you need to do this, use multiple variables; one for each type.

### Default Values

Variables can have default values that are used when the variable is not provided by the client or JWT. The syntax uses `??` followed by the default value inside the braces syntax:

```
${variable ?? defaultValue}
```

Examples:

```
team == ${client.team ?? "green"}
priority >= ${client.minPriority ?? 0}
```

In the first example, if the client does not provide a `team` variable, objects with `team == "green"` are synced. In the second example, if `minPriority` is not provided, all objects with `priority >= 0` are synced.

Default values follow the same syntax as literal values:

* Strings must be quoted: `${client.name ?? "anonymous"}` or `${client.name ?? 'anonymous'}`
* Numbers are unquoted: `${client.level ?? 42}` or `${client.price ?? 19.99}`

{% hint style="info" %}
An empty string (`""` or `''`) is a valid default value. For example, `${client.tag ?? ""}` uses an empty string if `tag` is not provided.
{% endhint %}

When a variable is used multiple times in an expression, each usage can have its own default value:

```
minAge <= ${client.age ?? 0} AND maxAge >= ${client.age ?? 999}
```

{% hint style="warning" %}
If a variable has no default value and is not provided by the client or JWT, the login will fail with an error. Use default values for optional variables to avoid this.
{% endhint %}

### Auth variables

"Auth" variables are defined by ObjectBox Sync Server authenticators when a client logs in. At this point, only the JWT authenticator provides variables. It is used when Sync clients provide JWTs to authenticate; see [JWT authentication](/sync-server/jwt-authentication) for details. Once the JWT has been validated, the Sync Server sets the JWT's claims as sync variables using the "auth." prefix. For example, JWTs typically have an "email" claim, which is then exposed as a variable named "auth.email". In sync filters, you can refer to this as `$auth.email`.

#### Custom claims

JWTs are basically encoded and signed JSON objects. While some JWT properties are (more or less) standardized like the "aud" and "iss" claims, JWT allows you to add additional properties to the JSON. These "custom claims" can be very useful for sync filters as they offer a standard way to provide client-specific data securely to the Sync Server.

Let's say you want to group users into teams. Check with your JWT provider how to add custom claims to your JWTs. Also, at the JWT provider side, assign users to teams. Then, you can use a filter expression like `team == $auth.team` to enable group-based sync.

#### Nested custom claims

Your JWT provider may only support custom claims that are nested JSON objects. You can access these values via the dot notation.

For example, let's assume your decoded JWT looks like this:

```json
{
  "email": "yolo@example.com",
  "user_properties": {
    "team": {
      "v": "blue"
    }
  },
  "other_properties": "..."
}
```

Then, you can access the team value via `$auth.user_properties.team.v`, e.g. a complete sync filter expression could look like this: `team == $auth.user_properties.team.v`.

### Client variables

ObjectBox Sync Clients can also define variables for sync filters. Before logging in, the client API allows to add variables using key/value pairs (strings). For API details, see [Sync Client](/sync-client#sync-filter-client-variables). These are sent to the Sync Server with the login request and can be used in sync filter expressions using the `client.` prefix.

For example, assume we want to group data into teams and allow clients can freely choose a team. Let's say a client adds a filter variable "team" with value "red" before logging in. A filter expression `team == $client.team` would then match only objects where the `team` property is "red" for this client.

#### Property type conversion

While you provide the filter variable values as a string, you can use it also for non-string properties. For example, if a filter condition refery to an int property "year" and the client provided value is `"2025"` (string), it's automatically parsed to the int value `2025`. The following (property) typesare supported:

* Strings (no conversion needed)
* Integers, e.g. "42" (all integer property types from 8 to 64 bits are supported)
* Dates (timestamp in milliseconds/nanoseconds since the epoch)
* Floating point numbers, e.g. "3.14159"
* Boolean ("true" vs. all other strings)

#### When (not) to use client variables

Client variables are by definition provided by clients; the server has no way to verify the values. They are fine for preferences-like data, which clients can freely choose from.

{% hint style="warning" %}
Avoid client variables for security- or business-critical matters, especially if values can be looked up or are guessable. Given a certain effort, if this information is "leaked" or guessed, a malicious client could use these values to access data it should not have access to. This can be mitigated by using none-guessable values like long enough random values, e.g. UUIDv4, which only the client can know.
{% endhint %}

## Combining Filter Conditions

### Logical Operators

In filter expressions, you can use the logical operators to combine conditions.

`AND` combines two conditions where both must be true. `AND` has higher precedence than `OR` (`AND` is evaluated first).

```
age >= 18 AND status == "active"
```

`OR` combines two conditions where at least one must be true. `OR` has lower precedence than `AND`.

```
category == "urgent" OR priority > 5
```

### Precedence and Grouping

Without parentheses, `AND` has higher precedence than `OR`.

Thus, the following two expressions are equivalent, e.g. requires the "premium" status or a combination of minimum age and score:

```
status == "premium" OR age >= 21 AND score >= 100 
```

```
status == "premium" OR (age >= 21 AND score >= 100) 
```

Use parentheses to control the order of evaluation; e.g. to (always) require a minimum score and either premium status or a minimum age:

```
(status == "premium" OR age >= 21) AND score >= 100 
```

### Complex Examples

Multiple conditions with different operators:

```
name ^= "John" AND age > 25 AND (status == "active" OR status == "pending")
```

String matching with case-insensitive comparison:

```
email $= "@company.com" AND department ==~ "ENGINEERING"
```

Numeric ranges and string patterns:

```
(price >= 10.0 AND price <= 100.0) AND description *= "sale"
```

## Performance

Sync filters are used to create queries, e.g. when clients connect for the first time for a "full sync". Thus, what makes a query performant also applies to sync filters.

Especially for equality conditions (`==`), it is highly recommended to use indexes for the properties used in the filter expressions (unless you only have a few objects of a type, e.g. less than a hundred). This is done in the standard ObjectBox way, i.e. using the index annotation (`@Index` for most languages) on the property in the data model.

## Caveats

Sync filters have some caveats to be aware of (future versions may or may not address them):

* **Do not change values of properties used in Sync filters.** If you rely on this, delete the object with the old value instead and insert a new object with the new value. For example, consider a property `team` that is used in a sync filter expression. One client changes the team from "blue" to "green". The server now correctly syncs the change to "team green" clients. However, it is not yet deleted from "team blue" clients that have synced before. Thus, use the delete and insert approach instead: the server will correctly remove the object from "team blue" clients.


# Sync Cluster

ObjectBox Sync Cluster for high availability and scalability

The ObjectBox Sync Cluster distributes the Sync load among multiple Sync Servers. This setup has two main advantages over a single server setup. First, more servers can be added to scale along e.g. a growing number of clients. Second, availability increases because there's no single point of failure. In case of failure, other servers take over.

## Scalability: Serving Millions

ObjectBox Sync allows you to start quickly and scale with increasing loads. There are two ways to scale:

* **Vertical scaling:** switch to more powerful machines (VMs, cloud instances, etc.). ObjectBox is designed for efficiency and uses a tiny fracture of resources compared to other systems. Accordingly, some vertical scaling (adding computing resources) gets you a very long way. Typically, you want to have fast NVMe drives for the database directory. Depending on your use case, CPU and RAM can have significant effects too.
* **Horizontal scaling:** add more cluster nodes to divide the work. Additional nodes empower serving more clients. Because an ObjectBox cluster node has all information locally, it serves data to clients without contacting other nodes. Thus, the scaling is practically linear.

### Read vs. Write

Within a cluster, ObjectBox Sync has a strictly consistent approach. This is achieved by different node types. By default, a cluster node is a "follower". All follower nodes get new data from the "leader" node. Once that happens, all followers can propagate the new data to their clients (read). When clients have new data (write), a follower will forward the data to the leader. Thus, the leader can take care of consistency since it can coordinate all incoming data. A great side effect of this is that the leader can batch data together, making data updates very efficient.

## Prerequisites

You need to get the Sync Server executable / Docker from ObjectBox. It must also contain the "Cluster" feature (when in doubt, just try it and/or check the Admin UI web app).

## Cluster setup

Typical cluster setups consist of an odd number of servers. For example, three Sync Servers can form a cluster that can compensate one server to be down.

Some general notes:

* Model: all servers need to operate the same model file

### Configuration

The base configuration of the Sync Server is described [here](/sync-server/configuration#configuration-file). Using the same configuration file, these are the Cluster specific options:

```json
{
    // ... Standard config as described in "ObjectBox Sync Server" goes here
    
    "clusterId": "myCluster",
    "serversToConnect": [
        {
            "url": "ws://1.2.3.4:5678",
            "credentialsType": "SHARED_SECRET_SIPPED",
            "credentials": "securePassword"
        },
        {
            "url": "ws://1.2.3.5:6789",
            "credentialsType": "SHARED_SECRET_SIPPED",
            "credentials": "securePassword"
        }
    ]
}
```

* `clusterId`: an identifier for the cluster. It's an arbitrary string and has to be the same on all servers involved in a cluster.
* `fixedFollower`: if `true`, this server never becomes the leader of the cluster; it always stays a follower. Default: `false`.
* `fixedLeader`: if `true`, this server is the (only!) leader of the cluster. Danger: using this option incorrectly can lead to data inconsistencies — read the Raft consensus section below carefully before enabling it. Default: `false`.
* `preferredLeader`: if `true`, this server may vote for itself faster during leader election, making it more likely to become the leader. Default: `false`.
* `serversToConnect`: for each server, the other servers of the cluster must be specified here. Each entry can specify the following fields:
  * `url` (required): the URL of the Sync Server; which has to be a WebSocket URL.
  * `credentialsType` is required (unless you are using unsecuredNoAuthentication) and should be `SHARED_SECRET_SIPPED`.
  * `credentials` (required): given `credentialsType`, this is the actual secret.

{% hint style="info" %}
**Note:** while most of the options can be specified either in the Sync Server command line and in the JSON file, the `serversToConnect` options is JSON file only. Thus, if you want to configure clustering for your Sync Server, please use a JSON configuration file as [described here](/sync-server#configuration-file).
{% endhint %}

## Overview of the clustering architecture

The ObjectBox clustering mechanism roughly implements the [Raft consensus algorithm](https://en.wikipedia.org/wiki/Raft_\(algorithm\)).

When establishing the cluster, it elects a leader node that is responsible for the Sync History, while other nodes will be identified as followers. The leader election is performed using a voting system: the candidate node that gathers the majority of votes becomes the leader.

A peer can therefore be in 3 different states: **leader**, **follower** or **candidate** (only during election).

After the leader is elected, it starts sending heartbeats to the follower nodes to notify them of its availability. When the followers stop receiving heartbeats from the leader (e.g. because the leader is down), the election takes place again.

The Sync Client changes are sent either to a follower node or to a leader node. If it's a follower node, the changes are not processed and forwarded to the leader node. The leader node synchronizes its followers to make sure they all share the same state and commits the changes to its own Sync History.

### Visualize the cluster activity

The Sync Cluster page of ObjectBox Admin web app helps you to visualize the Cluster activity and possibly debug your configuration and the network connection.

<figure><img src="/files/CTeoRf0BJ22AGCoaBrVg" alt=""><figcaption><p>Sync Cluster page from Admin UI</p></figcaption></figure>

In the top panel of the Admin app, you will find general information on the current Sync Server:

<figure><img src="/files/tkXGzFlikILXcmXP1LI0" alt=""><figcaption><p>General information of the Sync Server</p></figcaption></figure>

Below the Admin app top panel, follow two tables that show the peers of the current Sync Server.

The first table lists all the **client** peers: these are the other Sync Server(s) that are connected to the current one. In the image, we can see that the current Sync Server has other two Sync Server(s) connected to it.

<figure><img src="/files/V7pBYRvdxBkNuDUve3vI" alt=""><figcaption><p>Client peers table</p></figcaption></figure>

While the second table lists the **connected peers**:

<figure><img src="/files/brb68wrMesPtfo5li3CI" alt=""><figcaption><p>Connected peers table</p></figcaption></figure>


# Admin Web UI

The ObjectBox Admin is a web application. Use the browser to get details on ObjectBox Sync.


# Log Events

View important server-side events in the ObjectBox Admin web interface.

The **Log Events** page in the ObjectBox Admin web interface displays server-side log events, providing visibility into server operations, warnings, and errors.

![objectbox-admin-log-events.png](/files/BWLytJANDMlnjrHswzW3)

## Overview

Log events are stored persistently on the server and can be browsed through the Admin UI. Events are displayed in reverse chronological order (newest first) and include detailed information about server activity.

## Event Types

Each log event has a type indicating its severity:

| Type          | Description                                            |
| ------------- | ------------------------------------------------------ |
| **Debug**     | Diagnostic information useful for debugging            |
| **Info**      | General informational messages about normal operations |
| **Important** | Significant operational events worth noting            |
| **Warning**   | Potential issues that don't prevent operation          |
| **Error**     | Problems that affected an operation                    |
| **Crash**     | Critical failures                                      |

Events are color-coded in the UI for quick identification.

## Event Fields

Each log event contains the following information:

| Field              | Description                                                                               |
| ------------------ | ----------------------------------------------------------------------------------------- |
| **Timestamp**      | When the event occurred (nanosecond precision). Click to see full details including UUID. |
| **Type**           | Severity level of the event                                                               |
| **Message**        | Description of the event. Click to view the full message.                                 |
| **Component**      | The server component that generated the event                                             |
| **Peer ID**        | Identifier of the connected peer (if applicable)                                          |
| **Thread**         | Thread ID where the event occurred                                                        |
| **Subject**        | Additional context about what the event relates to                                        |
| **Stacktrace**     | Call stack at the time of the event (typically for errors)                                |
| **Parent ID**      | Reference to a related parent event                                                       |
| **Client ID**      | Client peer identifier (if applicable)                                                    |
| **Extra**          | Additional key-value pairs with context-specific information                              |
| **Server Version** | ObjectBox server version that generated the event                                         |

## Navigation

### Pagination

* **Newer** - Navigate to more recent events
* **Older** - Navigate to older events
* **Events per page** - Select how many events to display (10, 15, 20, 50, or 100)

### Jump to Date/Time

Click the calendar icon to open a date/time picker and jump directly to events from a specific point in time. This is useful for investigating issues that occurred at a known time.

### Refresh

Click the refresh button to reload the current view with the latest events.

## Viewing Details

Several fields may contain more information than can be displayed in the table:

* **Message** - Click to open a dialog with the full message text and a copy button
* **Stacktrace** - Click "View" to see the full stack trace with copy functionality
* **Parent ID** - Click "View" to see the parent event UUID
* **Client ID** - Click "View" to see the full client peer identifier
* **Extra** - Click "View" to see all additional key-value pairs in a table

## Downloading Events

Below the event table, a **Download** link allows you to download the currently displayed events as a JSON file. The filename includes context about which events are included (e.g., `objectbox-events-from-<uuid>.json`).

## Tips

* Use the date/time picker to quickly navigate to events around a known incident time
* Check the **Extra** field for additional context that may help diagnose issues
* Stack traces are particularly useful for understanding error conditions
* The **Component** field helps identify which part of the server generated an event
* Events with the same **Parent ID** are related and can be traced together


# Monitoring and Alerting

Monitor ObjectBox Sync Server in production using its Prometheus metrics endpoint, visualize metrics with Grafana, and set up alerting to get notified when something needs your attention.

ObjectBox Sync Server exposes its runtime metrics in the [Prometheus text format](https://prometheus.io/docs/instrumenting/exposition_formats/). This allows you to integrate the Sync Server into a standard monitoring stack: [Prometheus](https://prometheus.io/) scrapes and stores the metrics, [Grafana](https://grafana.com/) visualizes them in dashboards, and either of the two can actively alert you (e.g. via email or Slack) when something goes wrong.

{% hint style="info" %}
For a quick look at live server statistics without any external tooling, you can also use the "Sync Statistics" page of the [Admin web UI](/sync-server#admin-web-ui). The Prometheus endpoint is the right choice for continuous monitoring in production: long-term storage, custom dashboards, and alerting.
{% endhint %}

## The metrics endpoint

The metrics endpoint is part of the admin HTTP server (the same server that serves the Admin web UI) and is available at the path `/api/sync/prometheus`. For example, with the default developer admin configuration (`adminBind` set to `http://127.0.0.1:9980`), the metrics URL is `http://127.0.0.1:9980/api/sync/prometheus`. You can verify it works by opening it in a browser or using curl:

```shell
curl http://127.0.0.1:9980/api/sync/prometheus
```

This returns the current metric values in plain text, for example:

```
obx_uptime 6231 1781430000000
# HELP obx_messages Number of messages exchanged
# TYPE obx_messages counter
obx_messages{type="recv"} 6824 1781429999641
obx_messages{type="sent"} 7012 1781429999641
...
```

{% hint style="warning" %}
The metrics endpoint currently does not require authentication. Since it shares the host and port with the Admin web UI, apply the same precautions: do not expose the admin port to untrusted networks. Typically, you bind it to localhost or an internal network interface only, and let Prometheus scrape it from within that network.
{% endhint %}

{% hint style="info" %}
Metric values are sampled from the internal statistics collector, which updates once per second. Each metric line includes an explicit timestamp (milliseconds since epoch) matching the time the values were sampled.
{% endhint %}

## Available metrics

All metrics are prefixed with `obx_`. Most are **counters**: values that only ever increase ("total number of X since server start") and reset to zero when the server restarts. In Prometheus, you usually look at counters through `rate()` or `increase()` to get "X per second" or "X in the last N minutes". **Gauges** in contrast represent a current value that can go up and down (e.g. the number of currently connected clients).

### General

* `obx_uptime` (counter): server uptime in seconds. A value lower than the previous one indicates a server restart.

### Clients and connections

* `obx_connected_clients` (gauge): number of currently connected sync clients.
* `obx_connects` (counter): total number of client connections established.
* `obx_login_successes` (counter): total number of successful client logins (including authentication).
* `obx_heartbeats_received` (counter): total number of heartbeats received from clients.
* `obx_client_failures{type="..."}` (counter): failures related to clients, by `type` label:
  * `login`: general login failures
  * `login_auth_unavailable`: an authentication component was unavailable
  * `login_user_bad_credentials`: clients supplied bad credentials
  * `login_user_no_permission`: authenticated users lacked the permission to connect
  * `msg_sent`: errors while sending messages
  * `heartbeat`: clients disconnected due to missing heartbeats
  * `disconnect`: processing was aborted because the client disconnected
* `obx_errors{type="..."}` (counter): server-side errors, by `type` label:
  * `protocol`: protocol errors, e.g. offending clients
  * `in_handler`: errors inside message handlers

### Messages and data exchange

* `obx_messages{type="recv"|"sent"}` (counter): number of sync protocol messages received from/sent to clients.
* `obx_message_bytes{type="recv"|"sent"}` (counter): number of bytes received/sent via messages (measured at the application level; network-level numbers may differ).
* `obx_full_syncs` (counter): number of full syncs performed (clients synchronizing from scratch rather than via delta sync).

### Transactions (sync data flow)

* `obx_txs_applied{from="client"|"local"}` (counter): number of transactions applied to the server database, split by origin: received from sync clients vs. initiated locally on the server.
* `obx_client_tx_ops_applied` (counter): total number of operations (e.g. puts and removes) inside applied client transactions.
* `obx_client_tx_bytes_applied` (counter): total size in bytes of applied client transactions.
* `obx_skipped_tx_dups` (counter): transactions skipped because they were already applied before (duplicates, e.g. after reconnects).
* `obx_txs_sent{type="..."}` (counter): transactions sent to clients, by `type` label:
  * `historic`: from the sync history, e.g. to catch up reconnecting clients
  * `historic_merged`: additional transactions merged into historic update messages
  * `new`: "live" updates pushed to connected clients
* `obx_async_db_commits` (counter): database commits done by the asynchronous transaction queue.
* `obx_client_txs_behind` (gauge): how many transactions the most-behind connected client is behind the current server state.
* `obx_tx_history_sequence` (counter): the current sequence number of the transaction log history.
* `obx_tx_log_age` (histogram): age of incoming transaction logs when they are stored on the server, i.e. the time (in seconds) between a transaction being created at its source and it being applied here. This is an indicator of end-to-end sync latency; e.g. high values can point to clients that were offline for a while submitting old data, or to a server falling behind. Buckets: 0.1, 1, 10, 60 seconds, 1 hour, 1 day, +Inf.

### Server internals

* `obx_queue_length{type="tasks"|"async"}` (gauge): length of internal queues: `tasks` is the main worker pool queue, `async` is the asynchronous database transaction queue. Persistently growing values indicate the server cannot keep up with the load.
* `obx_task_counts{type="completed"|"failed"|"continued"}` (counter): number of internal tasks completed, failed, and continued (rescheduled).
* `obx_task_time{place="...",priority="..."}` (histogram): time (in seconds) tasks spent `in_queue` (waiting) and `processing` (executing), per task priority (`low_throttle`, `low_fail`, `regular`, `regular_quick`, `high`). Useful to detect server overload: increasing queue times mean tasks wait longer before being processed.
* `obx_cache{from="..."}` (counter): hits and misses of internal ID-mapping caches (`global_ids_hits`/`global_ids_misses`, `peer_ids_hits`/`peer_ids_misses`, `peer_local_ids_hits`/`peer_local_ids_misses`).
* `obx_cache_size{from="global_ids"|"peer_ids"}` (gauge): number of objects in the internal ID-mapping caches.

### Cluster

The following values are available when running a [Sync Cluster](/sync-server/sync-cluster):

* `obx_cluster_peer_state` (gauge): current cluster role of this server: 0 = unknown (e.g. not started), 1 = leader, 2 = follower, 3 = candidate (an election is in progress).
* `obx_connected_peers` (gauge): number of currently connected cluster peers.
* `obx_forwarded_messages{type="recv"|"sent"}` (counter): messages forwarded between cluster peers (e.g. writes forwarded from followers to the leader).

### MongoDB connector

The following values are available when using the [MongoDB Sync Connector](/mongodb-sync-connector):

* `obx_mongodb_changes{type="..."}` (counter): changes received from the MongoDB change stream, by `type` label:
  * `by_others`: changes made by other applications, to be synced
  * `by_us`: changes the Sync Server itself wrote to MongoDB
  * `filtered_out`: changes not relevant for sync, e.g. unknown collections
  * `unknown_operation`: change stream operations that are not supported
  * `skipped_without_doc`: changes skipped because no document was attached
* `obx_mongodb_errors{type="..."}` (counter): errors in the MongoDB connector, by source:
  * `mongodb`: errors interacting with MongoDB
  * `objectbox`: general errors on the ObjectBox side
  * `objectbox_change_prepare` and `objectbox_change_apply`: errors while preparing/applying incoming changes to ObjectBox
* `obx_mongodb_warnings` (counter): total number of warnings issued by the MongoDB connector.
* `obx_mongodb_change_stream_opens` (counter): number of times the connector opened the MongoDB change stream (since version 2026-06-12). A value greater than 1 means the stream was reopened, e.g. after change stream errors or a full sync.
* `obx_mongodb_connector_state` (gauge): current connector state: 0 = created, 1 = running, 2 = connected, 3 = failure, 4 = stopped.
* `obx_mongodb_connector_running` (gauge): 1 if the connector thread is running, 0 otherwise. A simple flag to alert on a stopped connector.
* `obx_mongodb_change_stream_open` (gauge): 1 while the MongoDB change stream is open, 0 otherwise (since version 2026-06-12). The stream is expected to be closed before the initial import from MongoDB was done and during a full sync; apart from that, a closed stream means changes from MongoDB are currently not received (see alerting below).
* `obx_mongodb_full_sync_active` (gauge): 1 while a full sync with MongoDB is in progress, 0 otherwise.
* `obx_mongodb_initial_import_required` (gauge): 1 if the initial import from MongoDB has not been done yet, 0 otherwise.

## Hooking up Prometheus

To let Prometheus scrape the Sync Server, add a scrape job to your Prometheus configuration (`prometheus.yml`). Note that `metrics_path` must be set, as the Sync Server does not use the default `/metrics` path:

```yaml
scrape_configs:
  - job_name: objectbox-sync-server
    metrics_path: /api/sync/prometheus
    scrape_interval: 10s
    static_configs:
      - targets:
          - "localhost:9980"  # host:port of the Sync Server admin HTTP server
```

After reloading Prometheus, the target should show up as "UP" on the Prometheus status page (Status → Targets). You can then explore the metrics in the Prometheus expression browser, e.g. by querying `obx_connected_clients` or `rate(obx_messages[5m])`.

{% hint style="info" %}
If you run the Sync Server in Docker (e.g. via Docker Compose alongside Prometheus), make sure the admin HTTP server is reachable from the Prometheus container: bind it to a non-localhost interface inside the container (e.g. `--admin-bind 0.0.0.0:9980`) and use the container/service name as the target (e.g. `sync-server:9980`). Do not publish the admin port to the public network.
{% endhint %}

## Visualizing with Grafana

Once Prometheus collects the metrics, add Prometheus as a data source in Grafana (Connections → Data sources → Prometheus, then enter the Prometheus server URL). You can then build a Sync Server dashboard. Useful starter panels:

* **Connected clients** (`obx_connected_clients`) - the most basic health indicator of your sync deployment.
* **Sync activity** - transactions applied per second: `rate(obx_txs_applied[5m])`, optionally split by the `from` label.
* **Network throughput** - bytes per second: `rate(obx_message_bytes[5m])`, split by the `type` label (recv/sent).
* **Errors and failures** - `increase(obx_errors[5m])` and `increase(obx_client_failures[5m])`, split by `type`. In a healthy system, these stay at or near zero.
* **Server load** - queue lengths (`obx_queue_length`) and task queue waiting time, e.g. the 95th percentile: `histogram_quantile(0.95, rate(obx_task_time_bucket{place="in_queue"}[5m]))`.
* **Uptime** (`obx_uptime`) - drops to zero indicate restarts.

If you use the MongoDB Sync Connector, also add `obx_mongodb_connector_running` and `obx_mongodb_change_stream_open` (both should constantly be 1 in normal operation) and `rate(obx_mongodb_changes[5m])` to see data flowing in from MongoDB.

## Alerting

Dashboards are great for analysis, but you do not want to stare at them all day. Both Prometheus (via [Alertmanager](https://prometheus.io/docs/alerting/latest/overview/)) and [Grafana Alerting](https://grafana.com/docs/grafana/latest/alerting/) can evaluate alert rules and notify you actively, e.g. via email, Slack, PagerDuty, or a webhook. Which one to use is mostly a matter of preference: if you already run Grafana, its built-in alerting is the quickest way to get notifications; Alertmanager is the classic choice in Prometheus-centric setups.

The general pattern for counters is: alert when the counter *increased* during a recent time window, i.e. when errors are *recurring* - a single hiccup (e.g. one failed login due to a typo) usually does not warrant a notification.

### Example 1: Recurring MongoDB connector errors

When the MongoDB Sync Connector repeatedly fails (e.g. MongoDB is down or misconfigured), you want to know about it quickly - data is not being synchronized in the meantime. The following Prometheus alert rules fire when the connector is not running, when the change stream (which receives changes from MongoDB) stays closed, or when errors keep occurring over a 15-minute window:

```yaml
groups:
  - name: objectbox-sync-server
    rules:
      - alert: MongoDbConnectorNotRunning
        expr: obx_mongodb_connector_running == 0
        for: 2m
        labels:
          severity: critical
        annotations:
          summary: "MongoDB connector is not running on {{ $labels.instance }}"
          description: "The MongoDB Sync Connector thread has stopped; data is not being synchronized with MongoDB."

      - alert: MongoDbChangeStreamClosed
        expr: >-
          obx_mongodb_change_stream_open == 0
          and obx_mongodb_initial_import_required == 0
          and obx_mongodb_full_sync_active == 0
        for: 10m
        labels:
          severity: critical
        annotations:
          summary: "MongoDB change stream is closed on {{ $labels.instance }}"
          description: >-
            The MongoDB change stream has been closed for 10 minutes
            (not explained by a pending initial import or an active full sync);
            changes from MongoDB are currently not received.
            Check that MongoDB is reachable and see the Sync Server logs for errors.

      - alert: MongoDbConnectorErrors
        expr: increase(obx_mongodb_errors[15m]) > 3
        labels:
          severity: warning
        annotations:
          summary: "Recurring MongoDB connector errors ({{ $labels.type }}) on {{ $labels.instance }}"
          description: >-
            {{ $value }} MongoDB connector errors of type {{ $labels.type }} in the last 15 minutes.
            Check the Sync Server logs for details.
```

Note: the change stream rule needs Sync Server version 2026-06-12 or later (which also made the connector recover the change stream after errors automatically; the alert catches cases where that recovery does not succeed, e.g. MongoDB staying unreachable).

### Example 2: Spike in client login failures

A sudden burst of login failures can indicate a misconfigured client release, expired credentials (e.g. an outdated JWT signing key), or someone probing your server. This rule fires when there are more than 10 login failures within 5 minutes:

```yaml
      - alert: SyncClientLoginFailures
        expr: sum by (instance) (increase(obx_client_failures{type=~"login.*"}[5m])) > 10
        labels:
          severity: warning
        annotations:
          summary: "Many sync client login failures on {{ $labels.instance }}"
          description: >-
            More than 10 client login failures in the last 5 minutes.
            Check client credentials and the authentication setup.
```

### More alerting ideas

Depending on your deployment, also consider alerting on:

* **Server restarts:** `resets(obx_uptime[1h]) > 0` detects (repeated) restarts; combine with `for:` to catch crash loops.
* **Server errors:** `increase(obx_errors[15m]) > 0` - protocol and handler errors should be rare; recurring ones deserve a look.
* **Overload:** `obx_queue_length` staying high or growing for several minutes means the server cannot keep up with the load.
* **Cluster without a leader:** in a [cluster setup](/sync-server/sync-cluster), a cluster should always have exactly one leader; alert when `count(obx_cluster_peer_state == 1) < 1` for more than a minute.
* **No connected clients:** `obx_connected_clients == 0` during hours when you expect activity may indicate a network or certificate issue in front of the server.
* **MongoDB change stream flapping:** `increase(obx_mongodb_change_stream_opens[1h]) > 3` - the connector reopens the change stream automatically after errors, but frequent reopens point to an unstable connection to MongoDB.
* **Missing metrics:** rules like `obx_mongodb_connector_running == 0` do not fire when the metric is *absent* (e.g. the Sync Server is down or unreachable, so there is no data at all). Cover this case with `up{job="objectbox-sync-server"} == 0` (Prometheus sets the `up` metric per scrape target) or `absent(obx_mongodb_connector_running)`; in Grafana, configure the alert rule's "no data" state to also fire the alert.

To set up the same alerts in Grafana instead, create an alert rule (Alerting → Alert rules → New alert rule) with the same PromQL expression as the query, and attach a notification policy (contact point) such as email or Slack.


# GraphQL

Using ObjectBox as a GraphQL database/server

ObjectBox Sync Server also offers a GraphQL database interface for clients. One can view it as an alternative to ObjectBox Sync in which clients access data in a more "traditional" way. Instead of having the data locally with ObjectBox Sync, a GraphQL client interacts with the data stored remotely at the ObjectBox server.

### GraphQL Playground

To get familiar with ObjectBox GraphQL, have a look at Admin web app. Select "GraphQL" from the main menu at the left hand side to start the GraphQL Playground. It allows to directly execute GraphQL queries and mutations on the data stored in the database.

<figure><img src="/files/WT06FrEgyki46cMtSGJi" alt=""><figcaption></figcaption></figure>

As you can see, the GraphQL playground comes with some useful features:

* multiple tabs
* code formatting
* documentation explorer

To explore the GraphQL schema; simply click on the book icon:

<figure><img src="/files/viMApe1x8H5J0J2UwUNP" alt=""><figcaption></figcaption></figure>

Click on "Query" to see all available queries with their arguments.

### Queries, Mutations, etc.

Please check the sub pages on how to use ObjectBox as a GraphQL database.


# GraphQL Queries

How to use queries to get data from the ObjectBox GraphQL database

### Query Name

The name of a GraphQL query is similar but not equal to the corresponding database entity type:

* for ObjectBox entities starting from a capital letter (e.g. TestEntity), the GraphQL query name has the first character in lowercase (testEntity);
* for ObjectBox entities starting from a lowercase letter, the GraphQL query is called `query_typeName` (so, e.g., the query for testEntity is `query_testEntity`).

### Query arguments

#### Simple query all

Get all objects of a given type by querying without any arguments.

```
query getAll {
  testEntity {
    id
  }
}
```

#### Query by ID

To select specific objects, you can query by ID(s) by simply supplying an array to the `ids` argument.

```
query getById {
  testEntity(ids: [1,2]) {
    id
    simpleString
    simpleInt
  }
}
```

#### Filters

Use filters to query with more complicated query conditions. The query will only return objects matching all given conditions. Note that querying by ID is significantly more efficient, so prefer to use that if the local object IDs are known (e.g. from previous queries).

Example using a filter to find all objects with a simpleString property equal to `banana`.

```
query getByString {
  testEntity(filter: {simpleString: {eq: "banana"}}) {
    id
    simpleShort
    simpleByte
  }
}
```

**Query conditions for different property types**

Each property type has its own set of query conditions. These are listed in the box below.

{% tabs %}
{% tab title="Bool" %}
Properties of type `Bool` only have one query condition:

* `eq`: equals a given bool value (true or false)
  {% endtab %}

{% tab title="Int, Int64 & Date" %}
The following query conditions apply to properties of type `Int`, `Int64` and `Date` (`simpleByte`, `simpleShort` and `simpleInt`, `simpleLong`, `simpleDate`):

* `eq`- short for "equal to". Filters objects by a property value that must be equal to the given value.
* `neq`- short for "not equal to". Filters objects by a property value that must be different from the given value.
* `lt`- short for "less than". Filters objects by a property value that must be less than the given value.
* `lte` - short for "less than or equal to". Filters objects by a property value that must be less than or equal to the given value.
* `gt` - filters objects by a property value that must be greater than the given value.
* `gte` - filters objects by a property value that must be greater than or equal to the given value.
  {% endtab %}

{% tab title="String" %}
A property of type `String` has all query conditions of `Int` and these in addition:

* `contains` - filters objects by a property value that must contain the given value (substring).
* `startsWith` - filters objects by a property value that must start with the given value (substring).
* `endsWith` - filters objects by a property value that must end with the given value (substring).
  {% endtab %}
  {% endtabs %}

#### Pagination

Pagination is supported via `offset` and `first` arguments.

* `offset` - return objects starting at the given offset (0-based, e.g. 1 will skip the first object and start at the second).
* `first` - return only the first n objects (limits the number of returned objects).

```
query get {
 testEntity(first: 2, offset: 3)  { id }
}
```


# GraphQL Mutations

How-to use mutations to insert data into the ObjectBox GraphQL database

Note: The GraphQL playground can also be used for mutations.

### How to write mutations

#### Mutation name

There are mutation operations for all entity types. For each entity, the following mutations are available: put\* and delete\*, where \* signifies entity name. So for a `TestEntity`, the available mutations are `putTestEntity`, `deleteTestEntity`.

#### Arguments

All ObjectBox GraphQL mutations require an argument. For put operations, we indicate the types and values of objects to put, while when deleting we indicate the ids of objects to be deleted, or use the `all` flag to delete all objects. Refer to the examples below to see how these have to be formatted in each case.

#### Rerurn ID(s)

Optionally, you can use the `returning` section to make your mutation return the ID(s) of object(s) that were put or deleted.

### Examples of mutations

#### Put new or existing object

To put an object into the ObjectBox database, use `putTestEntity` for an ObjectBox entity called TestEntity, providing the object's type and value inside an `input` argument. This works both for putting new objects and updating existing ones (in the latter case an `id` must be supplied).

```
mutation putOne {
  putTestEntity(
    input: {simpleBoolean: true}
  ) {
    returning {
      id
    }
  }
}
```

#### Put multiple objects

`input` can also be an array.

```
mutation putMultiple {
  putTestEntity(
    input: [
      {simpleString: "banana"}, 
      {simpleString: "orange"}, 
      {simpleString: "banana"}
      ]) {
    returning {
      id
    }
  }
}
```

#### Delete

Supply an array of IDs to be deleted.

```
mutation deleteById {
    deleteTestEntity(ids: [1, 3, 4, 42]) {
        id
    }
}
```

#### Delete all

To delete all objects, set the `all` argument to `true`.

```
mutation deleteAll {
    deleteTestEntity(all: true) {
        id
    }
}
```

####


# GraphQL Python Client

Client access to the ObjectBox GraphQL database server

### Install the client

Install a GraphQL client like "python-graphql-client":

```
pip install python-graphql-client
```

### Run the ObjectBox server

Your ObjectBox Sync Server also comes with a native GraphQL server, making ObjectBox a GraphQL database that clients can query.

Note that the port used for GraphQL is different than the one used for Sync.

### Get the session ID

In order to make GraphQL requests, you must first obtain a session ID.

Make an empty plain HTTP POST request to `/api/v2/sessions` in order to receive a session ID. E.g. using the [requests](https://pypi.org/project/requests/) library:

```
import requests

url = 'http://localhost:8081/api/v2/sessions'

print(requests.post(url).text)
```

### GraphQL requests

Now everything is ready for you to do the GraphQL requests. Note that the session ID you found in the previous step must be passed to all GraphQL requests. You can provide it via e.g. using argparse. It's passed via the standard `Authorization` header (see example below).

Here is a simple example of using the client to read all existing objects from the database.

```
from python_graphql_client import GraphqlClient
import requests

url = 'http://localhost:8081/api/v2/sessions'
token = requests.post(url).text
header = {
    'Authorization': 'Bearer ' + token[1:-1]
}

client = GraphqlClient(endpoint="http://localhost:8081/api/graphql", headers = header)

# Read existing objects
read = """
query getAll {
  testEntity {
    id
    simpleInt
    simpleString
  }
}
"""

# Synchronous request
data = client.execute(query=put)
print(data)
```


# Embedded Sync Server

How to set up an ObjectBox Sync server that is embedded in your application.

{% hint style="warning" %}
This page refers to the **embedded** sync server, **not the standalone** sync server.\
Usually, you want to use the [standalone server](/sync-server).
{% endhint %}

{% hint style="info" %}
Free Data Sync trials are currently available for [Standalone Servers](https://sync.objectbox.io/objectbox-sync-server) only.

However, for commercial use cases, we do offer embedded servers in all of the ObjectBox language bindings ([Java](https://docs.objectbox.io/), [Kotlin](https://docs.objectbox.io/), [C/C++](https://cpp.objectbox.io/), [Flutter/Dart](https://docs.objectbox.io/), [Go](https://golang.objectbox.io/), [Swift](https://swift.objectbox.io/)).
{% endhint %}

## Use a Sync server library

### Java SDK

{% hint style="info" %}
Currently available for Android, JVM on Linux
{% endhint %}

After talking to the ObjectBox team you were likely given Sync Server library artifacts, for example an Android Archive (AAR) or a Java Archive (JAR). To include these manually as dependencies in a Gradle project:

* In the desired subproject, likely in the `app` directory, copy the AAR or JAR file into a directory called `libs` . So for example:

```
app
|-- libs
|   | -- objectbox-sync-server-android.aar
|   | -- objectbox-sync-server-linux.jar
|-- build.gradle.kts
```

* In the Gradle build script of your subproject:
  * [Declare the libs directory as a repository](https://docs.gradle.org/current/userguide/declaring_repositories.html)
  * Exclude conflicting dependencies added automatically by the ObjectBox plugin
  * Add each AAR and JAR file as a dependency

{% tabs %}
{% tab title="Kotlin" %}
{% code title="build.gradle.kts" %}

```kotlin
plugins {
    // If not done already, apply the Sync version of the ObjectBox plugin
    id("io.objectbox.sync")
}

// Let Gradle search the libs folder for dependencies
repositories {
    flatDir {
        dirs("libs")
    }
}

// Exclude conflicting Android and Linux libraries added by the plugin
configurations {
    all {
        exclude(group = "io.objectbox", module = "objectbox-sync-android")
        exclude(group = "io.objectbox", module = "objectbox-sync-linux")
    }
}

// Add the Android or Linux library as needed
dependencies {
    implementation("io.objectbox", "objectbox-sync-server-android", ext = "aar")
    implementation("io.objectbox", "objectbox-sync-server-linux")
}
```

{% endcode %}
{% endtab %}

{% tab title="Groovy" %}
{% code title="build.gradle" %}

```groovy
plugins {
    // If not done already, apply the Sync version of the ObjectBox plugin
    id("io.objectbox.sync")
}

// Let Gradle search the libs folder for dependencies
repositories {
    flatDir {
        dirs("libs")
    }
}

// Exclude conflicting Android and Linux libraries added by the plugin
configurations {
    all {
        exclude(group: "io.objectbox", module: "objectbox-sync-android")
        exclude(group: "io.objectbox", module: "objectbox-sync-linux")
    }
}

// Add the Android or Linux library as needed
dependencies {
    implementation("io.objectbox:objectbox-sync-server-android@aar")
    implementation("io.objectbox:objectbox-sync-server-linux")
}
```

{% endcode %}
{% endtab %}
{% endtabs %}

## Start a Sync server

Use `Sync.server(boxStore, url, authenticatorCredentials)` to start a Sync server using a `boxStore` . The server binds to the address and port given in `url`.

When using `wss` as the protocol of the `url` a TLS encrypted connection is established. Use `certificatePath(path)` to supply a `path` to a certificate in PEM format. Use `ws` instead to turn off transport encryption (insecure, only use for testing!).

`authenticatorCredentials` are required to authenticate clients. It is possible to add more than one set of allowed credentials.

{% tabs %}
{% tab title="Java" %}

```java
SyncServer syncServer = Sync.server(
        boxStore,
        "wss://0.0.0.0:9999" /* Use ws for unencrypted traffic. */,
        SyncCredentials.sharedSecret("<secret>")
)                                // Builder...
.certificatePath(certPath)        // Server PEM certificate
.authenticatorCredentials(cred2) // Additional credentials
.buildAndStart();
```

{% endtab %}

{% tab title="C++" %}

```cpp
// Developer options; use wss and real credentials in production...
obx::SyncServer server(std::move(storeOptions), "ws://0.0.0.0:9999");
server.setCredentials(obx::SyncCredentials::none());
server.start();
obx::Store& store = server.store();
```

{% endtab %}
{% endtabs %}

During `buildAndStart()` the server will start and become ready to accept connections from clients. Read below for more configuration options you can use before starting the connection.

## Client authentication

These are the currently supported options to authenticate clients:

### Shared secret

```java
SyncCredentials credentials = SyncCredentials.sharedSecret("<secret>");
```

This can be any pre-shared secret string or a byte sequence.

### Google Sign-In

Not available, yet.

### No authentication (insecure)

{% hint style="danger" %}
Never use this option to serve an app shipped to customers. It is inherently insecure and allows anyone to access the sync server.
{% endhint %}

```java
SyncCredentials credentials = SyncCredentials.none();
```

For development and testing it is often easier to just have no authentication at all to quickly get things up and running.

## Manually start

Using the example above, the server automatically binds to the given address and port and starts listening for clients. It is also possible to just build the server and then start it once your code is ready to.

```java
// Just build the server.
SyncServer syncServer = Sync.server(...).build();

// Start now.
syncServer.start();
```

Note that a started server can not be started again. Stop and close an existing server and build a new one instead.

## Advanced

### Listening to incoming data changes

For advanced use cases, it might be useful to know exactly which objects have changed during an incoming sync update. This is typically not necessary, as observing a box or a query may be easier.

To listen to these incoming data changes:

```java
SyncChangeListener changeListener = syncChanges -> {
    for (SyncChange syncChange : syncChanges) {
        // This is equal to Example_.__ENTITY_ID.
        long entityId = syncChange.getEntityTypeId();
        // The @Id values of changed and removed entities.
        long[] changed = syncChange.getChangedIds();
        long[] removed = syncChange.getRemovedIds();
    }
};
// Set the listener when building the server.
syncBuilder.changeListener(changeListener);
// Or set the listener later.
syncServer.setSyncChangeListener(changeListener);

// Calling again replaces an existing listener.
syncServer.setSyncChangeListener(changeListener);
// Remove an existing listener.
syncServer.setSyncChangeListener(null);
```

On each sync update received on the server, the listener is called with an array of "Sync Change" objects, one for each affected entity type. It includes a list of affected object IDs - the ones that were put or removed in the incoming update.

### Adding peer servers

{% hint style="info" %}
Before using peer servers, please reach out to the ObjectBox team.
{% endhint %}

It is possible to have multiple sync servers for redundancy and load balancing where one or more secondary servers connect as special clients to a primary server.

To add the primary server when building a secondary server:

```java
syncBuilder.peer(primaryServerUrl, SyncCredentials.sharedSecret("<secret>"));
```


# Changelog

Recent Sync Server releases

Docker images use versions in the format "YYYY-MM-DD". Pull the latest image using `docker pull objectboxio/sync-server-trial`.

## 2026-07-14: Mesh Sync server support (beta)

ObjectBox version: 6.0.0-beta-2026-07-13

* Mesh Sync (beta): ObjectBox Sync clients can now sync with each other in a P2P mesh network, even while they have no connection to the Sync Server.
* The server now bridges into P2P meshes, i.e., mesh peers (Sync clients) with a server connection relay data bi-directionally (from and to the mesh):
  * Changes made on devices without a server connection still reach the server via a connected peer.
  * Changes from the server (e.g. from other Sync clients or MongoDB) are also forwarded into the mesh. A mesh peer connected to the server distributes them to peers without a server connection.
* Introduced Sync protocol V11: mesh clients identify themselves at login, and relayed transactions carry their source peer so the server can track the origin of the data.
* Admin: modernized user interface based on Vue.js 3 and Material Design 3

Upgrade notes:

* Mesh Sync requires mesh-enabled clients of version 6.0.0-beta or later (Sync protocol V11).
* This is a beta version to test and stabilize the mesh feature and the new Admin UI. It's not intended for production use as the mesh-related protocol changes may still evolve.
* Older clients are still fully supported (except the new mesh sync functionality).

## 2026-07-10: MongoDB: 16 MB document size limit

ObjectBox version: 5.3.2-next-2026-07-10

* MongoDB: property values (strings and vectors) that are too large for MongoDB are now skipped, so that syncing to MongoDB can continue with the remaining values of the object. Before, an oversized property value stopped the sync to MongoDB permanently ("Document ... is too large for the cluster"), as MongoDB rejects documents over its 16 MB size limit. A skipped property value is reported as an error log event including the type, object ID, and property name.
* New MongoDB config option `maxPropertySizeToMongoDb` to adjust the maximum property value size in bytes; the default is 16 MB minus 1 KB (16776192); 0 disables the check (restoring the former behavior). Note: on updates, a skipped property keeps its previously synced value in the MongoDB document (if any).
* New MongoDB config option `skipOversizedDocumentsToMongoDb` (default: false): if enabled, documents that are still over MongoDB's 16 MB limit (e.g. multiple large property values) are skipped (and reported as an error log event) instead of stopping the sync to MongoDB.

Upgrade notes: none

## 2026-07-07: MongoDB retry improvements

ObjectBox version: 5.3.2-next-2026-07-07

* MongoDB: Improved retry logic for applying changes to MongoDB
  * Detection of transient errors resulting in higher retry counts: 20 retries are done before tracking an error
  * Added growing delays between retries
* MongoDB: fixed empty string handling from MongoDB to ObjectBox flex properties
* Updated MongoDB driver; still including the unofficial hotfix (see 2026-06-24)

Upgrade notes: none

## 2026-06-24: Hotfix for MongoDB driver assert

ObjectBox version: 5.3.2-next-2026-06-24

* Hotfix for [MongoDB driver issue CDRIVER-6354](https://jira.mongodb.org/browse/CDRIVER-6354): In case you are seeing "bson\_steal(): assertion failed: dst" aborts, try this version.

Upgrade notes:

* Only use this version if you are affected by the mentioned issue.\
  Note that this is contains an unofficial hotfix of the MongoDB driver,\
  which will be replaced with an official fix once the MongoDB driver team releases a fix.

## 2026-06-12: MongoDB: null handling, change stream recovery

ObjectBox version: 5.3.2-next-2026-06-11

* Syncing objects to MongoDB now writes null (absent) ObjectBox property values as explicit null values. This ensures that values which became null in ObjectBox also clear the corresponding values in MongoDB documents.
* New MongoDB config option `omitNullValuesToMongoDb` to restore the former behavior of omitting null values (documents keep previous values for properties that became null in ObjectBox).
* MongoDB connector: improve recovery of the change stream after errors
* New Prometheus metrics for monitoring the change stream: `obx_mongodb_change_stream_open` (gauge; 1 if the change stream is currently open) and `obx_mongodb_change_stream_opens` (counter; a value > 1 means the stream was reopened, e.g. after errors).
* MongoDB connector: a failing user-requested full sync no longer stops the MongoDB connector (the error is logged and the full sync can be requested again).

Upgrade notes:

* If you rely on null values being absent in MongoDB documents, enable the new `omitNullValuesToMongoDb` option in the `mongoDb` section of the JSON config.
* Consider alerting on the new `obx_mongodb_change_stream_open` gauge (e.g. closed for more than a few minutes).

## 2026-06-10: Add MongoDB metrics to Prometheus

ObjectBox version: 5.3.2-next-2026-06-10

* The Prometheus metrics endpoint now lets you monitor MongoDB connector metrics
* Update MongoDB driver

Upgrade notes: no special actions required

## 2026-04-28: Performance and Fixes

ObjectBox version: 5.3.1-next-2026-04-28

* Performance improvements for sync filtering when catching up history
* Fixed a corner case with "unique replace on conflict" and absent sync clock value
* Internal fixes and improvements

Upgrade notes: no special actions required

## 2026-04-17: Client schema validation, part 2

ObjectBox version: 5.3.1-next-2026-04-17

* Clients with older schema versions now only get objects of types known to them (new types are filtered out).
* The new `clientSchemaValidation` JSON config object replaces the `disableClientSchemaValidation` flag. The default is back to non-strict and now allows configuring a default schema version for "unknown" clients.
* Admin: added the "Client Schema" tab to the Schema Versions page. This gives you an overview over all schema versions used by clients with usage counts.
* Admin: Schema Version UI improvements
  * View or download the data model JSON of schema versions
  * Checkbox to enable the schema version for clients
  * Added Model Size column
  * Compact timestamps with relative time on hover
  * Changed displayed hashes to match client hashes
* Creating a new schema version now triggers a log event (of type "Important")

Upgrade notes:

* If you used `disableClientSchemaValidation` in the config JSON, remove the flag as it is no longer needed.
* Watch the "Client Schema" tab on the Schema Versions page to see if all clients connect with known schemas (having an ID). If this is the case, you can enable strict client schema validation. This is recommended to ensure all schema versions are known to the server, i.e., to filter out unknown types.
* No client updates are required.

## 2026-04-09: Client schema validation

ObjectBox version: 5.3.1-next-2026-04-08

* **Breaking change:** By default, the server now only lets clients log in if their schema is known to the server and enabled. This prevents clients with outdated/unknown schemas from connecting. *Note:* this was reverted to non-strict by default in the 2026-04-17 release; see above.
* Using probabilistic checks to validate allocation states (via GWP ASan)
* Internal fixes and improvements

Upgrade notes:

* Carefully review the client schema validation. Do you have all schema versions of your clients available and enabled on the server? It is recommended to test client versions against the schema validation before deploying to production. If you cannot enforce client schema validation yet, disable it for now; however... It's recommended to enable it as soon as possible to prepare for future features that will depend on knowing the client's schema.
* The upgrade is still recommended even if client schema validation is disabled (for the fixes and additional validation).

## 2026-03-26: Customizable Sync Conflict Resolution

ObjectBox version: 5.3.1-2026-03-26

* Conflict resolution via sync clock and sync precedence
* Requires ObjectBox Sync clients supporting Sync clock and precedence properties (core version 5.3.1-2026-03-26)

## 2026-03-11: New config options, improved Sync History

ObjectBox version: 5.2.0-next-2026-03-11

* New config option `logLevel` (JSON; `--log-level` CLI) to set the log level at startup
* New config option `fullSyncMessageSplitMb` to optimize full sync message splitting
* Admin Sync History: show the oldest history entry
* Admin Sync History: search by TX ID
* Admin Sync History: paging now scales regardless of the current position
* Admin Sync History: fix the number of items displayed

## 2026-03-08: Improved Diagnostics

ObjectBox version: 5.2.0-next-2026-03-07

* Improved Sync history performance
* Introduced Sync protocol V10
* Change log level at runtime; via Admin UI
* More granular log levels that lead to less logs in "debug" mode
* Log levels "verbose" and "trace" can now be enabled for additional debug logging (requires DebugLog feature)
* Admin: added a new "Threads" status tab for expert analysis, e.g., download for ObjectBox support team
* Admin: added Log Events for sync message handling failures
* Admin: Log Event merging that collapses multiple occurrences of similar log events into a single one
* Admin: Status tab "Count and Sizes" now only counts all objects on click to preserve resources
* Admin: Status tab "Count and Sizes" now has a sum row at the bottom
* Admin: Status tab "System and Info" now shows additional information
  * Process memory / RSS
  * Database size and free disk size
  * CPU counts and loads
* Tuned down the default number of workers match the number of hardware threads. Before, it was set to three times that value, which could impact IO-bound systems. Consider tuning this value for your specific system if you have high concurrency.
* Client reported errors are now viewable from Log Events (requires Sync protocol V10 on the client side)
* Fixed setting automatic `maxReaders` value for default workers with high hardware thread count.
* New expert configuration option `maxReaders` to limit the number of concurrent readers; typically, you should not touch this and should trust the default value.

## 2026-02-16: Batch updates for Sync clients

ObjectBox version: 5.1.1-pre-2026-02-16

* Updates to clients are now sent batched (individual updates are merged into a single message): this significantly improves performance for "catching up" after being offline.
* Remove operations originating on the server (e.g., via MongoDB) are now filterable
* Admin: new "Counts and Sizes" view (via Status page) to give an overview over all types their object counts and sizes
* Old sync history logs are now evicted on server startup if the history limit is already exceeded.
* Admin: fix reload via browser to stay on the page
* Admin: schema view to display flags as text

## 2026-02-10: Limit Sync history via JSON

ObjectBox version: 5.1.1-pre-2026-02-09

* The Sync history can now be limited via JSON config (historySizeMaxKb and historySizeTargetKb). Setting a maximum size causes old sync history to be deleted automatically.
* Admin: refresh button for the data view

## 2026-01-20: Filterable Removes

ObjectBox version: 5.1.0-2026-01-19

* Synced "remove" operations can now be filtered (via Sync Filters): for this to work, clients must enable the new RemoveWithObjectData sync flag
* Introduced Sync protocol V8
* Raised minimum sync protocol to V5 (2024-09; client versions 4.0.x or higher)
* Minor internal improvements and fixes

## 2025-12-15: MongoDB Remove fix

ObjectBox version: 5.0.0-2025-12-15

* Fix for a rare condition in which applying a remove operation to MongoDB failed.

## 2025-12-10: Name mappings for MongoDB

ObjectBox version: 5.0.0-2025-12-10

* Define external names for types, properties and relations to "map" to a different collection/field name in MongoDB.\
  Note: Sync clients already allow you to define external names via annotations.
* MongoDB: allow conversion integer type conversion (32 vs 64 bits) from MongoDB to ObjectBox (types do not have to match exactly)
* Admin: the Schema view now shows if external name of types and properties if configured
* Admin: the Schema view now shows the type as text (e.g. "String") instead of the internal type ID
* Fix external type change detection when changed in the model

## 2025-12-05: Sync Filter default variable values

ObjectBox version: 5.0.0-2025-12-05

* Sync filters: added support for default variable values, e.g. `${client.team ?? "green"}`
* Sync filters optimizations

## 2025-12-04: Sync Filters IN condition

ObjectBox version: 5.0.0-2025-12-04

* Sync filters: added support for IN conditions allowing to filter objects based on multiple values. *Note:* there are some minor optimizations outstanding, which are expected for the next update.

## 2025-11-26: MongoDB change stream fix

ObjectBox version: 5.0.0-2025-11-26

* MongoDB changes were reported as an error if an updated document was deleted since the update. This is now handled gracefully. The debug logs will show this as "Skipping MongoDB change for a doc that does not exist anymore" along with its ID.

## 2025-11-24: Sync optimizations

ObjectBox version: 5.0.0-2025-11-24

* Initial full client sync: optimized the order of types, e.g. sync types without dependencies first
* Sync filters: optimizations, especially for connected clients
* Improved warning event logs for MongoDB changes (e.g. include offending MongoDB document)

## 2025-11-20: Sync filter relation fix

ObjectBox version: 5.0.0-2025-11-20

* Sync filters: fix filters for many-to-many relations, which did not consider user-specific variables
* JSON config: allow keys starting with an underscore to allow comments and temporarily disable setting elements
* Prometheus: fix missing content header so `fallback_scrape_protocol` is not required anymore

## 2025-11-19: Debug log flags via JSON config

ObjectBox version: 5.0.0-2025-11-19

* JSON config: added debug log flags for internal components
* JSON config: detect unknown JSON elements, e.g. fail on typos
* MongoDB export: removed (excessive) debug logs for compression

## 2025-11-15: Fix Sync filter performance

ObjectBox version: 5.0.0-2025-11-15

* Fixed an issue with Sync filters that led to poor client synchronization performance.
* Admin: fix "Clients TXs behind" Sync statistic to consider sync filters
* Minor tweak for bulk put operations to MongoDB

## 2025-11-13: Faster Sync to MongoDB

ObjectBox version: 5.0.0-2025-11-11

* Data synchronization to MongoDB is now faster for transactions with multiple objects of the same type. Note: if you update multiple objects, use a single transaction to improve performance (in general). Hint: try to avoid switching object types for put and remove operations often; MongoDB is faster for consecutive operations of the same object type.

## 2025-11-11: New MongoDB Connector option flags

ObjectBox version: 5.0.0-2025-11-11

* When syncing from MongoDB, there is a new global flag that creates empty lists for absent list values.
* For data conversion from/to MongoDB, there is a new strict option for each direction, which will stop sync on conversion errors. This may be useful e.g. during development to ensure no data glitch is forgotten.

## 2025-11-08: MongoDB Connector improvements

ObjectBox version: 5.0.0-2025-11-08

* The import phase of "MongoDB full sync" is now faster. By using larger batches, processing got more efficient and also results in fewer Sync history entries.
* Many-to-many relations synced from MongoDB are now considered by sync filters more reliably. With MongoDB, we saw some scenarios where many-to-many relations where synced before the actual target objects.\
  Since sync filters did not have sufficient information, these relations were filtered out before.

## 2025-10-10: JWT and MongoDB improvements

Update advise: update asap if you are using MongoDB Sync Connector.

ObjectBox version: 5.0.0-rc-2025-10-10

* JWT and Sync filters: values from nested claims in the JWT JSON are now available in sync filters
* JWT: allow `aud` to be a array (single string only)
* MongoDB connector: making Sync to MongoDB more robust, e.g. always using majority read concern

## 2025-10-02: Minor fixes and improvements

**Note: Sync filters require version 5.0 of ObjectBox sync clients.**

ObjectBox version: 5.0.0-rc-2025-10-02

* Incoming objects from Sync (clients) are now checked more strictly.
* Fix MongoDB CLI arguments when a configuration file is used.
* Internal improvements and dependency updates

## 2025-09-16: Sync filter updates, client filter variables

**Note: Sync filters require version 5.0 of ObjectBox sync clients.**

* Detect when sync filters are changed for a client and enforce a complete sync from scratch.
* Client filter variables: clients can now send variables to the Sync Server, which are available in sync filter expressions.

## 2025-08-28: JSON model fix for external types and names

* Parsing the JSON model file with externalType or externalName field fixed
* Sync filters: added `${...}` variable syntax for special characters

## 2025-08-21: Sync filter fix for vector types

* Fixes "Float vector indexes are not supported" when using vectors in sync filter expressions
* MongoDB Sync Connector: add mapping for MongoDB's decimal128 type to string (via external property type)
* Minor dependency updates

## 2025-08-02: Filter expression string value improvements

* Sync filter expression improvements for string values: allow single quotes in addition to double quotes, allow escapes using the `\` character.

## 2025-08-01: Sync filters and user-specific sync (beta)

* Sync filters: configure expressions for the Sync Server to filter objects that are to by synced.
* User-specific sync: sync filter expression can use user-specific variables and thus enable user-specific sync. This is a major feature that allows clients to sync only partial (individual) data.
* JWT claims available as user-specific sync filter variables. Data send by the clients via JWT is available to the sync filter expressions. Check your JWT provider how you can add the claims that you need to your JWT.

This beta version has a few known limitations that will be addressed in one of the next versions:

* When sync filter expressions changed, it's not yet handled. Clients may still keep old data previously synced by old filters. In a new version, we will likely enforce a complete sync from scratch when filters change so that clients have consistent data.
* It's possible to change the value of a property, which is used in a sync filter expression. For example, consider a property `team` that is used in a sync filter expression. One client changes the team from "blue" to "green". The server now correctly syncs the change to "team green" clients. However, it is not yet deleted from "team blue" clients.
* JWT claims are only the first variables available to sync filter expressions. We are currently collecting customer requirements to add more variables and user information. Check with the ObjectBox to ensure that your needs are covered.

## 2025-07-21: MongoDB grant check fix

* MongoDB Connector: when using a MongoDB without authentication, do not display warnings in the status page.

## 2025-07-17: MongoDB user grant checks and maintenance

* MongoDB Connector: improved error handling; some errors only showed up in debug logs.
* MongoDB Connector: fix to only sync entity types that are actually enabled for sync.
* Admin: fixed GraphQL page (this time pinning GraphiQL to version 4.1)
* Admin: MongoDB status page now shows the MongoDB user and warnings if it does not have enough privileges for Sync.
* Admin: Special connection state if full sync was not yet performed
* Docker image: adding various Linux utility packages that are useful to debug/troubleshoot: iputils, iproute, procps-ng, strace, lsof, nmap-ncat
* Internal improvements, e.g. updated dependencies and compiler to new major versions

## 2025-06-02: Admin Fixes

* Admin: fixed GraphQL page
* Admin: minor UI improvements in the menu (icons, padding)

## 2025-05-27: Public docker image and major improvements

* The Sync trial is now distributed publicly as a Docker image via Docker Hub
* New "JSON to native" property type to convert strings to nested documents in MongoDB; requires 4.3 client releases
* Increase maximum Sync message size to 32 MB
* JWT authentication: public keys URLs can now refer to directly to PEM public key or X509 certificate files
* Admin fixes

## 2025-05-05: MongoDB initial Sync, etc.

* Import initial data from MongoDB, pick-up sync at any point.
* Admin: new admin page for full-syncs with MongoDB
* Admin: better display of large vectors in data view; display only the first element and the full vector in a dialog
* Admin: detect images stored as bytes and show them as such (PNG, GIF, JPEG, SVG, WEBP)
* Admin: new log events for important server events, which can be viewed on new Admin page

## Earlier versions

We started this changelog only in May 2025, when the Sync Server was first released as a public Docker image. Earlier versions, which were provided individually, are not listed here.


# Data model

How to manage a growing data model (schema).

The structure of the data stored by ObjectBox is described by a data model, also called a schema. The separation of the model and the data allows ObjectBox to work more efficiently and robustly with data. It's similar to objects of strongly typed languages, so you know exactly with what data (types) you are dealing with.

{% hint style="info" %}
This section refers mostly to the standard object model provided by ObjectBox. There are alternative ways to model data in ObjectBox, e.g. generic trees and "flex buffers", that can be used to represent flexible data models ("schema-less").
{% endhint %}

## Schema Versions

![](/files/A6mPbAmzxyFOqdhGCWrE)

The Admin lets you view and manage schema versions. All schema versions ever used are listed in the "Schema Versions" tab. The current version is displayed in bold (typically the latest data model that you use).

Notable columns:

* Clients allowed: if disabled, clients will be rejected at login if they use this schema version. This is independent of the "strict" client schema validation setting, which controls whether clients with unknown schemas are allowed to connect.
* Actions icons: view or download the model JSON file.

## Add a new schema version

In the [Sync Server docs](/sync-server), you already saw data models in action. The server initially needs the JSON file containing the data model to start with. Over time this data model will evolve. New types and properties will be added, and sometimes old ones will be retired. The ObjectBox Sync Server tracks these versions and helps you manage clients using different model versions.

Let's say you have a new client version of your application that also introduced new properties to a type. To prepare that for synchronization, you need to upload the updated data model to the server. This is done via the Admin web UI — in the "Schema Versions" section, click the "New Version" button on the right, and you'll get an upload dialog.

![](/files/-MVaBm8fWN1tztMZdQU1)

You can add the new ObjectBox model JSON file by clicking the "Schema model JSON" text in the dialog. After a file is selected, the dialog window shows some preliminary information about the model; click Save to add the model version to Sync Server.

![](/files/-MVaCK6oKPR0cWNoJU4l)

The newly added model isn't active yet. You can switch the server to use it by clicking the "Change current version ID" button, which shows the dialog with version selection (if there are multiple options):

![](/files/-MVaD2vR-XWZ9ck9md-N)

This causes the server to restart with the newly selected model version.

## Client data models

When clients log in, they send their data model version to the server. More specifically, clients send two data model hashes to identify their schema version: the "base hash" and the "full hash". The "base hash" is a hash of the model's essential information, such as the entities and their properties. The "full hash" is a hash of the entire model, including metadata like indexes and constraints.

{% hint style="info" %}
If two schema versions have the same base hash, they are considered "data equal" even if their full hashes are different. E.g., when you index a property, the base hash does not change, but the full hash does.
{% endhint %}

### Client Schema validation

By default, validation is non-strict: clients with unknown schemas can still connect. You can enable strict validation via the [`clientSchemaValidation`](/sync-server/configuration) JSON config object, which rejects clients whose schema is unknown or not enabled on the server. Use this to ensure that only "compatible" clients can connect to the server; you define what compatible means. For example, older clients may lack new entity types that are now mandatory for your application to function.

Clients with older (still enabled) schema versions automatically receive only objects of types known to them. New types added in later schema versions are filtered out during synchronization, so older clients never encounter unknown data.

You can also set a default schema version for "unknown" clients via the [`clientSchemaValidation`](/sync-server/configuration) JSON config object. This is intended to still support older clients that have gone "off the radar". For future versions, you should ensure uploading all schema versions used by clients to the server.

### Client Schema tab

![](/files/NAQtBDRNobcU8QgCazHo)

The Admin UI includes a "Client Schema" tab on the Schema Versions page. This gives you an overview of all schema versions used by connected clients, along with usage counts. Use this to monitor whether all clients connect with known schemas (i.e., schemas that have an ID on the server). Once all clients use known schemas, you can safely enable strict client schema validation. This is recommended to ensure all schema versions are known to the server, i.e., to filter out unknown types.

### Client Schema validation example

Suppose your server has two schema versions uploaded:

| ID          | Version | Base hash   | Full hash   | Clients allowed |
| ----------- | ------- | ----------- | ----------- | --------------- |
| 2 (current) | 2       | `ccc...ccc` | `ddd...ddd` | ✅ yes           |
| 1           | 1       | `aaa...aaa` | `bbb...bbb` | ✅ yes           |

Now three clients connect and try to login with their schema hashes:

| Client | Base hash   | Full hash   | Description                                                  |
| ------ | ----------- | ----------- | ------------------------------------------------------------ |
| A      | `ccc...ccc` | `ddd...ddd` | Full hash matches ID 2 exactly                               |
| B      | `aaa...aaa` | `eee...eee` | Base hash matches ID 1, full hash differs (e.g. index added) |
| C      | `111...111` | `222...222` | No hash matches any known version                            |

#### Non-strict (default behavior)

No special configuration needed (or `"strict": false`).

```json
{
  "clientSchemaValidation": {
    "strict": false
  }
}
```

| Client | Outcome                                                                                                                                   |
| ------ | ----------------------------------------------------------------------------------------------------------------------------------------- |
| A      | ✅ Connects. Matched to ID 2 by full hash. Receives all V2 types.                                                                          |
| B      | ✅ Connects. Matched to ID 1 by base hash (the schemas are data-equal). Receives only V1 types.                                            |
| C      | ✅ Connects. No matching version found, but strict is off — client is assigned to the current schema ID 2 and thus receives **all** types. |

This is the most permissive mode defaulting to the latest schema version. It is useful during development when the data models are still evolving.

#### Strict

```json
{
  "clientSchemaValidation": {
    "strict": true
  }
}
```

| Client | Outcome                                                                       |
| ------ | ----------------------------------------------------------------------------- |
| A      | ✅ Connects. Matched to ID 2 by full hash. Receives all V2 types.              |
| B      | ✅ Connects. Matched to ID 1 by base hash. Receives only V1 types.             |
| C      | ❌ **Rejected.** No known version matches — the server refuses the connection. |

Use strict mode once you have uploaded all schema versions used by your clients. The "Client Schema" tab in the Admin UI helps you verify this.

#### Default hash

```json
{
  "clientSchemaValidation": {
    "defaultHash": "bbb...bbb"
  }
}
```

Here `defaultHash` is set to the full hash of V1.

| Client | Outcome                                                                                   |
| ------ | ----------------------------------------------------------------------------------------- |
| A      | ✅ Connects. Matched to ID 2 by full hash. Receives all V2 types.                          |
| B      | ✅ Connects. Matched to ID 1 by base hash. Receives only V1 types.                         |
| C      | ✅ Connects. Unknown hash, but falls back to V1 via `defaultHash`. Receives only V1 types. |

This is helpful when older clients are already deployed and you cannot upload their exact schema version. By setting `defaultHash` to a compatible version, those clients can still connect and sync; without the types that were added after that version.

{% hint style="info" %}
Strict mode and default hash are mutually exclusive. Enabling both will result in an error.
{% endhint %}


# Object IDs and Sync

ObjectBox Sync offers local and global ID spaces. Understand the implications and what's best for your use case.

## Default Behavior: ID mapping

Let's say we have a shared to-do list app on two devices connected via ObjectBox Sync. On Device A, Alice inserts a new task "Buy milk" and Bob on device B inserts another task "Feed the cat". Using the default ID mechanism, ObjectBox keeps assigning IDs starting from 1. Let's also assume device B is currently offline and thus does not sync the data just yet. In that case, each device has only its local object as illustrated by the following table:

| <p>Tasks on device A</p><p>ID:text</p> | <p><em>Tasks on device B</em></p><p><em>ID:text</em></p> |
| -------------------------------------- | -------------------------------------------------------- |
| 1:"Buy milk"                           | *1:"Feed the cat"*                                       |

As you can see, the two tasks have the same ID 1 **locally**. Now, what happens if both devices sync each others data? As the tasks are distinct (different from each other), one may assume that both devices each have two tasks. And this is exactly what happens. The table now looks like this:

| <p>Tasks on device A</p><p>ID:text</p> | <p><em>Tasks on device B</em></p><p><em>ID:text</em></p> |
| -------------------------------------- | -------------------------------------------------------- |
| 1:"Buy milk"                           | *1:"Feed the cat"*                                       |
| 2:"Feed the cat"                       | *2:"Buy milk"*                                           |

{% hint style="info" %}
Each ObjectBox Sync client has its own **local ID space**.
{% endhint %}

Each device added a task with the next locally available ID (her it's ID 2 for both). Thus IDs are local to the device (or more accurately per store) and may differ from device to device while addressing the same object.

{% hint style="info" %}
Under the hood, ObjectBox Sync uses a global addressing scheme and **ID mapping** mechanisms. This is transparent to you.
{% endhint %}

### Object Relations and IDs

ObjectBox expresses relations between objects using (object) IDs. When object IDs get mapped, so do the IDs used in relations. On the local device, this is transparent to you.

**Example:** let's say tasks are organized into folders. This is a one-to-many relation in which the `Task` object has a reference to its `Folder` object it is contained in. On one device, we have a "Shopping list" folder with ID 23, and a task "Broccoli" with ID 47. To make the "Broccoli" task part of the "Shopping list" folder, let's assume that there is a `folderId` property in the `Task` type, which would carry the value 23. Since IDs on another device will be different (mapped), you will see also the relations mapped to different IDs. The following table shows the same Task object on two separate devices with example ID values:

| Device | Task: ID | Task: text | Task: folderId |
| ------ | -------- | ---------- | -------------- |
| A      | 47       | Broccoli   | 23             |
| *B*    | *81*     | *Broccoli* | *104*          |

{% hint style="warning" %}
IDs used in relations are automatically mapped. Do not reference objects using IDs in non-relation properties (e.g. using a long integer, or in a textual list, embedded JSON etc.).
{% endhint %}

## Shared Global IDs

Local IDs with an internal ID mapping as illustrated in the previous section are the default in ObjectBox. As a rule of thumb, you should stick to ID mapping, e.g. to avoid ID collisions causing unrelated objects to overwrite each other.

{% hint style="danger" %}
When in doubt, use the default (ID mapping).\
Using shared global IDs incorrectly may cause data being lost.
{% endhint %}

However, if you can somehow ensure unique 64 bit IDs over all devices, you can opt to use "shared global IDs". (Again, this doesn't change IDs to a GUID-like type - ObjectBox always addresses objects with a 64 bit ID.) An example could be base data, that an single instance is managing.

On the positive side, shared global IDs do not require additional ID mapping information and thus are a bit more efficient.

Shared global IDs are a property of entity type. Thus you can specify the ID behavior selectively for types, e.g. have some types with the default ID mapping and other types with shared local IDs.

To enable shared global IDs for a type, use this annotation on the type (class) definition in your code:

{% tabs %}
{% tab title="Java" %}

```java
@Sync(sharedGlobalIds = true)
```

{% endtab %}

{% tab title="Dart" %}

```dart
@Sync(sharedGlobalIds: true)
```

{% endtab %}

{% tab title="Swift" %}

```
// objectbox: sync = { "sharedGlobalIds": true }
```

{% endtab %}
{% endtabs %}

{% hint style="danger" %}
You define the ID behavior for a type once when you introduce a type.\
You cannot change it later.
{% endhint %}


# Mesh Sync

How to use ObjectBox Mesh Sync to synchronize Sync clients directly with each other without a central Sync Server connection.

Mesh Sync lets ObjectBox Sync clients synchronize directly with nearby peers (peer-to-peer, P2P). It is intended for offline-first apps where devices may meet locally and exchange changes. Typically, Mesh Sync is complementing the regular Sync Server by providing local sync while no Internet is available.

{% hint style="info" %}
ObjectBox Mesh Sync is currently available as a **preview for Android** (Java/Kotlin and Flutter/Dart). More platforms will follow; let us know if you are interested. Please also note that the APIs are still subject to change until the final release. For a list of current limitations, see [Current Limitations](#current-limitations).
{% endhint %}

## Overview
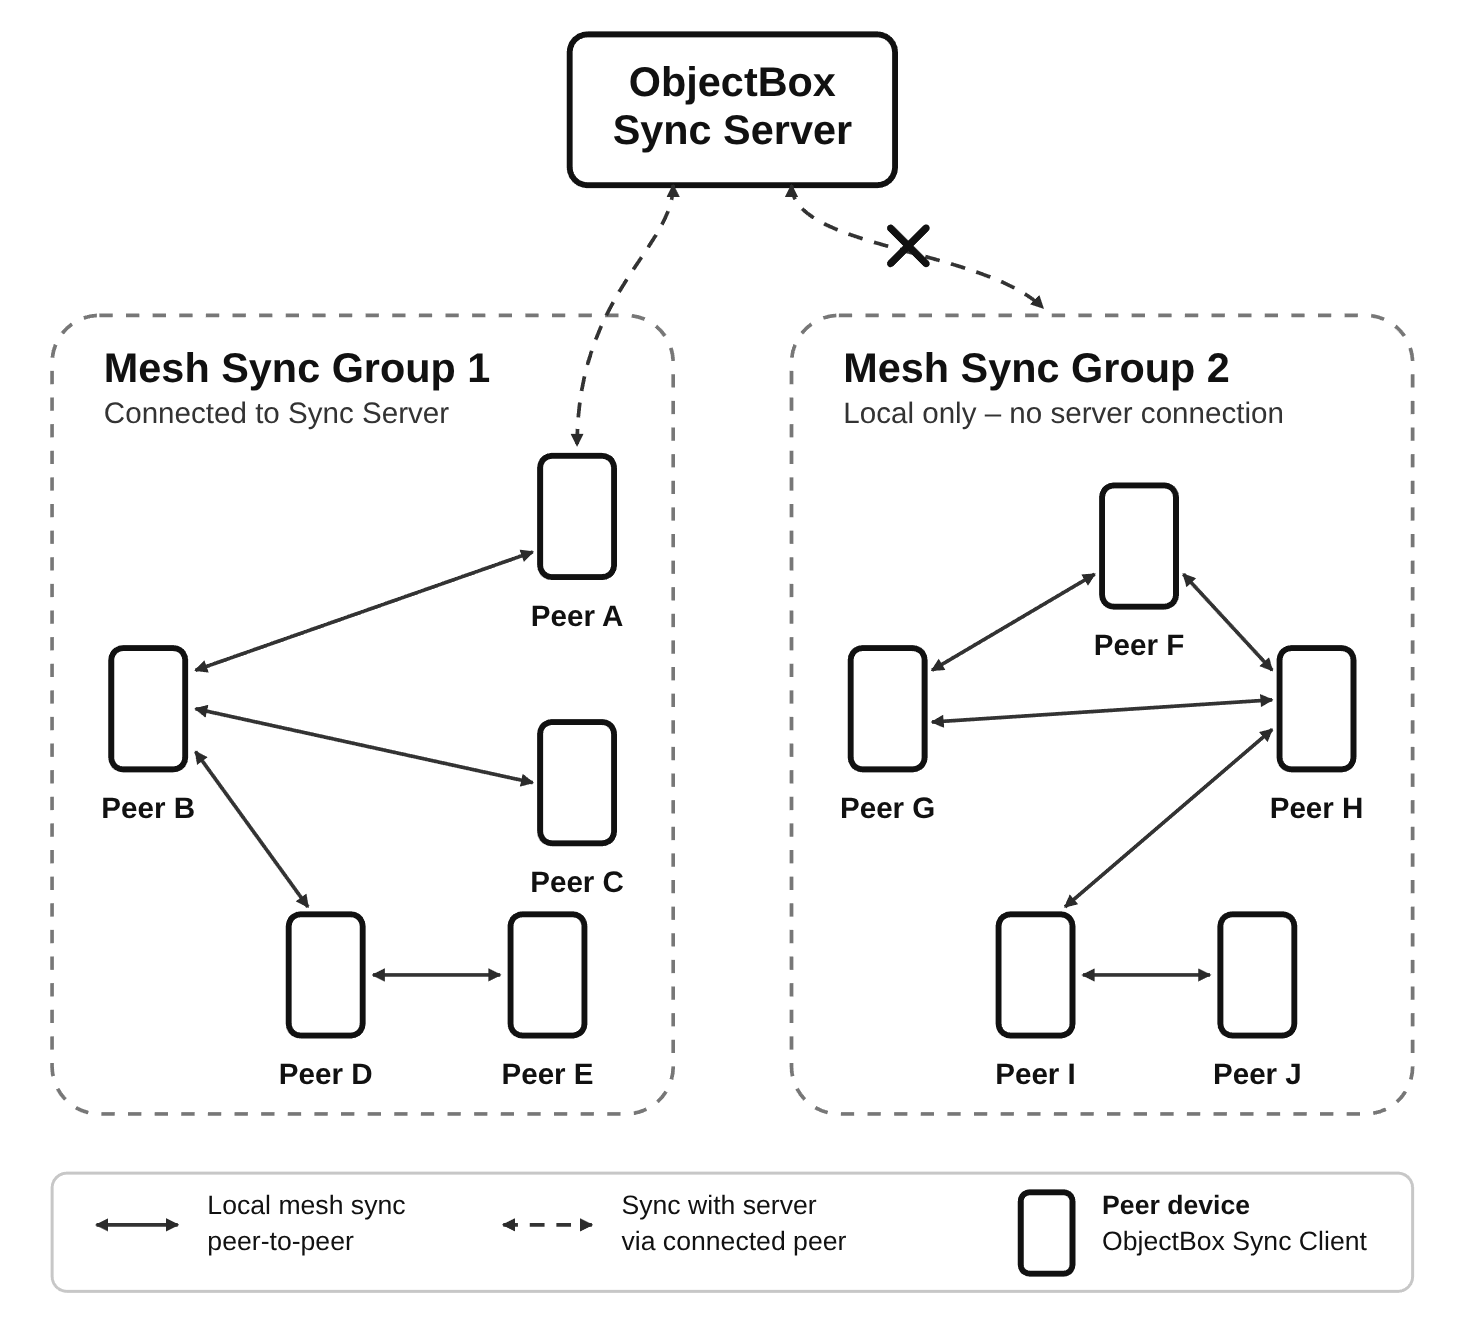
<figure><img src="/files/sqTPUePziIXdcUmwJNwu" alt="ObjectBox Mesh Sync Overview"><figcaption><p>Figure 1: ObjectBox Mesh Sync Overview</p></figcaption></figure>

Mesh Sync forms a local mesh network of devices to synchronize data between them. It can use different technology stacks, such as Bluetooth (classic and BLE), Wi-Fi (LAN and Wi-Fi Aware) and others. This allows data to move across devices even if not every device is directly connected to every other device.

Mesh Sync starts and stops together with the `SyncClient` and can coexist with regular Sync Server synchronization.

## Code: Initializing Mesh Sync

These minimal examples create the normal `SyncClient`, attach a mesh configuration and start syncing. Use the same mesh identifier on all apps/devices that should join the same mesh. The mesh ID should be unique to your application (for example, based on your application ID, like `com.example.myapp.mesh`).

{% tabs %}
{% tab title="Java" %}

```java
import io.objectbox.meshsync.android.AndroidMeshSync;
import io.objectbox.sync.MeshConfig;
import io.objectbox.sync.Sync;
import io.objectbox.sync.SyncClient;
import io.objectbox.sync.SyncCredentials;

MeshConfig meshConfig = AndroidMeshSync.createConfig(context, "com.example.myapp.mesh");

SyncClient syncClient = Sync.client(boxStore)
        .url("ws://sync.example.com:9999")
        .credentials(SyncCredentials.none())
        .mesh(meshConfig)
        .buildAndStart();
```

{% endtab %}

{% tab title="Kotlin" %}

```kotlin
import io.objectbox.meshsync.android.AndroidMeshSync
import io.objectbox.sync.MeshConfig
import io.objectbox.sync.Sync
import io.objectbox.sync.SyncClient
import io.objectbox.sync.SyncCredentials

val meshConfig: MeshConfig = AndroidMeshSync.createConfig(context, "com.example.myapp.mesh")

val syncClient: SyncClient = Sync.client(boxStore)
    .url("ws://sync.example.com:9999")
    .credentials(SyncCredentials.none())
    .mesh(meshConfig)
    .buildAndStart()
```

{% endtab %}

{% tab title="Dart/Flutter" %}

```dart
import 'package:objectbox/objectbox.dart';
import 'package:objectbox_sync_flutter_libs/objectbox_sync_flutter_libs.dart'
    show createMeshConfig;

final mesh = await createMeshConfig('com.example.myapp.mesh');

final syncClient = SyncClient(
  store,
  ['ws://sync.example.com:9999'],
  [SyncCredentials.none()],
  mesh: mesh,
);

syncClient.start();
```

{% endtab %}

{% tab title="C++" %}

```cpp
#include "objectbox-sync.hpp"

obx::MeshOptions meshOptions("com.example.myapp.mesh");

// Provided by a platform SDK or custom transport integration.
meshOptions.registerNetwork(networkSharedPtr);

std::shared_ptr<obx::SyncClient> syncClient = obx::Sync::client(store)
    .url("ws://sync.example.com:9999")
    .credentials(obx::SyncCredentials::none())
    .mesh(std::move(meshOptions))
    .build();

syncClient->start();
```

Note: The C and C++ APIs expose the underlying mesh options, but a platform transport must be registered before creating the Sync client. Do not use `obx_mesh_opt_network_internal()` directly unless your platform SDK or integration provides the required transport handle.
{% endtab %}

{% tab title="C" %}

```c
#include "objectbox-sync.h"

OBX_sync_options* sync_opt = obx_sync_opt(store);
obx_sync_opt_add_url(sync_opt, "ws://sync.example.com:9999");

OBX_mesh_options* mesh_opt = obx_mesh_opt("com.example.myapp.mesh");

// Provided by a platform SDK or custom transport integration.
obx_mesh_opt_network_internal(mesh_opt, network_shared_ptr);

// obx_sync_opt_mesh() consumes mesh_opt, including when an error occurs.
obx_sync_opt_mesh(sync_opt, mesh_opt);

OBX_sync* sync_client = obx_sync_create(sync_opt);
obx_sync_credentials(sync_client, OBXSyncCredentialsType_NONE, NULL, 0);
obx_sync_start(sync_client);
```

Note: The C and C++ APIs expose the underlying mesh options, but a platform transport must be registered before creating the Sync client. Do not use `obx_mesh_opt_network_internal()` directly unless your platform SDK or integration provides the required transport handle.
{% endtab %}
{% endtabs %}

## Setup

Keep the regular ObjectBox Sync plugin and setup from [Sync Client](/sync-client#objectbox-sync-enabled-library).

Mesh Sync is available starting with version `6.0.0-beta` of the ObjectBox Java and Dart libraries.

{% tabs %}
{% tab title="Android Kotlin DSL" %}
Use the Sync variant of ObjectBox version `6.0.0-beta` (or later), and add the Mesh Sync library for Android:

```kotlin
dependencies {
    implementation("io.objectbox:objectbox-meshsync-android:6.0.0-beta")
}
```

This library provides the mesh network for Android using [Google Nearby Connections](https://developers.google.com/nearby/connections/overview). It also includes the required manifest permissions (see [Permissions](#permissions)) and the `play-services-nearby` dependency, so you do not need to add these yourself.
{% endtab %}

{% tab title="Android Groovy" %}
Use the Sync variant of ObjectBox version `6.0.0-beta` (or later), and add the Mesh Sync library for Android:

```groovy
dependencies {
    implementation "io.objectbox:objectbox-meshsync-android:6.0.0-beta"
}
```

This library provides the network transport for specific to Android. It also includes the required manifest permissions (see [Permissions](#permissions)) and the `play-services-nearby` dependency, so you do not need to add these yourself.
{% endtab %}

{% tab title="Dart/Flutter" %}
Use version `6.0.0-beta` (or later) of the ObjectBox Dart packages, which contain Mesh Sync support:

```yaml
dependencies:
  objectbox: ^6.0.0-beta
  objectbox_sync_flutter_libs: ^6.0.0-beta
```

On Android, the `objectbox_sync_flutter_libs` plugin already includes the Mesh Sync library for Android, with the required manifest permissions and the Google Nearby Connections dependency.
{% endtab %}
{% endtabs %}

## Permissions

Mesh Sync may use Bluetooth, Wi-Fi and location-related Android permissions for discovery and connections.

The Mesh Sync library for Android declares the permissions that may be required by Nearby Connections in its manifest. They are automatically merged into your app's manifest, so you do not need to declare them yourself. This applies to both Android (Java/Kotlin) apps and Flutter apps.

For reference, these are the permissions added by the library:

```xml
<uses-permission android:name="android.permission.ACCESS_WIFI_STATE" />
<uses-permission android:name="android.permission.CHANGE_WIFI_STATE" />
<uses-permission android:name="android.permission.BLUETOOTH" />
<uses-permission android:name="android.permission.BLUETOOTH_ADMIN" />
<uses-permission android:name="android.permission.ACCESS_COARSE_LOCATION" />
<uses-permission android:name="android.permission.ACCESS_FINE_LOCATION" />
<uses-permission android:name="android.permission.BLUETOOTH_ADVERTISE" />
<uses-permission android:name="android.permission.BLUETOOTH_CONNECT" />
<uses-permission
    android:name="android.permission.BLUETOOTH_SCAN"
    android:usesPermissionFlags="neverForLocation" />
<uses-permission
    android:name="android.permission.NEARBY_WIFI_DEVICES"
    android:usesPermissionFlags="neverForLocation" />
```

Note that not all of these permissions may be required. Depending on a device's Android version and your app's needs, only some of them may actually be necessary. For example, location permissions are typically not required for Nearby Connections on recent Android releases. To remove permissions your app does not need, use [merge rule markers](https://developer.android.com/build/manage-manifests) in your app's manifest:

```xml
<uses-permission
    android:name="android.permission.ACCESS_COARSE_LOCATION"
    tools:node="remove" />
<uses-permission
    android:name="android.permission.ACCESS_FINE_LOCATION"
    tools:node="remove" />
```

### Runtime Permissions

Request all dangerous (runtime) permissions before starting Mesh Sync. On modern Android versions this typically includes nearby devices, Bluetooth scan/connect/advertise and location permissions. Location services may also need to be enabled on the device for discovery to work reliably.

If permissions are only granted after the sync client has started, call `retryNetworks()` on the running mesh, so it immediately retries starting its network radios. (Advertising is also retried automatically with an increasing delay, see `advertisingRetryMillis` in [Configuration](#configuration).)

{% tabs %}
{% tab title="Android (Kotlin/Java)" %}
The `MeshSyncPermissions` helper class requests any missing runtime permissions and notifies the mesh once they are granted:

```kotlin
class ExampleActivity : Activity() {

    private val meshSyncPermissions = MeshSyncPermissions(this)

    override fun onRequestPermissionsResult(
        requestCode: Int,
        permissions: Array<out String>,
        grantResults: IntArray
    ) {
        super.onRequestPermissionsResult(requestCode, permissions, grantResults)
        meshSyncPermissions.notifyMeshIfPermissionsGranted(requestCode, syncClient.mesh)
    }

    fun onRequestPermissionsButtonClick() {
        meshSyncPermissions.requestIfMissing()
    }
}
```

If your app already [requests runtime permissions](https://developer.android.com/training/permissions/requesting) for other purposes, you can instead use `MeshSyncPermissions.runtimePermissions()` (or `missingRuntimePermissions()`) with your own permission logic, and call `MeshSync.retryNetworks()` once permissions are granted.
{% endtab %}

{% tab title="Dart/Flutter" %}
In Dart, `createMeshConfig()` requests the missing runtime permissions from the user via the system UI. It does not wait for the user's decision: the mesh network is created immediately. Pass an `onPermissionsGranted` callback to get notified once the user has granted (some of) the requested permissions; it should call `retryNetworks()` on the running mesh:

```dart
SyncClient? syncClient;

final mesh = await createMeshConfig(
  'com.example.myapp.mesh',
  onPermissionsGranted: () => syncClient?.mesh?.retryNetworks(),
);

syncClient = SyncClient(
  store,
  ['ws://sync.example.com:9999'],
  [SyncCredentials.none()],
  mesh: mesh,
);
```

Alternatively, you can also implement your own permission request logic, and pass `false` to the `requestPermissions` parameter to prevent requesting runtime permissions. Note that `createMeshConfig()` will only request runtime permissions if they are not already granted.
{% endtab %}
{% endtabs %}

## Configuration

The mesh identifier controls which peers can discover each other. Peers with different identifiers ignore each other. Use different identifiers to isolate sync groups.

| Option                            | Default  | Description                                                                                                                          |
| --------------------------------- | -------- | ------------------------------------------------------------------------------------------------------------------------------------ |
| `meshId`                          | Required | Mesh network identifier.                                                                                                             |
| `maxConnectionCount`              | `3`      | Maximum number of simultaneous peer connections.                                                                                     |
| `backoffMillis`                   | `10000`  | Delay before retrying a failed connection.                                                                                           |
| `evictionBackoffMillis`           | `30000`  | Delay between peer evictions when a full peer makes room for a newcomer.                                                             |
| `randomSeed`                      | `0`      | Random seed; `0` uses the current time.                                                                                              |
| `requestTimeoutMillis`            | `5000`   | Timeout for requesting a missing sync log from a peer before trying another peer.                                                    |
| `advertisingDelayMillis`          | `2000`   | Delay before advertising starts after Mesh Sync starts.                                                                              |
| `advertisingRetryMillis`          | `5000`   | Base delay before retrying advertising after it failed to start (e.g. due to missing permissions); retried with exponential backoff. |
| `advertisingRetryMaxMillis`       | `60000`  | Upper bound for the advertising retry backoff.                                                                                       |
| `connectDelayMillis`              | `1000`   | Minimum delay between outgoing connection attempts.                                                                                  |
| `initialDiscoveryDurationSeconds` | `30`     | Duration of the first discovery phase; `0` means it does not stop by time.                                                           |
| `discoveryDurationSeconds`        | `15`     | Duration of later discovery phases; `0` means they do not stop by time.                                                              |
| `discoveryPauseSeconds`           | `45`     | Pause between discovery phases.                                                                                                      |
| `discoveryPauseJitterSeconds`     | `15`     | Random positive or negative jitter applied to the discovery pause.                                                                   |
| `txLogBatchSizeKb`                | `100`    | Soft payload size cap for batching sync logs into a single transfer.                                                                 |
| `txLogBatchMaxCount`              | `1000`   | Maximum number of sync logs to batch into one transfer.                                                                              |
| `txLogMaxAgeSeconds`              | `28800`  | Maximum age of sync logs kept in the local mesh storage (default: 8 hours).                                                          |

The default `maxConnectionCount` of `3` is a good starting point for most meshes. A value of `4` may improve fault tolerance, but it increases radio activity. Values above `4` are usually not recommended. A value of `1` creates pairs and is not a real mesh topology.

Set configuration options using the API for your language. Note that not every option is exposed by every language API yet; for example, the Java/Kotlin API currently does not expose `randomSeed` and `txLogMaxAgeSeconds`. The following examples show how to configure a mesh and set `maxConnectionCount` to `4`.

{% tabs %}
{% tab title="Java" %}
Configure optional settings using the chainable setters of `MeshConfig`:

```java
MeshConfig meshConfig = AndroidMeshSync.createConfig(context, "com.example.myapp.mesh")
        .maxConnectionCount(4);
```

{% endtab %}

{% tab title="Kotlin" %}
Configure optional settings using the chainable setters of `MeshConfig`:

```kotlin
val meshConfig = AndroidMeshSync.createConfig(context, "com.example.myapp.mesh")
    .maxConnectionCount(4)
```

{% endtab %}

{% tab title="Dart/Flutter" %}

```dart
final mesh = await createMeshConfig(
  'com.example.myapp.mesh',
  maxConnectionCount: 4,
);
```

{% endtab %}

{% tab title="C++" %}

```cpp
obx::MeshOptions meshOptions("com.example.myapp.mesh");
meshOptions.maxConnectionCount(4);
```

{% endtab %}

{% tab title="C" %}

```c
OBX_mesh_options* mesh_opt = obx_mesh_opt("com.example.myapp.mesh");
obx_mesh_opt_max_connection_count(mesh_opt, 4);
```

{% endtab %}
{% endtabs %}

If several devices start at the same time, give discovery and connection setup a little time. Mesh Sync intentionally staggers advertising and outgoing connection attempts to reduce radio contention.

## Diagnostics

The running mesh can report its state and connected peer count. Important states are `Created`, `Discovering`, `FullyConnected`, `Stopped` and `Dead`. Useful counters include discovered peers, connected peers, failed connection attempts, sent and received messages, received sync logs and applied sync logs.

{% tabs %}
{% tab title="Java" %}

```java
MeshSync mesh = syncClient.getMesh();
if (mesh != null) {
    System.out.println(mesh.getStateString());
    System.out.println(mesh.getConnectedPeerCount());
    System.out.println(mesh.getStats(MeshStats.TX_LOGS_APPLIED));
}
```

{% endtab %}

{% tab title="Kotlin" %}

```kotlin
val mesh: MeshSync? = syncClient.mesh
if (mesh != null) {
    println(mesh.stateString)
    println(mesh.connectedPeerCount)
    println(mesh.getStats(MeshStats.TX_LOGS_APPLIED))
}
```

{% endtab %}

{% tab title="Dart/Flutter" %}

```dart
final mesh = syncClient.mesh;
if (mesh != null) {
  print(mesh.stateString());
  print(mesh.connectedPeerCount());
  print(mesh.stats(MeshStats.txLogsApplied));
}
```

{% endtab %}

{% tab title="C++" %}

```cpp
obx::Mesh mesh = syncClient->mesh();
if (mesh.isAttached()) {
    std::cout << mesh.stateString() << std::endl;
    std::cout << mesh.connectedPeerCount() << std::endl;
    std::cout << mesh.statsU64(OBXMeshStats_txLogsApplied) << std::endl;
}
```

{% endtab %}

{% tab title="C" %}

```c
OBX_mesh* mesh = obx_sync_mesh(sync_client);
if (mesh) {
    printf("%s\n", obx_mesh_state_string(mesh));
    printf("%zu\n", obx_mesh_connected_peer_count(mesh));

    uint64_t applied = 0;
    obx_mesh_stats_u64(mesh, OBXMeshStats_txLogsApplied, &applied);
    printf("Applied sync logs: %llu\n", (unsigned long long) applied);
}
```

{% endtab %}
{% endtabs %}

## Current Limitations

Mesh Sync is currently in public preview. Until the final release, we'll finalize the API and plan to address the following limitations.

* Only works on Android (Mesh Sync has a network abstraction layer that is currently only implemented for Android)
* Data expiration is time-based only: sync logs kept for the mesh expire after `txLogMaxAgeSeconds` (default: 8 hours); there is no size-based limit yet.
* TBD: Peer authentication; currently there's no auth between peers other than the mesh ID.
* TBD: the mesh ID (required at construction time) is the only mechanism to form sync groups.

## Related Pages

* [Sync Client](/sync-client)
* [Troubleshooting Sync](/troubleshooting-sync)


# MongoDB Sync Connector

Bi-directional Data Sync with MongoDB - on-premise and to the cloud

ObjectBox Data Sync syncs data with MongoDB using the integrated [MongoDB Sync Connector](https://objectbox.io/mongodb/). Changes made on ObjectBox clients are synchronized in real-time to MongoDB and vice versa.

{% hint style="info" %}
Use MongoDB as your backend and ObjectBox as your superfast local database.
{% endhint %}

## Bi-directional Synchronization with MongoDB

<figure><img src="/files/vBXh3PmzuagzMKMi1mRq" alt="Architecture: MongoDB <--> ObjectBox Sync Server <--> ObjectBox Sync Client"><figcaption><p>ObjectBox Sync Connector for MongoDB: Architecture</p></figcaption></figure>

ObjectBox Sync brings your data in MongoDB to the edge (e.g. mobile and IoT devices, big and small servers) and synchronizes changes back to MongoDB. By using ObjectBox Sync, you can make your MongoDB data always available: continue to work offline and sync in real-time when online.

## Migrating from Realm

If you are coming from Atlas Device Sync, you already know that it [reached its official end-of-life](https://www.mongodb.com/docs/atlas/app-services/deprecation/) on **September 30, 2025**, and maybe you got an extension to a later date. In any case, it's a good idea to get started with [migrating from Realm to ObjectBox](https://objectbox.io/dev-how-to/migrate/realm-to-objectbox/guide) asap. Like Realm, ObjectBox has a deep integration with the programming language allowing you to work on (persistent) objects directly; no SQL required.

## Production ready

The ObjectBox MongoDB Sync Connector reached GA status in October 2025. It is already being successfully used with large datasets and complex data models.

## Understanding ObjectBox and MongoDB

ObjectBox and MongoDB have many similarities. Nevertheless, it's important to understand some differences in terminology and concepts between the two databases. The following table illustrates these differences. It serves as background information on how to map things between the two systems:

<table><thead><tr><th width="186">Concept</th><th>ObjectBox</th><th>MongoDB</th></tr></thead><tbody><tr><td><strong>Database</strong> containing the data</td><td>A <strong>store</strong>, grouped into types (data classes).</td><td>A <strong>database</strong>, grouped into collections.</td></tr><tr><td><strong>What your application "opens"</strong></td><td>Using a name or directory a single store (database) is opened locally on device. (In the case of Sync, this is the "client database".)<br>Multiple stores can be opened, which are strictly separate.</td><td>A client is used to connect to a MongoDB server. All databases can be accessed on the server remotely.</td></tr><tr><td><strong>Arranging data in a database (e.g. data sets)</strong></td><td>A <strong>box</strong> holds all objects of the same <strong>type</strong>. A type typically matches a data class in programming languages.<br>It's part of a <strong>strict schema</strong> (data model) that is enforced. The type definition consists of a fixed set of <strong>properties</strong>.</td><td><strong>Collections</strong> are used to group documents together. By default, no strict rules are imposed (<strong>schema-less</strong>).</td></tr><tr><td><strong>Data record</strong></td><td>An <strong>object</strong> is an instance of a type. It can have data values for the <strong>properties</strong> defined in the type.</td><td>A <strong>document</strong> is a set of data values called <strong>fields</strong>. It's very similar to a JSON file.</td></tr><tr><td><strong>Modelling related data</strong></td><td>Objects can have <strong>to-one and to-many relationships</strong> to other objects. Relationships are bidirectional. Data is typically <strong>normalized</strong>.</td><td>Typically, a document <strong>embeds</strong> all "related data" into itself resulting in larger documents. Data is typically <strong>not normalized</strong>. Alternatively, one can also choose to use references, which is more similar to relationships.</td></tr><tr><td><strong>Many-to-many relationships</strong></td><td><strong>Fully supported</strong>. Unlike to-one relationships, the data is stored <strong>outside the object</strong>. Updating relations is very <strong>efficient</strong>. There's <strong>no user-defined order</strong> and <strong>no duplicates</strong>.</td><td><strong>Alternative modelling</strong> by embedding or referencing documents. <strong>Inside the document</strong>, you can have an array of IDs in a <strong>user-defined order</strong> allowing <strong>duplicates</strong>.</td></tr><tr><td><strong>Nested data records</strong></td><td>Nested data is supported by <strong>flex properties.</strong> E.g. these allow maps, which can contain nested data structures (JSON-like).</td><td>Documents contain nested data <strong>by default</strong>.</td></tr><tr><td><strong>Identifiers (IDs)</strong></td><td>IDs are <strong>64-bit integers.</strong><br>They are unique within its box and database instance.</td><td>MongoDB uses <strong>Object ID</strong> (short: OID; 12 bytes) by default and supports other ID types. OIDs are unique within their collection and likely globally unique.</td></tr></tbody></table>

## Next Steps

* Setup a MongoDB instance, either locally or in the cloud.
* Setup an ObjectBox Server instance and configure the MongoDB Sync Connector.
* Import data from MongoDB to ObjectBox initially.
* Now, two-way data synchronization between MongoDB and ObjectBox automatically happens.


# MongoDB Configuration

Ensure your MongoDB is ready to sync with ObjectBox.

In short, the ObjectBox Sync Connector only needs two things:

1. An existing MongoDB Atlas instance or a local MongoDB instance configured as a replica set.
2. A MongoDB connection URL (and thus a MongoDB user account).

## Supported MongoDB

You need at least MongoDB 5.0 or higher. If possible, use the latest 8.0 release as it provides the best performance and most of our testing happens here. Otherwise, versions 5.0 to 7.0 are also tested automatically and supported. However, we may drop support for 5.0 in the future. Contact us if you need to use an older version.

ObjectBox Sync Connector supports all MongoDB variants:

* MongoDB Community Edition (self-hosted)
* MongoDB Enterprise Advanced (self-hosted)
* MongoDB Atlas or similar cloud services (hosted)

Note: you can use the [MongoDB Atlas](https://www.mongodb.com/products/platform/atlas-database) Cloud service, which offers a free tier (M0) that is known to work well with the MongoDB Sync Connector.

## Separate MongoDB Instance for Testing

It is highly recommended to use a separate MongoDB instance for testing the ObjectBox Sync Connector. Switch to a production MongoDB instance only after everything has been thoroughly tested and confirmed to be working correctly.

It is common to start with a local MongoDB instance during the development process for quick roundtrips and tests.

## Ensure that your MongoDB instance is a Replica Set

{% hint style="info" %}
**MongoDB Atlas clusters** are already replica sets, no additional configuration is required.
{% endhint %}

If you use a local MongoDB instance (e.g. a local instance or via Docker), it likely is not a replica set yet. Only a MongoDB replica set instance provides the necessary features for the MongoDB Sync Connector to work (e.g. MongoDB's change streams).

A local **standalone MongoDB instance** (MongoDB Community Edition is fine) can be converted to a replica set. You can do this either by following the [official MongoDB documentation](https://www.mongodb.com/docs/manual/tutorial/convert-standalone-to-replica-set/), or by following these simplified steps (tested on Ubuntu Linux) for a single node setup:

1. Stop the MongoDB service: `sudo systemctl stop mongod`
2. Edit the MongoDB configuration file: `sudo vi /etc/mongod.conf`
3. Add the following lines to the configuration file:

   ```yaml
   replication:
     replSetName: "rs0"
   ```
4. Start the MongoDB service: `sudo systemctl start mongod`
5. Connect to the MongoDB shell: `mongosh`
6. Initialize the replica set via the MongoDB shell: `rs.initiate()`

Note: If you are running MongoDB within a Docker container, the general principle of enabling replica set mode still applies. You would typically modify the MongoDB configuration file used by the Docker container or pass appropriate command-line arguments to `mongod` when starting the container to initiate it as a replica set. Consult the documentation for the specific MongoDB Docker image you are using for precise instructions.

## Prepare a user account for the MongoDB Sync Connector

It is recommended to use a separate MongoDB user account for the MongoDB Sync Connector. To create a MongoDB user account, see [MongoDB User Accounts](https://www.mongodb.com/docs/manual/tutorial/create-users/). The user must have certain privileges, for which you have two options, which we will discuss next:

* Database-level privileges: simple to set up, e.g. for evaluating and to quickly get started
* Collection-level privileges: more granular control, safer

### Database-level privileges

This is the easiest way to set up a user account for the MongoDB Sync Connector: give the user the `readWrite` role on the database being synchronized. The `readWrite` is a built-in role that gives read and write access to all collections in the database.

A disadvantage of the database level user config is that you may give more grants than strictly necessary to the user. On the other hand this setup is convenient during development, when new types/collection are added as it requires no changes.

### Collection-level privileges

If you have additional collections in the database, which you do not want to synchronize with ObjectBox, granting privileges on the collection level is an alternative. Ensure that the user account has read and write access to the database and collections that you want to synchronize.

The setup requires three steps (all are required):

1. Grant the `readWrite` role on each of the collections that take part in syncing. ObjectBox obviously needs to read and write to the collections during sync.
2. Grant the `readWrite` role on the collection named `__ObjectBox_Metadata`. The ObjectBox Sync Connector will store a few small metadata documents in this collection.
3. Grant the `find` and `changeStream` action on the database, e.g. by defining a custom role for the database. Using the predefined `read` role works too, but we recommend to keep the grants as narrow as possible. This is required for the change stream processing, which allows ObjectBox to receive updates from MongoDB (in "real-time").

Note: When new types/collections are added, do not forget to update the grants for the user!

### Use the configured user

Once the user account is set up, you can get the MongoDB connection URL for the [ObjectBox Sync Connector setup](/mongodb-sync-connector/objectbox-sync-connector-setup), which is the next step.

### Troubleshooting user privileges

If you encounter errors, the MongoDB status page in the Admin UI should be the first place to check. This page shows you potential issues with the user privileges and also the last error message:

<figure><img src="/files/6qc2iwsOB4uxNG8Wts9C" alt="ObjectBox MongoDB User grants missing"><figcaption><p>Figure 1: Example when MongoDB user grants are missing</p></figcaption></figure>

If this does not help, please enable debug logs (see [troubleshooting sync](/troubleshooting-sync)) and check the logs for irregular messages.

#### Change stream processing

Issue: Changes from MongoDB do not sync to ObjectBox (after the full sync was made).

Error 1: "Could not start change stream processing (operation error code 13): not authorized on objectbox\_sync to execute command { aggregate: 1, pipeline: \[ { $changeStream: ..."

Error 2: "Could not start change stream processing (operation error code 8000): user is not allowed to do action \[changeStream] on ..."

Solution (primary): Double-check if the `find` and `changeStream` actions are granted to the database for the user. See the section on collection-level privileges above for details.

Solution (alternative; try the primary solution first): In the Atlas UI, edit the database user and either disable "Restrict Access to Specific Clusters/Federated Database Instances/Stream Processing Instances", or, if the UI allows it, enable the Stream Processing Instances.


# ObjectBox Sync Connector Setup

Configure the ObjectBox Sync Server to connect to MongoDB and do an initial synchronization.

Once you have a [MongoDB instance running](/mongodb-sync-connector/mongodb-configuration), you can connect the ObjectBox Sync Server to it.

## ObjectBox preparations

Before using the MongoDB Sync Connector, let us ensure that the ObjectBox Sync Server is up and running. This involves basically two steps: having a data model and running the ObjectBox Sync Server. Read on for details.

### Create and provide a data model

{% hint style="info" %}
The ObjectBox data model defines which collections are synced with MongoDB (and much more).
{% endhint %}

In general, ObjectBox relies on a data model, which is typically defined as part of your (client) application. This is a different approach to MongoDB and other databases. The data model is defined by developers using special annotations in the programming language of your application. If you are not familiar with that process yet, then this is a good time to get familiar with ObjectBox "annotations" and how to define your data model. This is dependent on the programming language:

* [Java, Kotlin, Dart, Python](https://docs.objectbox.io/entity-annotations)
* [Swift](https://swift.objectbox.io/entity-annotations)
* [Go](https://golang.objectbox.io/entity-annotations)
* [C, C++](https://cpp.objectbox.io/entity-annotations) (uses a FlatBuffers schema file)

All ObjectBox build tools also generate a data model JSON file, which must be provided to the ObjectBox Sync Server. This data model is also used by the MongoDB Sync Connector to map data between ObjectBox and MongoDB (see the [data mapping page](/mongodb-sync-connector/mongodb-data-mapping)).

### Run and test Sync Server

To avoid any later issues, run and test Sync Server without connecting to MongoDB and your client application, and validate that data is synced.

See the [Sync Server](/sync-server) page on how to run Sync Server.

By then you should be able to reach the ObjectBox Sync Server [Admin web app](/sync-server#admin-web-ui). Navigate to the "Schema" page to see your data model, which should look similar to this:

<figure><img src="/files/8BEYnHInYIYaw6vfQpFf" alt="Admin web app schema page showing a Tape with its properties"><figcaption><p>Figure 1: Data model (schema), which will be synced with MongoDB</p></figcaption></figure>

For a visual overview, you can also try the "Type dependencies" and "Class" diagrams on the page.

## Configure the MongoDB connection

{% hint style="warning" %}
Use a separate MongoDB instance for testing purposes.
{% endhint %}

Now that the Sync Server is up and running, let us connect it to MongoDB. This can be done via CLI arguments or via the configuration file. These two settings are essential:

* The **"MongoDB URL"** is the [MongoDB connection string](https://www.mongodb.com/docs/manual/reference/connection-string/) (URL or URI). This can be an empty string for the default `127.0.0.1:27017` host (i.e. a MongoDB instance running locally for development).
* The **"primary MongoDB database name"** is the "database" containing the collections used for sync. By default, this is "objectbox\_sync". This value must not be changed after the full sync with MongoDB was made. See below for more information.

### Configure via CLI arguments

To configure the ObjectBox MongoDB Sync Connector via CLI arguments when starting Sync Server (see [Sync Server](/sync-server)), you can use the following CLI arguments:

* `--mongo-url`: The MongoDB connection string (URL or URI).
* `--mongo-db`: The primary MongoDB database name.
* `--mongo-initial-import`: Automatically triggers the full sync/import from MongoDB on startup (equivalent to `mongoDb.automaticInitialImport` in the JSON config).

{% hint style="info" %}
If you are using Docker on Windows/macOS to run an instance of the ObjectBox Sync server, use `host.docker.internal` as the host in the MongoDB connection string for the `--mongo-url` parameter, for example,

```bash
docker run --rm -it \
    --volume "$(pwd):/data" \
    --user $UID \
    --publish 127.0.0.1:9999:9999 \
    --publish 127.0.0.1:9980:9980 \
    objectboxio/sync:sync-server-${sync_server_version} \
    --model /data/objectbox-model.json \
    --unsecured-no-authentication \
    --admin-bind 0.0.0.0:9980 \
    --mongo-url mongodb://host.docker.internal:27017 \
    --mongo-db test-db
```

This enables the Sync server running within the container to access the MongoDB instance running on the host system. Note: **it only works on Windows and macOS**, but not on Linux.
{% endhint %}

### Configure via configuration file

Alternatively, configure the MongoDB connection in the Sync Server configuration file (see [Configuration](/sync-server/configuration)). In your `sync-server-config.json`, add a new `mongoDb` node which contains key/value pairs for MongoDB specific configuration attributes:

```json
{
    "mongoDb": {
        "url": "mongodb://1.2.3.4:27017",
        "database": "MyDatabase"
    }
}
```

### The primary MongoDB database

At this point, ObjectBox syncs against one "primary MongoDB database name". It's called the "primary" DB name as ObjectBox will be able to target multiple MongoDB databases in the future. Reach out to the ObjectBox team if you are interested in this feature.

{% hint style="warning" %}
Do not switch the primary database after the full sync with MongoDB was made.
{% endhint %}

During development, you may want to "switch" the primary MongoDB database. In this case, it's recommended to delete the ObjectBox database and do a complete full sync with MongoDB from scratch. In the future we may provide additional options.

Note that there is no way to **rename** a database inside MongoDB. Instead, one usually copies a database to a new name and deletes the old one ("dump and restore" is a variation). This is another case of "switching" the database, so you also must delete the ObjectBox database and do a complete full sync with MongoDB from scratch.

## All configuration options

While `url` and `database` are the mandatory options (explained in the section above), the JSON configuration for MongoDB covers additional options.

```json
{
    "mongoDb": {
        "url": "mongodb://1.2.3.4:27017",
        "database": "MyDatabase",
        "automaticInitialImport": true,
        "maxPropertySizeToMongoDb": 16776192,
        "skipOversizedDocumentsToMongoDb": true,
        "strictConversionsFromMongoDb": true,
        "strictConversionsToMongoDb": true,
        "emptyListForAbsentValuesFromMongoDb": true      
    }
}
```

Each option explained:

* `automaticInitialImport`: ObjectBox sync with MongoDB usually starts with an initial full sync/import from MongoDB. This is usually triggered manually through the Admin UI, but setting this flag will trigger the import automatically on startup.
* `emptyListForAbsentValuesFromMongoDb`: For list (vector/array) property types with no value present in MongoDB, use empty lists when converting to ObjectBox property values. By default, absent values are also absent in ObjectBox typically resulting in null values. @note if the value is an explicit null in MongoDB, it will remain null in ObjectBox.
* `maxPropertySizeToMongoDb`: The maximum size in bytes for a single property value (strings and vectors) synced to MongoDB; the default is 16 MB minus 1 KB (16776192), and 0 disables the check. MongoDB rejects documents over its 16 MB size limit, so larger property values are skipped (omitted from the MongoDB document) and reported as error log events, allowing sync to MongoDB to continue with the remaining values of the object. Note: on updates, a skipped property keeps its previously synced value in the MongoDB document (if any).
* `skipOversizedDocumentsToMongoDb`: If enabled, entire documents exceeding MongoDB's 16 MB document size limit (e.g. due to multiple large property values) are skipped and reported as error log events, so that sync to MongoDB continues with the next operation. By default, this is off: an oversized document causes errors that stop the sync to MongoDB. In that case, sync remains blocked until this option is enabled or `maxPropertySizeToMongoDb` cuts off the oversized properties. Note: just updating the oversized object does not unblock sync, as the sync history still carries the oversized version of the object.
* `strictConversionsFromMongoDb`: Enables strict conversions of data values from MongoDB documents to ObjectBox objects. By default, strict mode is off to ensure that convertable data is synced. On conversion errors, the sync to ObjectBox will fail without syncing the document. This may completely stop the sync from MongoDB to ObjectBox. Thus, you should carefully consider the trade-off before enabling this option for production use.
* `strictConversionsToMongoDb`: Enables strict conversions of data values from ObjectBox objects to MongoDB documents. By default, strict mode is off to ensure that convertable data is synced. On conversion errors, the sync to MongoDB will fail without syncing the object. This may completely stop the sync from ObjectBox to MongoDB. Thus, you should carefully consider the trade-off before enabling this option for production use.

## Initial import from MongoDB

To fully enable data synchronization, an initial import from MongoDB is necessary. This syncs all collections from MongoDB, which are part of the ObjectBox data model, into ObjectBox. It performs this with snapshot isolation level to offer a maximum level of consistency, e.g. concurrent updates from other systems do not interfere with this process (when done in accordance with MongoDB transaction semantics). From this snapshot onwards, all changes are synchronized continuously between MongoDB and ObjectBox. If one system goes offline, the synchronization will pick up where it left off, so no change will be lost.

When you navigate to a MongoDB page in the Admin UI, you will see a prominent message if the initial import has not run yet:

<figure><img src="/files/4PtKQUienBUbWLWJJyev" alt="Admin web app initial import message"><figcaption><p>Figure 2: The initial MongoDB import still needs to be triggered</p></figcaption></figure>

## Triggering a full MongoDB import

On the "Full Sync" page beneath the "MongoDB Connector" menu, tap the "Full Import from MongoDB" button and a dialog like this will appear:

<figure><img src="/files/zpyVEIGTl5Au4mptLlcD" alt="Full MongoDB import dialog showing info and input fields for name and notes" width="563"><figcaption><p>Figure 3: MongoDB import confirmation dialog</p></figcaption></figure>

It shows you some information and input fields. You must enter your name (required) and optional notes to help you identify this import in the future. Then tap "Import" to start the import process.

During the import you can see the progress on the page. There are two main phases:

* Exporting from MongoDB: one column shows the counts of MongoDB databases, collections and documents already exported.
* Importing into ObjectBox: the next column to the right shows the counts of objects actually changed in ObjectBox and the total count of all checked objects, which should roughly match the number of documents in MongoDB.

<figure><img src="/files/MZfXxFONGucbX3VpYuVX" alt="MongoDB Example of an ongoing import process in Admin UI"><figcaption><p>Figure 4: MongoDB Example of an ongoing import</p></figcaption></figure>

As you can see in the image above, you have the possibility to abort an ongoing import process. This is to be used very cautiously, as it can yield inconsistent states of data if importing has already started (e.g. dangling relations). Then the best course of action is to start a new full sync again and let it complete. Aborting an ongoing import should be reserved for emergencies only.

A finished import will show up as "Completed" in the "State" column on a green background. At that point, it is a good time to check the logs to ensure the sync went smoothly. Also, having a look at the "Data" page will give you a good overview of the data imported.

## Viewing imports

As seen in a previous screenshot above, the "Full Sync" MongoDB page shows a table of all current and past import processes. This history gives you a good overview of what was imported and when. These are the columns:

* Started: when the import started
* State: the current state of the import; it typically goes through these phases: "Started", "Exporting", "Importing", "Completed"
* "Export: DBs/Coll./Docs": the counts of MongoDB databases, collections and documents exported
* "Changed/Objects": the count of objects actually changed in ObjectBox and the total count of all checked objects, which should roughly match the number of documents in MongoDB
* Warnings/Errors: the count of warnings and errors; details can be found in the logs
* Triggered by: the name entered for this import (in the import confirmation dialog)
* Note: the note entered for this import (in the import confirmation dialog)
* Schema Version: The ObjectBox schema version that was current when the import started. The Admin UI has a "Schema Versions" page showing the history of past versions of the data model. Thus, you can track changes to the data model over time.
* MongoDB: the URL and MongoDB version used for this import
* Logs: A link to the log events. Note: a future version will filter the logs for this import.

You can also see the timeline of an import/sync process by clicking on the state. It shows when a new state was reached and should look like this:

<figure><img src="/files/4HUeSe0mWI4OYmQH5Bo1" alt="MongoDB Example Timeline of a completed sync process in Admin UI" width="563"><figcaption><p>Figure 5: MongoDB Example Timeline of a completed sync</p></figcaption></figure>
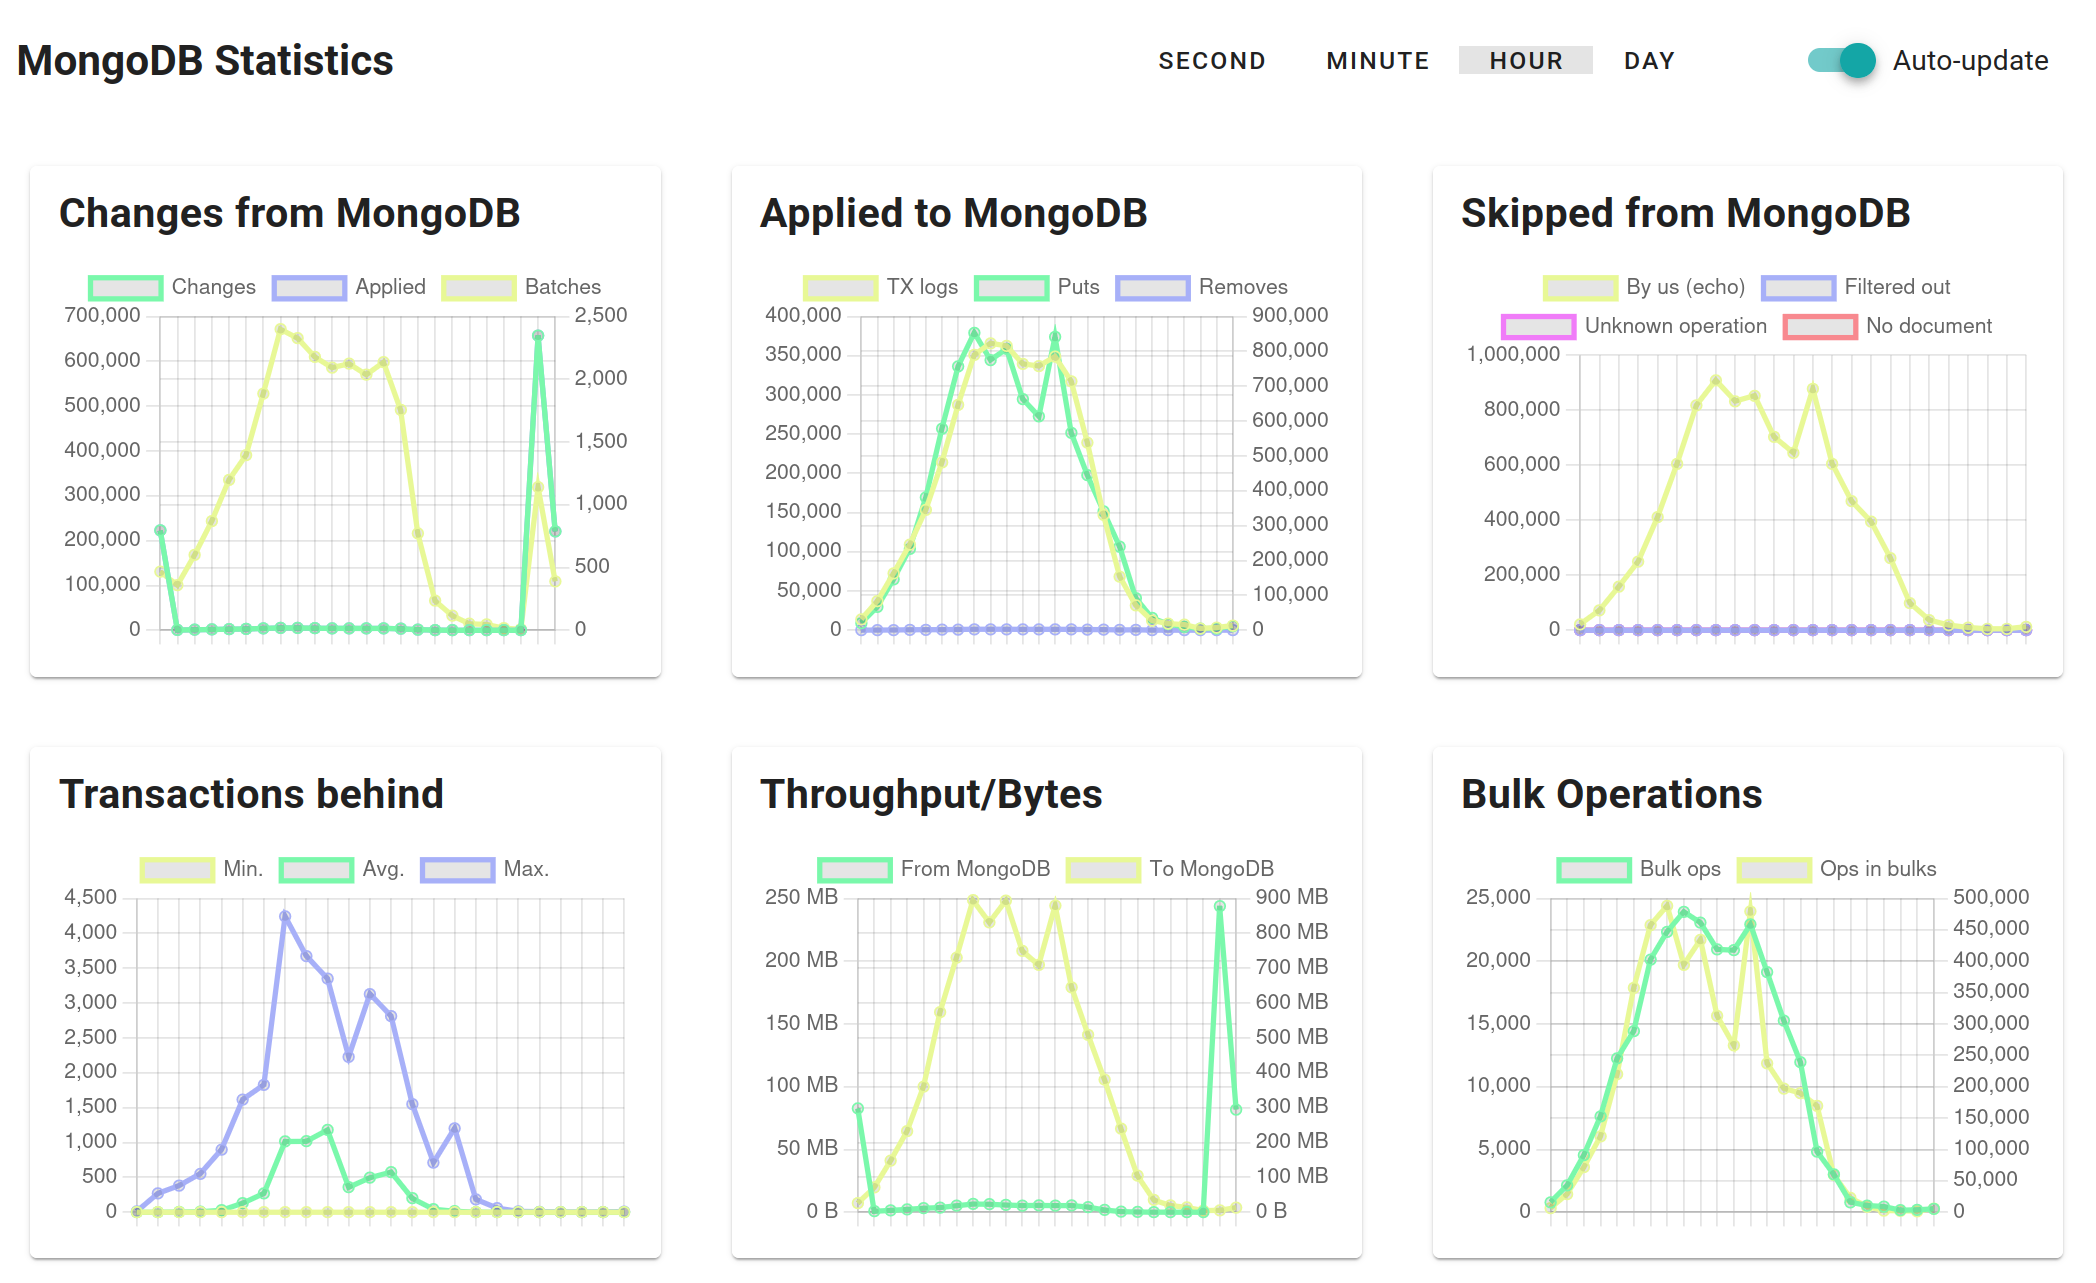
## Troubleshooting

### MongoDB Snapshot Isolation and Timeouts

{% hint style="info" %}
This section gives some technical details about MongoDB snapshot isolation. You can skip it if your import was completed successfully.
{% endhint %}

If you run into snapshot errors like "SnapshotTooOld" during an import, this is likely due to a MongoDB setting. In the ObjectBox log, you may see an error message like this:

```
Prefetch failed: Read timestamp Timestamp(1234567890, 1) is older than the oldest available timestamp.: generic server error`
```

What is happening? To read the data from MongoDB, the ObjectBox Sync Connector uses the [snapshot read concern](https://www.mongodb.com/docs/manual/reference/read-concern-snapshot/) to ensure consistent reads at a single point in time (from a strict database perspective). MongoDB keeps snapshots for a limited time, e.g. 5 minutes by default. Thus, if reading the data from MongoDB does not complete within that time, it will fail with a snapshot history error.

This issue typically only starts with MongoDB databases containing at least 10 GB, and depending on the network and MongoDB instance speed, the limit may be much higher. If you run into this error, you may want to increase the snapshot history window. A MongoDB admin (special elevated permissions are typically needed) can increase the setting [minSnapshotHistoryWindowInSeconds](https://www.mongodb.com/docs/manual/reference/parameters/#mongodb-parameter-param.minSnapshotHistoryWindowInSeconds) to a higher value. The default value is 300 (5 minutes), so adjust it according to your database size and network speed.

*Note:* with MongoDB Atlas or other cloud providers, setting the `minSnapshotHistoryWindowInSeconds` value may require filing a support ticket.

### Verify that the MongoDB Atlas cluster is reachable

First, attach to the Docker container as the root user (for details, see [troubleshooting sync](/troubleshooting-sync)):

```bash
docker exec -it --user 0 <container-id> /bin/bash
```

Then, inside the container run this:

```bash
microdnf install -y bind-utils # needs root
# From your MongoDB connection string, get the cluster address for the next command:
dig +short SRV _mongodb._tcp.<your-cluster-address> 
# This will show multiple host names; pick one host and run:
nc -vz <host> 27017
```

When this succeeds, the output should look something like this:

```
Ncat: Connected to 1.2.3.4:27017.
Ncat: 0 bytes sent, 0 bytes received in 0.05 seconds.
```


# MongoDB Data Mapping

Ensure smooth data synchronization between MongoDB and ObjectBox by correctly mapping data and types.

The ObjectBox data model defines types, which are mapped to MongoDB collections. Similarly, the properties of a type are mapped to fields (keys) inside a MongoDB document. The mapping is done via the names of the types and properties. If the names do not match, you can [define "external names"](#name-mapping) to specify different names on the MongoDB side.

Some MongoDB field types like strings match ObjectBox types and thus do not need additional mapping information. More specialized types need "external types" to be defined in the ObjectBox data model to match the MongoDB field types. This page explains how to do this.

## Objects and Documents

When you compare the data structure of simple data elements, the difference is not significant. Without nested data, the main difference you will note is the ID type.

<figure><img src="/files/KyBADr0IHzDfG30fWazk" alt="Comparison of ObjectBox Object and MongoDB Document structure" width="563"><figcaption><p>Figure 1: ObjectBox Object vs. MongoDB Document (Simplified)</p></figcaption></figure>

Note: nested documents are supported via the ObjectBox "flex properties" type or JSON strings. See the section below for details.

## Name mapping

{% hint style="info" %}
If you are fine with using the same names in ObjectBox and MongoDB, there is no further configuration needed.
{% endhint %}

By default, the names defined in the ObjectBox data model are used in MongoDB collections and fields. For example, if you have a type called "Person" with a property called "name", the collection will be named "Person" and the field will be named "name".

If you want to use different names on the MongoDB side, you can define "external names" next to the ObjectBox name. Maybe you have an existing MongoDB database with a different naming convention. For example, you want to use `camelCase` for property names in ObjectBox and `snake_case` for property names in MongoDB.

External names are defined in the ObjectBox data model (the entities) in your application code. They can be applied to types, properties and many-to-many relations. Then, as usual, you take the generated JSON model file to the Sync Server to let it know about the external names.

### Example

In the ObjectBox model, which is defined in your programming language, you define a "external name" annotation. The following example shows a simple model with a "Person" type and two properties: "name" and "lastName". The "Person" type and the "lastName" property use different names on the MongoDB side.

{% tabs %}
{% tab title="Java" %}

```java
@ExternalName("person_collection")
@Entity
@Sync
public class Person {
    // No external name annotation needed if "name" is used in MongoDB as well
    public String name;
    
    @ExternalName("last_name")
    public String lastName;
}
```

{% endtab %}

{% tab title="Kotlin" %}

```kotlin
@ExternalName("person_collection")
@Entity
@Sync
data class Person(
    // No external name annotation needed if "name" is used in MongoDB as well
    var name: String,
    
    @ExternalName("last_name")
    var lastName: String
)
```

{% endtab %}

{% tab title="Swift" %}

```swift
// objectbox: entity, sync
// objectbox: externalName="person_collection"
class Person {
    // No external name annotation needed if "name" is used in MongoDB as well
    var name: String
    
    // objectbox: externalName="last_name"
    var lastName: String
}
```

{% endtab %}

{% tab title="Dart/Flutter" %}

```dart
@Entity
@Sync
@ExternalName("person_collection")
class Person {
    // No external name annotation needed if "name" is used in MongoDB as well
    String name;
    
    @ExternalName("last_name")
    String lastName;
}
```

{% endtab %}

{% tab title="C/C++ (using Generator)" %}

```cpp
/// objectbox: sync
/// objectbox: external-name=person_collection
table Person {
    // No external name annotation needed if "name" is used in MongoDB as well
    name: string;
    
    /// objectbox: external-name=last_name
    lastName: string;
}
```

{% endtab %}

{% tab title="Go" %}

```go
// This is not yet released in Go; will likely look like this:
// `objectbox:"sync,externalName=person_collection"`
type Person struct {
    // No external name annotation needed if "name" is used in MongoDB as well
    Name string
    
    // `objectbox:"externalName=last_name"`
    LastName string
}
```

{% endtab %}
{% endtabs %}

Once the code generation kicked in, the JSON model file will also be updated (you do not edit it manually). Then the JSON model file should contain values looking like this:

```json
{
  "...": "...",
  "name": "lastName",
  "externalName": "last_name",
  "....": "..."  
}
```

## ID mapping

ObjectBox Sync automatically maps IDs when syncing with an external system like MongoDB. This way, you can use the native IDs in each system: 64-bit integer IDs in ObjectBox and, for example, 12-byte object IDs in MongoDB. This also means that the MongoDB ID is not present in ObjectBox objects and vice versa.

{% hint style="warning" %}
ObjectBox IDs are only valid on their local device. Do not store them manually (apart from relations) e.g. as a custom list or vector, when you want to sync to other devices.\
For details, you can refer to the [internal ID mapping docs](/data-model/object-ids) that occurs on each ObjectBox device.
{% endhint %}

### Special ID types

If you only use standard MongoDB object IDs, you do not need to do anything special. This section is only relevant if you want to use other ID types.

ObjectBox supports most common ID types offered by MongoDB. IDs of **incoming documents from MongoDB** are automatically detected and mapped to ObjectBox local IDs (always 64-bit integers). This mapping is persisted, and thus any change made on the ObjectBox side can be mapped back to the initial ID type and value.

For **newly created (inserted) objects on the ObjectBox side,** a new MongoDB object ID (OID) is created by default. You can customize the MongoDB ID types in the ObjectBox data model: for the ID property, define an "external property type" on the ID property. Then, ObjectBox will create a new UUID-based ID for the MongoDB document.

{% tabs %}
{% tab title="Java" %}

```java
@ExternalType(ExternalPropertyType.UUID)
private long id;
```

Available external types for IDs: `MongoId` (default), `UUID` (UUIDv7), `UUIDString` (UUIDv7 stored as string), `UUIDV4`, `UUIDV4String`.
{% endtab %}

{% tab title="Swift" %}

```swift
// objectbox: externalType="uuid"
var id: Int
```

Available external types for IDs: `mongoId` (default), `uuid` (UUIDv7), `uuidString` (UUIDv7 stored as string), `uuidV4`, `uuidV4String`.
{% endtab %}

{% tab title="Dart/Flutter" %}

```dart
@Id()
@ExternalType(type: ExternalPropertyType.uuid)
int id = 0;
```

Available external types for IDs: `mongoId` (default), `uuid` (UUIDv7), `uuidString` (UUIDv7 stored as string), `uuidV4`, `uuidV4String`.
{% endtab %}

{% tab title=".fbs (C, C++, JS)" %}
FlatBuffers schema file (in combination with ObjectBox Generator):

```
/// objectbox:external-type=Uuid
id: ulong;
```

Available external types for IDs: `MongoId` (default), `Uuid` (UUIDv7), `UuidString` (UUIDv7 stored as string), `UuidV4`, `UuidV4String`.
{% endtab %}
{% endtabs %}

The following table shows the supported ID types:

<table><thead><tr><th width="198.5333251953125">MongoDB type</th><th width="216.6998291015625" align="center">Incoming from MongoDB</th><th align="center">IDs for new documents created in ObjectBox</th></tr></thead><tbody><tr><td>Object ID</td><td align="center"><span data-gb-custom-inline data-tag="emoji" data-code="2705">✅</span></td><td align="center"><span data-gb-custom-inline data-tag="emoji" data-code="2705">✅</span><br>This is the default type</td></tr><tr><td>UUID (Binary with UUID subtype)</td><td align="center"><span data-gb-custom-inline data-tag="emoji" data-code="2705">✅</span></td><td align="center"><span data-gb-custom-inline data-tag="emoji" data-code="2705">✅</span><br>External types: Uuid (V7) or UuidV4</td></tr><tr><td>String</td><td align="center"><span data-gb-custom-inline data-tag="emoji" data-code="2705">✅</span></td><td align="center"><span data-gb-custom-inline data-tag="emoji" data-code="2705">✅</span><br>External types: UuidString (V7) or UuidV4String</td></tr><tr><td>Binary</td><td align="center"><span data-gb-custom-inline data-tag="emoji" data-code="2705">✅</span></td><td align="center">Uses default MongoDB Object ID</td></tr><tr><td>Int64</td><td align="center"><span data-gb-custom-inline data-tag="emoji" data-code="2705">✅</span></td><td align="center">Uses default MongoDB Object ID</td></tr><tr><td>Int32</td><td align="center"><span data-gb-custom-inline data-tag="emoji" data-code="2705">✅</span></td><td align="center">Uses default MongoDB Object ID</td></tr></tbody></table>

## Property/Field type mapping

### Standard Types

Most standard types do not need an explicit mapping between ObjectBox (also used in your programming language) and MongoDB:

* Strings
* Integers: integers with 8, 16 or 32 bits map to MongoDB Int32, integers with 64 bits map to MongoDB Int64
* Floating point numbers: double and float types both map to MongoDB Double
* Booleans
* Dates: Date maps to MongoDB Date, DateNano maps to MongoDB Int64
* Arrays/Vectors of standard types map to a MongoDB array (all elements have the same type, heterogeneous types are discussed below)

### Special Types

MongoDB defines several special types that do not have direct equivalents in ObjectBox. To handle these types, you can define **external property types** in your ObjectBox data model. This allows you to map ObjectBox properties to more specific MongoDB field types. For example, a string in your programming language can represent various MongoDB field types, such as a string, UUID, a Decimal128, etc. The following table lists the possible mappings:

| ObjectBox Property Type | External Property Type |   MongoDB Field Type   |
| :---------------------: | :--------------------: | :--------------------: |
|   Bytes (byte vector)   |            -           |         Binary         |
|   Bytes (byte vector)   |       Decimal128       |       Decimal128       |
|   Bytes (byte vector)   |         MongoId        |        ObjectId        |
|   Bytes (byte vector)   |       MongoBinary      | Binary/dynamic subtype |
|   Bytes (byte vector)   |          Uuid          |       Binary/UUID      |
|   Bytes (byte vector)   |         UuidV4         |       Binary/UUID      |
|           Flex          |            -           |         Object         |
|           Flex          |         FlexMap        |         Object         |
|           Flex          |       FlexVector       |          Array         |
|    Long (64-bit int)    |            -           |          Int64         |
|    Long (64-bit int)    |     MongoTimestamp     |        Timestamp       |
|          String         |            -           |         String         |
|          String         |       Decimal128       |       Decimal128       |
|          String         |       JavaScript       |    JavaScript (Code)   |
|          String         |      JsonToNative      |      Object/Array      |
|          String         |         MongoId        |        ObjectId        |
|          String         |          Uuid          |       Binary/UUID      |
|          String         |         UuidV4         |       Binary/UUID      |
|      String Vector      |            -           |  Array (strings only)  |
|      String Vector      |       MongoRegex       |          Regex         |

The external property types are defined as part of your data model on the "client" side using the external property types annotation. Check the docs for your specific ObjectBox API.

**Notes:**

* The **Flex type** is discussed in more detail in separate sections below (nested documents and arrays). Note that the flex type is not available on all ObjectBox platforms yet.
* **JsonToNative** is discussed in more detail in separate sections below (nested documents and arrays).
* **MongoBinary**: on the ObjectBox side, this is encoded as a byte vector with a 4 bytes prefix. The first 3 bytes are reserved and must be zero. The 4th byte defines the MongoDB binary sub type. After the 4 bytes prefix, the actual binary content follows.
* **MongoRegex**: on the ObjectBox side, a string vector with exactly 2 elements is created. The first element is the regex pattern, the second element is the regex options (index 0: pattern, index 1: options).
* MongoDB has the following deprecated types, which are currently not supported: Undefined, DBPointer, Symbol. If you rely on these types, please contact us. We may provide at least some support for these types.
* IDs and relations are documented separately on this page.

**Example:** a string that is mapped to a Decimal128 on the MongoDB side

{% tabs %}
{% tab title="Java" %}

```java
@ExternalType(ExternalPropertyType.DECIMAL_128)
private String decimalString;

/** Constructs a BigDecimal from the decimal string */
BigDecimal asBigDecimal() {
    return new BigDecimal(decimalString);
}
```

Note: the `asBigDecimal()` is optional as it only showcases how one could use more convenient native types on the Java side instead of strings.
{% endtab %}

{% tab title="Kotlin" %}

```kotlin
@ExternalType(ExternalPropertyType.DECIMAL_128)
var decimalString: String? = null
```

{% endtab %}

{% tab title="Swift" %}

```swift
// objectbox: externalType="decimal128"
var decimalString: String?
```

{% endtab %}

{% tab title="Dart/Flutter" %}

```dart
@ExternalType(type: ExternalPropertyType.decimal128)
String decimalString;
```

{% endtab %}

{% tab title=".fbs (C, C++, JS)" %}
FlatBuffers schema file (in combination with ObjectBox Generator):

```
/// objectbox:external-type=Decimal128
decimalString: string;
```

Available external types for IDs: `MongoId` (default), `Uuid` (UUIDv7), `UuidString` (UUIDv7 stored as string), `UuidV4`, `UuidV4String`.
{% endtab %}
{% endtabs %}

## To-One Relations

{% hint style="info" %}
If you want to learn more about ObjectBox relations, check the [relation documentation](https://docs.objectbox.io/relations).
{% endhint %}

ObjectBox Sync also automatically maps IDs used in relations.

Consider ObjectBox to-one relations, which have a single relation property pointing to another object using a 64-bit integer ID. This becomes a reference field in MongoDB's document containing the MongoDB object ID (OID). See the following illustration for an example:

<figure><img src="/files/yENTcVgIKb5qnNQ5EPfz" alt="To-One Relationship Example: motherId mapping" width="563"><figcaption><p>Figure 2: To-One Relationship Example (motherId)</p></figcaption></figure>

The supported ID types also apply for relations. For example, if a "Person" document uses a UUID as its `_id` field value, relations to it would also use the UUID as the relation ID on the MongoDB side.

## Many-to-Many Relations

Many-to-many relations work a bit differently. As illustrated in the table above, many-to-many relations work differently in ObjectBox and MongoDB. For mapping between them, the following rules apply:

* On the MongoDB side, many-to-many relations are stored as an array of ID references:
  * The IDs are stored inside the document "owning" the relationship.
  * The owning side of a relationship is always the same type (collection).
  * If you want to, you can make this relation bidirectional by adding IDs to the "target side" of the relationship. Do not make this visible in the ObjectBox data model.
* On the ObjectBox side, its native many-to-many relationships are used:
  * They are bidirectional, e.g. you can define it on the owning and target side.
  * They can be updated efficiently without touching the object.
  * They can be used in queries to link types (aka join).

As to-many relations consist of ID values, all supported types can be used. In theory, different ID types can be used in the same to-many relation. However, it is usually good practice to stick to a single ID type per MongoDB collection if possible.

## Nested Documents

MongoDB documents are key-value pairs. And because values may be documents, it is possible to have documents inside a document. This is known as "nested documents", "embedded documents" or "sub documents". ObjectBox offers two ways to handle this: [flex properties](https://docs.objectbox.io/advanced/custom-types#flex-properties) and JSON strings.

The following table shows the current support for the two variants per programming language:

| Programming Language | Flex | JSON String |
| -------------------- | :--: | :---------: |
| Java                 |   ✅  |      ✅      |
| Kotlin               |   ✅  |      ✅      |
| Swift                |      |      ✅      |
| Dart/Flutter         |      |      ✅      |
| C and C++            |      |      ✅      |

### Flex Properties Mapping

To map nested documents with [flex properties](https://docs.objectbox.io/advanced/custom-types#flex-properties), you define maps with string keys in your entity definition directly on the ObjectBox side:

{% tabs %}
{% tab title="Java" %}

```java
@Nullable Map<String, Object> stringMap;
```

{% endtab %}

{% tab title="Kotlin" %}

```kotlin
var myStringMap: MutableMap<String, Any?>? = null
```

{% endtab %}
{% endtabs %}

Flex properties characteristics and notes:

* Directly access the data as maps in your code
* Nested documents and arrays are supported
* The precision of integer types on the MongoDB side may change, e.g. Int32 to Long (64-bit)
* The order of keys is not preserved

### JSON String Mapping

An alternative is to store the nested document as a JSON string on the ObjectBox side. This is done with a standard string property and the external property type "JSON to native". Thus, on the ObjectBox side, you can use a JSON API of your choice to access the nested document.

{% tabs %}
{% tab title="Java" %}

```java
@ExternalType(ExternalPropertyType.JSON_TO_NATIVE)
private String myNestedDocumentJson;
```

{% endtab %}

{% tab title="Kotlin" %}

```kotlin
@ExternalType(ExternalPropertyType.JSON_TO_NATIVE)
var myNestedDocumentJson: String? = null
```

{% endtab %}

{% tab title="Dart/Flutter" %}

```dart
@ExternalType(type: ExternalPropertyType.jsonToNative)
String? myNestedDocumentJson;
```

{% endtab %}

{% tab title="Swift" %}

```swift
// objectbox: externalType="jsonToNative"
var myNestedDocumentJson: String?
```

{% endtab %}

{% tab title=".fbs (C, C++, JS)" %}
FlatBuffers schema file (in combination with ObjectBox Generator):

```
/// objectbox:external-type=JsonToNative
myNestedDocumentJson: string;
```

{% endtab %}
{% endtabs %}

JSON string characteristics and notes:

* JSON API to access the data
* Nested documents and arrays are supported
* The precision of integer types on the MongoDB side may change, e.g. Int32 to Long (64-bit)
* The order of keys is preserved

## Heterogeneous Arrays

{% hint style="info" %}
Homogeneous arrays (all values of the same type) are mapped automatically by ObjectBox.
{% endhint %}

Similar to nested documents, arrays with values of different types can be used inside a MongoDB document. This is supported in ObjectBox and MongoDB. The same rules apply as for nested documents.

### Flex Properties Mapping

To map nested arrays, you define lists in your entity definition directly on the ObjectBox side:

{% tabs %}
{% tab title="Java" %}

```java
@ExternalType(ExternalPropertyType.FLEX_VECTOR)
Object myArray;
```

{% endtab %}

{% tab title="Kotlin" %}

```kotlin
var myArray: MutableList<Any?>? = null
```

{% endtab %}
{% endtabs %}

### JSON String Mapping

Exactly the same approach as for nested documents applies (see above). Instead of a JSON object, a JSON array is used.


# Performance & Best Practices

Read on for some practical hints on how to sync with MongoDB efficiently and robustly.

## Transactions

When doing multiple database write operations at once, you should always use [transactions](https://docs.objectbox.io/transactions). For example, it's **much more efficient** to do 10 operations in a single transaction than doing these 10 operations in 10 separate transactions. This is a general rule applying to most databases and is especially true for ObjectBox and even more so for ObjectBox Sync.

Inside an ObjectBox transaction, you can write large quantities of objects in any order: ObjectBox is known for its extremely high CRUD performance and you likely won't run into bottlenecks. But when syncing to MongoDB, you may want to consider some technicalities of MongoDB for the best results. Thus, to avoid surprises later, use transactions (on the ObjectBox client) and consider the following rules inside a transaction:

* Most importantly, try to **avoid switching object types** for write operations often.\
  MongoDB is faster for consecutive operations of the same type (collection).\
  Example: instead of writing 100 pairs of `Person` and `Address` in a loop, first write all 100 `Person` objects and then all 100 `Address` objects.
* If possible, keep `put` operations separate from `remove` operations.\
  Example: let's say we replace 100 `Address` objects with new ones. Instead of deleting one `Address` and inserting a new `Address` in a loop, first remove all 100 `Address` objects before inserting the 100 new `Address` objects.
* The more objects you process, the more important the above recommendations get. You will most likely get away with breaking the rules with a few dozen objects without any consequence. But when processing several thousand objects in the "wrong" order, the consequences may become notable. Changes will likely be applied to MongoDB with notable delays (e.g. several seconds). In extreme cases, you may even run into MongoDB transaction timeout errors (60 seconds is the MongoDB default).

{% hint style="info" %}
**Background info:** ObjectBox is an embedded database and has practically **zero latency** for write operations within a transaction. On the other hand, MongoDB, like many databases that operate on a network, has a significant latency per operation caused by networking and internal processing. The latency is typically in the millisecond range. It only becomes noticeable when doing lots of operations, e.g. with a thousand operations, milliseconds literally become seconds. Thus, it's important to keep the number of operations low for optimal MongoDB performance. This can be achieved by considering the guidelines above: the ObjectBox Sync Connector will handle the technical details.
{% endhint %}


# Syncing Concurrent Changes

See how ObjectBox Sync manages concurrent updates from multiple devices, and choose the approach that best matches your use case.

Offline-first apps do concurrent updates all the time. Often, these updates are independent of each other, and they can be applied in any order; once all devices (Sync clients) sent their individual updates to the Sync server, all data is synced without any issues.

But what happens when **two devices edit the same object** at the same time? This is a sync conflict, and ObjectBox Sync gives you several ways to handle it.

## Default: Last Received Write Wins

By default, ObjectBox Sync resolves conflicts with a simple rule: **the last write received by the Sync server wins**. The server processes incoming updates in the order they arrive. If Device A and Device B both modify the same object while offline, whichever device syncs last will overwrite the other's changes.

{% @mermaid/diagram content="sequenceDiagram
participant A as Device A
participant S as Sync Server
participant B as Device B

```
Note over A,B: Both devices are offline
A->>A: Set task.text = "Buy oat milk"
B->>B: Set task.text = "Buy almond milk"
Note over A,B: Both devices come online
A->>S: Sync (text = "Buy oat milk")
Note over S: Server stores "Buy oat milk"
B->>S: Sync (text = "Buy almond milk")
Note over S: Last received write wins → "Buy almond milk"
S->>A: Update (text = "Buy almond milk")
Note over A,B: Both devices now have "Buy almond milk"" %}
```

This default is easy to reason about but has no notion of "wall-clock time." A device that was offline for a week and then syncs will overwrite a recent edit simply because its update arrived later.

{% hint style="info" %}
The default conflict resolution works at the **object level**: when a conflict is detected, the entire object is replaced.
{% endhint %}

ObjectBox Sync offers two property-level annotations to customize this behavior:

| Annotation          | Purpose                                                           |
| ------------------- | ----------------------------------------------------------------- |
| **Sync Clock**      | A hybrid logical clock (HLC) that enables true "last write wins." |
| **Sync Precedence** | A developer-assigned priority value: "higher precedence wins."    |

You can use them independently or combine them — when both are present, precedence is compared first, and the sync clock acts as the tie-breaker for equal precedence values.

{% hint style="info" %}
Rule of thumb: use a sync clock to avoid unexpected overwrites. E.g., when a device was offline for a long time and then syncs again, its data is likely obsolete.
{% endhint %}

## Sync Clock

A **sync clock** property is an unsigned 64-bit integer that ObjectBox Sync updates automatically on every put operation. It implements a so-called "Hybrid Logical Clock (HLC)" that combines:

* the **wall clock** (physical time) of the device, and
* a **logical counter** that increments to compensate for clock skew between devices.

This means two devices with different system clocks can still produce a consistent ordering of writes. On conflict, the write with the **higher clock value wins** — giving you true "last write wins" based on when the change was actually made, not when it was received.

{% hint style="info" %}
Initialize it to `0` in new objects; ObjectBox Sync takes care of the rest. The sync clock uses a custom internal format — do not read, interpret, or set clock values yourself.
{% endhint %}

{% hint style="warning" %}
HLC clocks still work best if the time on the devices is as accurate as possible. E.g. allow setting the time automatically in the system settings. Devices with very different times can lead to unexpected results, so make your support aware of this.
{% endhint %}

### How It Works

{% @mermaid/diagram content="sequenceDiagram
participant A as Device A (T=100)
participant S as Sync Server
participant B as Device B (T=102)

```
Note over A,B: Both devices edit the same task offline
A->>A: task.text = "Buy oat milk" (clock → 100)
B->>B: task.text = "Buy almond milk" (clock → 102)
Note over A,B: Both devices come online
B->>S: Sync (clock 102, "Buy almond milk")
A->>S: Sync (clock 100, "Buy oat milk")
Note over S: Clock 102 > 100 → keep "Buy almond milk"
S->>A: Update (text = "Buy almond milk")
Note over A,B: Both devices have "Buy almond milk"" %}
```

Even though Device A synced **after** Device B, the server keeps Device B's change because its clock value is higher. Without a sync clock, Device A's later-arriving write would have silently won.

### Defining a Sync Clock Property

Add a 64-bit integer property (unsigned if the language allows) to your synced entity and annotate it as a sync clock. Initialize it to `0` for new objects. There can be only **one** sync clock property per entity type.

{% tabs %}
{% tab title="Java" %}

```java
@Sync
@Entity
public class Task {
    @Id long id;

    String text;

    @SyncClock
    long syncClock = 0;
}
```

{% endtab %}

{% tab title="Kotlin" %}

```kotlin
@Sync
@Entity
data class Task(
    @Id var id: Long = 0,
    var text: String = "",
    @SyncClock var syncClock: Long = 0
)
```

{% endtab %}

{% tab title="Dart/Flutter" %}

```dart
@Entity()
@Sync()
class Task {
  @Id()
  int id = 0;

  String text;

  @SyncClock()
  int syncClock = 0;

  Task(this.text);
}
```

{% endtab %}

{% tab title="Swift" %}

```swift
// objectbox: entity, sync
class Task {
    var id: Id = 0
    var text: String = ""

    // objectbox: syncClock
    var syncClock: Int64 = 0
}
```

{% endtab %}

{% tab title="C/C++ (using Generator)" %}

```
/// objectbox: sync
table Task {
    id: ulong;
    text: string;

    /// objectbox: sync-clock
    sync_clock: ulong = 0;
}
```

{% endtab %}

{% tab title="Go" %}

```go
// `objectbox:"sync"`
type Task struct {
    Id        uint64
    Text      string
    SyncClock uint64 `objectbox:"sync-clock"`
}
```

{% endtab %}
{% endtabs %}

### About the Hybrid Logical Clock (HLC)

A pure wall clock is unreliable in distributed systems — device clocks drift, are set manually, or jump after NTP corrections. A pure logical clock (like a Lamport clock) gives you ordering but no connection to real time.

The HLC gives you the best of both:

* It **tracks real time** as closely as possible.
* It **never goes backwards**, even if the wall clock is adjusted.
* It uses a **logical counter** to break ties when two events share the same millisecond timestamp.

This makes the sync clock safe to use for conflict resolution without requiring perfectly synchronized clocks across devices.

{% hint style="info" %}
ObjectBox Sync uses a special HLC implementation with additional compensation for clocks set in the future. This makes the ObjectBox Sync clock more robust in situations with concurrent offline edits.
{% endhint %}

## Sync Precedence

While the sync clock answers "which write happened last?", **sync precedence** answers "which write is more important?" It is an unsigned 64-bit integer property whose value you control. On conflict, the write with the **higher precedence value wins**.

This is a powerful mechanism for encoding business logic directly into conflict resolution.

{% hint style="warning" %}
Precedence values are an advanced feature that is entirely in your hands. Assigning them incorrectly can lock out further updates to an object — use with care.
{% endhint %}

### Defining a Sync Precedence Property

Like the sync clock, there can be only **one** sync precedence property per entity type.

{% tabs %}
{% tab title="Java" %}

```java
@Sync
@Entity
public class Order {
    @Id long id;

    String item;
    int quantity;

    @SyncPrecedence
    long precedence = 0;

    @SyncClock
    long syncClock = 0;
}
```

{% endtab %}

{% tab title="Kotlin" %}

```kotlin
@Sync
@Entity
data class Order(
    @Id var id: Long = 0,
    var item: String = "",
    var quantity: Int = 0,
    @SyncPrecedence var precedence: Long = 0,
    @SyncClock var syncClock: Long = 0
)
```

{% endtab %}

{% tab title="Dart/Flutter" %}

```dart
@Entity()
@Sync()
class Order {
  @Id()
  int id = 0;

  String item;
  int quantity;

  @SyncPrecedence()
  int precedence = 0;

  @SyncClock()
  int syncClock = 0;

  Order(this.item, {this.quantity = 0});
}
```

{% endtab %}

{% tab title="Swift" %}

```swift
// objectbox: entity, sync
class Order {
    var id: Id = 0
    var item: String = ""
    var quantity: Int = 0

    // objectbox: syncPrecedence
    var precedence: Int64 = 0

    // objectbox: syncClock
    var syncClock: Int64 = 0
}
```

{% endtab %}

{% tab title="C/C++ (using Generator)" %}

```
/// objectbox: sync
table Order {
    id: ulong;
    item: string;
    quantity: int;

    /// objectbox: sync-precedence
    precedence: ulong = 0;

    /// objectbox: sync-clock
    sync_clock: ulong = 0;
}
```

{% endtab %}

{% tab title="Go" %}

```go
// `objectbox:"sync"`
type Order struct {
    Id         uint64
    Item       string
    Quantity   int32
    Precedence uint64 `objectbox:"sync-precedence"`
    SyncClock  uint64 `objectbox:"sync-clock"`
}
```

{% endtab %}
{% endtabs %}

{% hint style="warning" %}
Precedence is treated as an **unsigned** value. Do not assign negative numbers — they will be interpreted as very large values and may permanently lock out further updates to the object.
{% endhint %}

### Conflict Resolution Order

When both a sync precedence and a sync clock are defined on the same entity type, conflicts are resolved as follows:

{% @mermaid/diagram content="flowchart TD
A\[Conflict detected] --> B{Compare precedence values}
B -- Higher precedence --> C\[Higher precedence wins]
B -- Equal precedence --> D{Compare sync clock values}
D -- Higher clock --> E\[Higher clock wins]
D -- Equal clock --> F\[First received write wins]" %}

### Example: Closing an Order

Consider an order-management app where orders can be edited until they are **closed**. Once closed, no further edits should overwrite the closed state — even if a device with an older, still-open version syncs later.

**Approach:** when closing an order, set the `precedence` property to a high value (e.g. `1000`). Regular edits keep the default precedence of `0`.

{% @mermaid/diagram content="sequenceDiagram
participant A as Device A (Warehouse)
participant S as Sync Server
participant B as Device B (Office)

```
A->>A: Edit order: quantity = 5 (precedence 0)
B->>B: Close order: status = CLOSED (precedence 1000)
B->>S: Sync (precedence 1000, status = CLOSED)
A->>S: Sync (precedence 0, quantity = 5)
Note over S: Precedence 1000 > 0 → keep CLOSED version
S->>A: Update (status = CLOSED)
Note over A,B: Order stays closed on all devices" %}
```

Even though Device A's write arrived later, it cannot overwrite the closed order because its precedence (`0`) is lower than the closing write (`1000`).

{% hint style="info" %}
Once Device A receives the closed version (with precedence `1000`), subsequent updates from Device A **will** sync again — because they now carry the same or higher precedence. The sync clock then serves as the tie-breaker.
{% endhint %}

### More Use Cases for Sync Precedence

**Linear workflow states.** Model a pipeline where objects move through stages (e.g. `Draft → Review → Approved → Published`). Assign increasing precedence values to each stage (e.g. 100, 200, 300, 400). A later stage always wins over an earlier one, preventing accidental rollbacks.

{% hint style="info" %}
It's generally a good idea to use larger increments like 100 or 1000 for precedence values. This allows for future extensions to the workflow and introducing values in-between.
{% endhint %}

**Role-based authority.** Give admin or manager edits a higher precedence than regular-user edits. For example, a manager sets precedence to `1000` when overriding a field; normal users leave it at `0`. This ensures managerial corrections are never silently overwritten by regular edits.

**Checkpoint timestamps.** Periodically "approve" or "checkpoint" an object by updating its precedence to the current timestamp (e.g. Unix seconds). Any changes made before the checkpoint that arrive late are discarded because their precedence is lower. Only changes made after the checkpoint — which naturally carry a higher precedence — will be accepted.

{% hint style="warning" %}
Choose precedence values carefully. Once an object has a high precedence, only writes with an equal or higher precedence can update it. Also, avoid `Long.MAX_VALUE` completely.
{% endhint %}

## Summary

Using a Sync clock is a solid default choice for most apps.

| Mechanism          | Conflict rule              | Controlled by         | Best for                              |
| ------------------ | -------------------------- | --------------------- | ------------------------------------- |
| Default            | Last received write wins   | Arrival order         | Simple apps, non-critical overwrites  |
| Sync Clock (HLC)   | Last actual write wins     | Automatic (ObjectBox) | Fair ordering despite offline periods |
| Sync Precedence    | Higher precedence wins     | Developer             | Business logic (states, roles, locks) |
| Precedence + Clock | Precedence first, then HLC | Both                  | Full control with a sensible fallback |


# Troubleshooting Sync

Something is not working? This guide helps to identify typical problems quickly.

## How to reach the Sync Server

Sync Clients specify the URL of the Sync Server. In a test setting, both may be running on the same machine. In this case, you can use ws\://127.0.0.1 as the destination; 127.0.0.1 is the IP address of localhost. If it's separate machines, you need to exchange 127.0.0.1 with an reachable IP address of the server, or, some valid DNS name.

{% hint style="info" %}
Using Android emulator? You can use 10.0.2.2 to reach the host (the machine running the emulator). Thus, specify "ws\://10.0.2.2" in your client if you run the Sync Server on the same machine. For details on Android emulator networking, see [here](https://developer.android.com/studio/run/emulator-networking).
{% endhint %}

## Check the network connection

If it looks like data is not synchronized, usually the first thing to check is the network connection between the devices. Usually it's helpful to start the Sync server with the admin web app enabled, so you can e.g. check the connection using the HTTP server URL in the standard browser of clients.

{% hint style="info" %}
See [Sync Server configuration](/sync-server) on how to enable HTTP and options.
{% endhint %}

1. Using a standard web browser, can you reach the Sync host on port 9980? E.g. first try it on the machine running Sync server via <http://127.0.0.1:9980>. The ObjectBox Admin web app should show up. If this fails, check the server's configuration.
2. Try to reach the Sync port (9999 by default) using a web browser (or a tool cURL): <http://127.0.0.1:9999>. You should see a short plain text response if this connection is fine.
3. To check that the hostname is correctly registered, try to connect to the Sync Server using a web browser. You should be able to reach the following addresses: <http://your-hostname.com:9980> (the ObjectBox Admin web app) or <http://your-hostname.com:9999> (the Sync endpoint). If the pages are loaded and the browser doesn't hang, then your hostname was resolved correctly. You can further investigate hostname issues by using command line tools like `nslookup`.
4. Next, if the client runs on another machine, check the same ports from client's machine in a web browser. Of course, you need to exchange 127.0.0.1 with an reachable IP address of the server, or, some valid DNS name.

If one of those steps fail, you need to check your network configuration. Like any networking application, ObjectBox Sync relies on a functioning network.

## Check the logs

Sync Server has two kind of logs: standard logs that go to standard output and "log events" that are persisted in the database.

### Enable debug logging

{% hint style="info" %}
Debug logging is available for standard logs (not log events). You need access to the **standard output** of the Sync Server. This may be straight-forward for most configurations, but may be "hidden" for some setups. For example, when running with Docker Compose, you may need to run `docker compose logs` or something like `docker compose logs -f --tail=50 sync-server` to follow Sync Server logs.
{% endhint %}

The network connection seems fine? Then let's get additional information to the logs. The Sync server comes with a switch to turn on debug logging. Logs go to standard output and are typically very sparse. Debug logs on the other hand provide you with a lot of extra information, which can help you to diagnose problems. For example, a client got disconnected? The debug logs usually tell why.

There are three ways to enable debug logs (see also [Sync Server configuration](/sync-server/configuration)):

* Use the Admin UI on the "Status" page to find switch to enable debug logging. Note: since this requires the Sync Server to be already running, this will not log while the server starts.
* Use the `--log-level debug` CLI argument when starting the server (the older `--debug` flag still works but is deprecated).
* In the server configuration file, add `"logLevel": "debug"`. If the server is running, you need to restart it to apply the change.

### Log events

Unlike standard logs, "log events" capture important events and are persisted to be available across server restarts. Thus, these may give additional context for issues that span multiple restarts. You can check them using the Admin UI on the "Log Events" page.

{% hint style="info" %}
You can export log events to a file using the download link at the bottom of the page.
{% endhint %}

### Client logs

While the server logs are the first thing to check, the client logs can also help to diagnose certain issues. Sync clients log only sparsely, e.g. when problems occur. So when you don't see anything in the client logs, it's likely a connection problem, which are covered here too, or the issue can be found on the server side. The client logs go to standard output or logcat on Android.

## System utilities inside the Docker container

If you are familiar with Linux utilities, you can use them directly inside the Docker Sync Server container. Starting with version 2025-07-17 of the Docker container, these packages are pre-installed: iputils, iproute, procps-ng, strace, lsof, and nmap-ncat.

### Attach to a running container

Example to "attach" to a running Sync Server container:

```bash
docker ps # Copy the container ID for objectboxio/sync-server-trial
docker exec -it --user 0 <container-id> /bin/bash # root shell
# or, if you do not want to run as root:
 docker exec -it <container-id> /bin/bash # non-root
```

### Pre-installed commands

Then you are inside the running container. For starters, try these commands:

* `top`: shows system info and the running processes; you should see the Sync Server process with process ID (PID) 1 and "sync-server" as the command. Also, since you "attached" to the container you should see a "bash" and a "top" process.
* `ss -ltnp`: show listening sockets; at "Local Address:Port" you should see 0.0.0.0:9999 and 0.0.0.0:9980. The IP address 0.0.0.0 tells that it listens on all interfaces. 9999 is the Sync endpoint, 9980 is the Admin UI.
* `ping 8.8.8.8`: ping Google's DNS server to check if container can reach the Internet.

### Install additional packages

The base image is a Rocky Linux container, so you can use `microdnf` to install additional packages. To do so, ensure that you have a root shell using `--user 0` for the docker `exec command` (see above). For example, to install the bind-utils package to get `dig` and `nslookup` commands: `microdnf install -y bind-utils`. (Note: bind-utils comes with larger dependencies and thus is not pre-installed.)

## Clients do not connect

If Sync clients do not connect to the server, please doublecheck the [Sync Client setup](/sync-client), specifically:

* You are using a sync-enabled library of the ObjectBox SDK.
* The URL to the Sync Server is correct (see above to ensure the URL is reachable).

## Clients cannot log in

Clients may reach the server at the network level but still be rejected during login. Enable [debug logging](#enable-debug-logging) to see the reason; the server logs the rejection cause for each failed login attempt.

Common causes:

* **Authentication credentials not accepted** — The client did not provide valid credentials or used an authentication method not configured on the server. Verify that the auth method and credentials match on both sides.
* **Data model (schema) not recognized** — Since server version 2026-04-07, the server rejects clients whose data model is unknown or not active. The client receives an `UNSUPPORTED_DATA_MODEL` error code (57). To resolve this:
  * Upload the correct data model JSON via the Admin UI → Schema Versions.
  * Make sure the schema version matching the client is set as active on the server.
  * See the [Data Model page](/data-model) for how to manage schema versions.
  * For development or testing environments where clients intentionally use different schema versions, you can set `"disableClientSchemaValidation": true` in the server config to skip this check. See [configuration](/sync-server/configuration#developer-and-debug-options).

## Clients connect but do not sync

Can you see the clients connecting to the server in the (debug) logs, but no data is synchronized? Double check that your entity types are sync enabled. If they are not, ObjectBox will store the objects only locally. Follow this checklist:

* Did you add a "sync annotation" for the types you want to sync? The [Sync Client setup](/sync-client) page has the details for the ObjectBox API of the programming language you are using.
* Ensure that the generated files data model are up-to-date. Hint: in the model JSON file you should see `"flags": 2` for the entity types you want to sync (`2` is actually a bit flag that enables sync).
* Ensure that the up-to-date model JSON is also used for the server config.

## IDs do not match across devices

You may notice that IDs of objects stored on one device may not always match the IDs on another device. Well, that's not a bug, but a feature. :slight\_smile: Check the [docs on Object ID mapping](/data-model/object-ids) and the possibility to use global IDs instead.

## MongoDB-specific issues

Please check the page [MongoDB Sync Connector](/mongodb-sync-connector) and its subpage for MongoDB-specific issues and troubleshooting. Typical issues include the MongoDB user configuration, and not triggering the initial "Full Sync".

## Sync slows down

If you notice that sync performance degrades over time, check for both conditions apply to you:

* Remove operations are used regularly in your app
* Sync filters are enabled

### Symptoms

* Sync takes longer than expected, particularly when catching up after being offline.
* Server debug logs show that an unusual amount of messages are sent to clients.
* You may see log entries like: `Did not remove object because no local ID mapping found for <ID>`. These are expected but should decrease over time with the setting below.

### Cause

"Legacy" remove operations do not contain sufficient data for sync filters. This results in clients processing many unnecessary remove transactions.

### Solution

Ensure you have the latest Sync client version and enable the `RemoveWithObjectData` [sync flag](/sync-client#sync-flags). This flag includes the full object data with remove operations, allowing the server to filter them out based on sync filter conditions. Also, ensure to have an up-to-date Sync server version.

{% hint style="info" %}
**Performance improvements are gradual.** The benefits depend on the overall client population running the updated version. Old clients without the flag will still indirectly slow down new ones, as the server cannot filter remove operations for them. Once a significant portion of clients are updated, sync performance should improve noticeably.
{% endhint %}

## Sync server database keeps growing

You may notice that the Sync Server database keeps growing over time. This typically happens if you have a lot of data changes ongoing, even if the data volume in the current "visible database" does not grow. The most likely cause is the accumulation of sync history logs.

### Cause

The Sync Server maintains a history of history logs to synchronize clients that reconnect after being offline. By default, **there is no size limit** on this history, so it grows indefinitely as new transactions are processed. Over time, this can consume significant disk space.

### Solution

Configure a maximum history size using the `historySizeMaxKb` and `historySizeTargetKb` options in your JSON configuration file. Once the limit is reached, the Sync Server automatically deletes old TX logs.

For details on these options, see the [configuration page](/sync-server/configuration#sync-history-size-limit).

### Trade-off

Limiting the history size means that clients that have been offline for a very long time may no longer find their last synced transaction in the history. In that case, the server triggers a full sync for the client, re-sending all current data. Choose a history size that balances disk usage with the expected offline duration of your clients.

{% hint style="info" %}
You can monitor the database size using standard file system tools (e.g. `du -sh` on the database directory) or the Admin UI. If the database is already very large, the size will decrease gradually as old TX logs are cleaned up after setting the limit.
{% endhint %}

## Other hiccups

A checklist of other likely issues:

* [ ] Do you have the latest versions running?
* [ ] Does the server have the latest version of the data model?
* [ ] Does the client version "match" the server version? Typically, Sync Server updates are maintain backward compatibility for clients. But to be safe, check if any breaking changes were announced in the release notes.

## Still having trouble?

We try to provide common troubleshooting tips on this page. If this did not help with your issue, please let us know. The ObjectBox team is here to help you. Here's a checklist to provide us with relevant information, so we can efficiently help you in the best possible way:

* [ ] Let us know the server and client version you are running (are these up-to-date?).
* [ ] Describe the steps that have led to the problem. Does this reproduce the issue?
* [ ] Attach the server debug logs (from standard output) at the time of the problem and a bit before that. See above on how to enable debug logs.
* [ ] Check the log events in the Admin UI. Ensure that all relevant log events are visible on the page: you can navigate through log events and set the number of events displayed per page. Then, download the log events via the download link at the bottom of the page. Attach this file for us.
* [ ] If it affects Sync clients: check the client logs (standard output or logcat on Android) and attach them for us.
* [ ] Is there anything else you consider noteworthy? What could be related to the issue? Was there a recent change on your side?

In any case, do not hesitate to reach out! :heart:


# FAQ

Frequently asked questions about ObjectBox Sync.

## Data Model

*ObjectBox has a (mostly) fixed schema, aka the data model.*

**How do I get the data model (objectbox-model.json) for the Sync Server?**

The data model file is created by Sync Clients. Use the same file for the Sync server (e.g. copy it to your server directory). When your data model changes, the file will change and thus it has to be updated for the Sync Server, too. Details are available on the [Sync Server page](/sync-server#data-model-json-file).

***

**What are these IDs in the data model file? Why do I have to check in the model file?**

When you look inside the JSON file of the model file, you will notice that entity types and properties also have IDs. These IDs are essential information to ObjectBox Sync and there are strict rules to them. First and most importantly, consider the data model file a crucial part of your sources and store it in your version control system like git. The IDs are maintained by the ObjectBox build tools and should not be changed manually nor should the model file be deleted. Different IDs, e.g. when regenerating the data model after it was, lead to inconsistencies that will prevent to sync to work(!).

Why use IDs at all? Unlike string-based names, IDs are meant to be stable. Consider renaming a property: from the data model perspective it is not clear if it was a rename or if one property was deleted and a new property was added. This is solved by using IDs. Furthermore, it allows automatic data model updates without writing any migration scripts.

For details, please refer to the general [Data Model Updates](https://docs.objectbox.io/advanced/data-model-updates) and Sync-specific [Data Model](/data-model) pages.

***

**I want to sync non-structured data - how can I do that?**

There are two ways: [Flex Properties](https://docs.objectbox.io/advanced/custom-types#flex-properties) (only for Java/Kotlin at this point) and, when syncing to MongoDB, JSON strings that contain MongoDB sub-documents. For the latter, please check the [MongoDB Data Mapping](/mongodb-sync-connector/mongodb-data-mapping) page and its sections on nested documents and heterogeneous arrays.

## Sync Server

*General questions about the ObjectBox Sync Server that do not fit into any other category.*

**Can I sync data directly between devices?**

The typical ObjectBox Sync setup is centralized. However, alternative setups are possible within given bounds. For example, for a limited number of devices it is possible to configure peers that sync directly with each other. There are also "hybrid" nodes that are both a client and a server. And finally, there's also an "edge" setup, e.g., via a central MongoDB that allows multiple Sync Servers. Talk to us if you are interested in such a setup.

## Admin UI

*The Admin UI is a web interface for ObjectBox Sync Server.*

**Can I edit/remove data directly in the Admin interface or via API? Or only via Sync clients?**

The Admin allows you to browse data in a read-only way. You can modify data directly on the Sync Server via the [GraphQL API](/sync-server/graphql-database).

## MongoDB Connector

*The MongoDB Connector allows to synchronize data between ObjectBox Sync Server and MongoDB.*

**When does the MongoDB Connector start syncing?**

The MongoDB connector starts along with Sync Server. In the initial state, the connector won't "start" right away. It will only start syncing once the first full sync is completed. The idea not to do this automatically is to make this a conscious decision, so that this does not happen by accident. While the first sync has not happened yet, there is a prominent message in the Admin UI for the MongoDB pages. Also, the logs periodically print a "reminder".

***

**Do I need to run a full import from MongoDB to receive the latest changes? Or should this happen automatically?**

You need only **one initial** full import (triggered via Admin UI) in the beginning. Once this completes, ObjectBox will pick up changes from there on. ObjectBox and MongoDB are then synced bidirectionally and automatically.

***

**What is the purpose of the \_\_ObjectBox\_Metadata collection and what does it store?**

When syncing ObjectBox to MongoDB, ObjectBox creates a collection called \_\_ObjectBox\_Metadata. This collection stores the exact state from where sync (from ObjectBox to MongoDB) can continue. Changing \_\_ObjectBox\_Metadata is part of the transaction, where data gets changed. So this is the transactional-safe way. The same info is also written to ObjectBox' internal database after the MongoDB transaction. Thus, even deleting the \_\_ObjectBox\_Metadata (e.g. by accident) typically does not affect anything. It's "just" to make things fully transactional.

***

**Do I have to create an objectbox\_sync database in MongoDB? Or can I use custom database and collection names for syncing?**

The database name can be configured via CLI and JSON; see [the MongoDB connector setup](/mongodb-sync-connector/objectbox-sync-connector-setup#configure-the-mongodb-connection) for details.

Collection (and field) names will be configurable by "external name" annotations in the data model in the future. Please reach out to us if you require this feature.

***

**What happens if fields are only present on the MongoDB side?**

If a field/property is present on both sides, it will be synced. If a field is only present in a MongoDB document, it will be ignored on ObjectBox. Updates from ObjectBox do not touch "unknown" fields stored in the MongoDB document. New documents created from ObjectBox objects will only include fields that are present on ObjectBox. If a field is present on ObjectBox only, it will be ignored on MongoDB.

***

**What happens if properties are only present on the ObjectBox side?**

If a field/property is present on both sides, it will be synced. If a property is only present in an ObjectBox object, it will be read as a "null" value (no value). Updates and inserts from ObjectBox will store the property value as a field in the MongoDB document.

***

**Is it possible to connect multiple Sync Servers to one MongoDB instance?**

Yes, that's what we call "tiered sync" or "edge sync". The MongoDB database becomes the central instance where all ObjectBox Sync Servers are connected to synchronize data. Each Sync Server can be deployed at its own location and can have its own set of clients. You can set this up with the Server trial on your own, or talk to us if you are interested in further details.